Ronstar
Moderator Emeritus
Retirees have to have their hobbies. One of mine is woodworking.
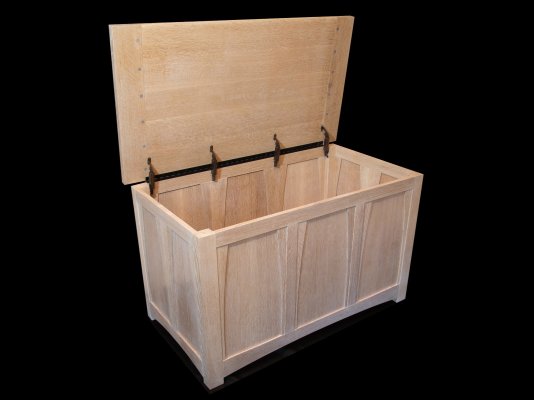
Just finished building a toy box for my niece’s baby. Quarter sawn white oak whitened with liming wax and finished with clear wax. Top has breadboard ends pinned with walnut dowels. Posted a photo of it in the photography thread, where ERD50 asked for a thread on how I built it. Here’s a quick rundown.
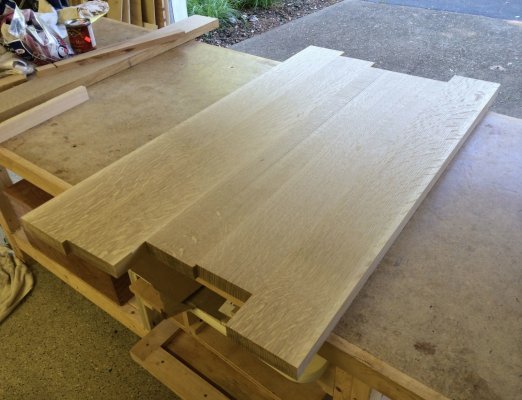
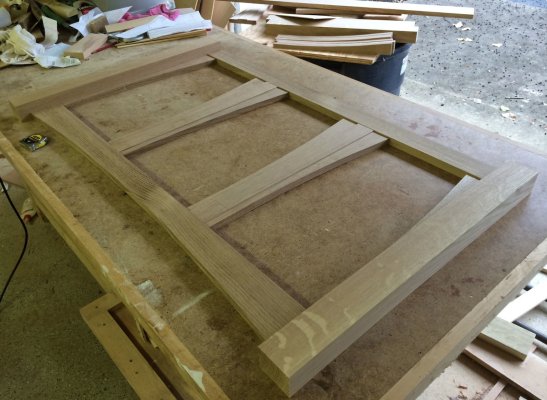
The top. Started off with 7 boards (1-/4” thick about 4” wide) then planed them square. Next clamped and glued 5 of them together edgewise for the main part of the top. Then cut down the middle, making 2 top pieces that would fit in my planer. (photo2).
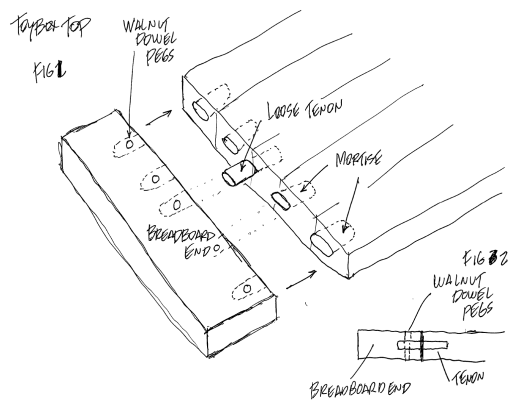
Planed the 2 pieces flat and clamped and glued them together. Cut to length after glue dried. Then cut 6 mortises (1-1/4”x3/8”) on the ends for preparation of the breadboard ends. (fig1) Also cut mortises in the 2 breadboard end pieces. Cut loose tenons (2-1/2”x3/8”) and glued them into the 6 mortises on each end of the top. Slid the breadboard ends onto the tenons on the top and drilled ½” holes through the breadboard ends and tenons. (fig 2) Took the breadboard ends off and widened the holes in the outside 2 tenons on each side to allow side to side movement of the breadboard ends. The breadboard ends were then re-attached to the top. The middle 2 tenons were glued on both the main top and breadboard ends. Walnut pegs were then driven through all holes and sanded flush with the breadboard ends.
Box construction is frame and panel. The frame is made of ¾” thick material for the stiles (vertical) and rails (horizontal). Curved parts of stiles were made from stock planed down to 5/8” thick. The 5/8" pieces were glued to the 3/4" pieces to form a 3 piece multi thickness stile. (photo 3). Curves were cut on my band saw. Then grooves were cut in the sides of the curved stiles with a slot cutting bit on the band saw. Curves were also cut in for the bottoms of the lower rails. Grooves were also cut in the bottom of the upper rails and tops of the lower rails to accept the panels
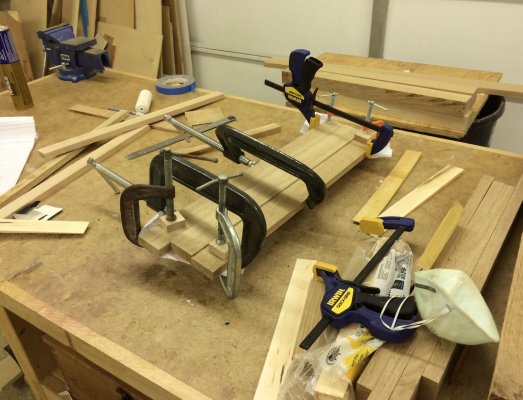
The panels were made from ¾” stock resawn into 2 pieces (approx. 3/8” thick) and planed to 1/4" thick. Then glued together edgewise making bookmatched grain panels.(photo4) The curved edges of the panels were cut on the band saw to match the curves in the stiles. The panels are ½” bigger than the openings in the frames so as to fit in the grooves. I then put each side together as single pieces, with the stiles glued to the rails with loose tenons like used in the top. The panels are snug but not glued to the frame, allowed to float for expansion/contraction.
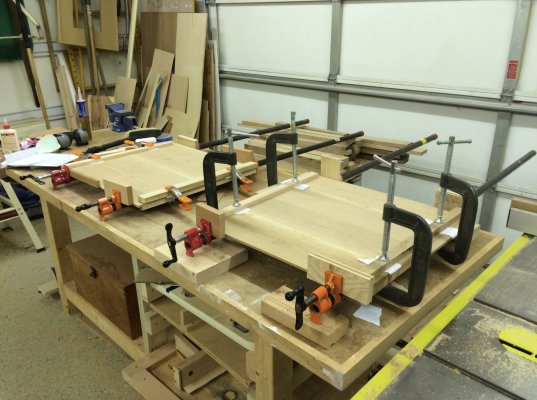
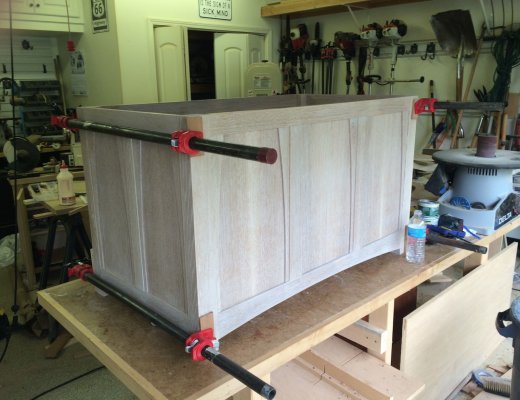
Then clamped and glued the four sides together to form the box, with mortises and loose tenons. Then installed a plywood bottom to the sides with cleats for support. Attached the top to the box with a piano hinge. And torsion spring lid supports to prevent the lid from slamming. (photo5)
The finish is liming wax to whiten the oak. Then a coat of clear wax, followed by more liming wax to lighten it more. All finish was applied to the individual pieces before assembly.
Just finished building a toy box for my niece’s baby. Quarter sawn white oak whitened with liming wax and finished with clear wax. Top has breadboard ends pinned with walnut dowels. Posted a photo of it in the photography thread, where ERD50 asked for a thread on how I built it. Here’s a quick rundown.
The top. Started off with 7 boards (1-/4” thick about 4” wide) then planed them square. Next clamped and glued 5 of them together edgewise for the main part of the top. Then cut down the middle, making 2 top pieces that would fit in my planer. (photo2).
Planed the 2 pieces flat and clamped and glued them together. Cut to length after glue dried. Then cut 6 mortises (1-1/4”x3/8”) on the ends for preparation of the breadboard ends. (fig1) Also cut mortises in the 2 breadboard end pieces. Cut loose tenons (2-1/2”x3/8”) and glued them into the 6 mortises on each end of the top. Slid the breadboard ends onto the tenons on the top and drilled ½” holes through the breadboard ends and tenons. (fig 2) Took the breadboard ends off and widened the holes in the outside 2 tenons on each side to allow side to side movement of the breadboard ends. The breadboard ends were then re-attached to the top. The middle 2 tenons were glued on both the main top and breadboard ends. Walnut pegs were then driven through all holes and sanded flush with the breadboard ends.
Box construction is frame and panel. The frame is made of ¾” thick material for the stiles (vertical) and rails (horizontal). Curved parts of stiles were made from stock planed down to 5/8” thick. The 5/8" pieces were glued to the 3/4" pieces to form a 3 piece multi thickness stile. (photo 3). Curves were cut on my band saw. Then grooves were cut in the sides of the curved stiles with a slot cutting bit on the band saw. Curves were also cut in for the bottoms of the lower rails. Grooves were also cut in the bottom of the upper rails and tops of the lower rails to accept the panels
The panels were made from ¾” stock resawn into 2 pieces (approx. 3/8” thick) and planed to 1/4" thick. Then glued together edgewise making bookmatched grain panels.(photo4) The curved edges of the panels were cut on the band saw to match the curves in the stiles. The panels are ½” bigger than the openings in the frames so as to fit in the grooves. I then put each side together as single pieces, with the stiles glued to the rails with loose tenons like used in the top. The panels are snug but not glued to the frame, allowed to float for expansion/contraction.
Then clamped and glued the four sides together to form the box, with mortises and loose tenons. Then installed a plywood bottom to the sides with cleats for support. Attached the top to the box with a piano hinge. And torsion spring lid supports to prevent the lid from slamming. (photo5)
The finish is liming wax to whiten the oak. Then a coat of clear wax, followed by more liming wax to lighten it more. All finish was applied to the individual pieces before assembly.