Your recent repair? 2013 - 2020

Status
Not open for further replies.
attachment.php


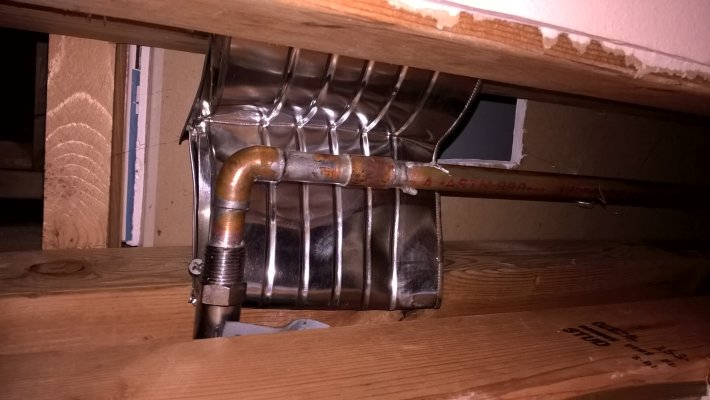
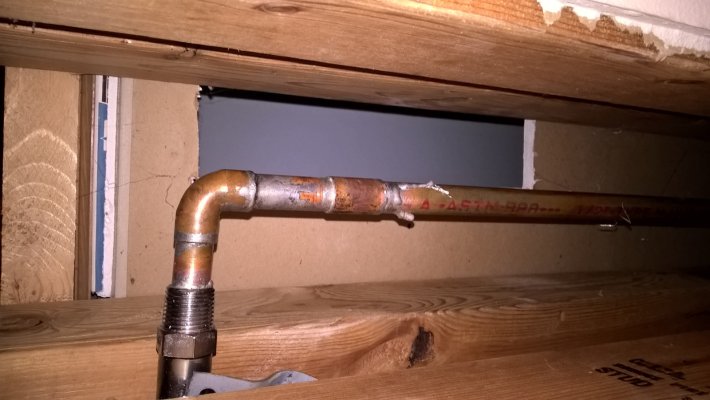
Koogie, this is a perfect example of plumber's nightmare.
 
Watching HGTV, I learned that the in-thing now is a shower with multiple heads and water squirting every which way. Oohh! Aahh!

Out here in the arid west, water is precious, so I would feel guilty taking long showers (even though my wife uses tons of water for her garden, and our pool also evaporates plenty). On top of that, ever since I started to do RV, I have learned to shower with even less water.

By the way, what happens to the drought in California and southern Oregon? Time for this inquisitive mind to surf the Web to find out.
 
Washer fluid pump was bad on my old BMW. Dealer wanted €50 just for the part, which I then found on Amazon for less than €10. Twenty minutes later, and good to go. Dealer may have charged €150 to do the job.

Sent from my HUAWEI GRA-L09 using Early Retirement Forum mobile app
 
Completed a front end rebuild on my 65 Chevy Impala SS convertible. Installed new control arm bushings, ball joints, center control arm, tie rod ends, strut rod bushings, etc. While the front end was all apart I installed later model Corvette disc brakes with larger rotors and 4 piston calipers. Also bolted up a new fat ADDCO sway bar since I was already working in the area. No big deal, just about 9 hours total labor. Boy am I sore now, getting too old for that kind of work.
 
Completed a front end rebuild on my 65 Chevy Impala SS convertible. Installed new control arm bushings, ball joints, center control arm, tie rod ends, strut rod bushings, etc. While the front end was all apart I installed later model Corvette disc brakes with larger rotors and 4 piston calipers. Also bolted up a new fat ADDCO sway bar since I was already working in the area. No big deal, just about 9 hours total labor. Boy am I sore now, getting too old for that kind of work.

That's impressive! I think I would have had a mechanic do it.
 
Replaced an aging and groaning garbage disposal with a modestly priced version from Lowes.
The bonus was the new disposal fit right into the old disposals sink connection so I didn't have to mess with making sure it wouldn't leak around the drain.
I had planned on a good hour to do the work and 20 minutes later it was done. Yea me.

I ordered a new garbage disposal on Amazon and saved $30 over buying locally. We recently installed granite with new sinks, and the sinks are different heights.

The disposal pipe was 1 1/2 inches too low, and there are no plumbing fittings sold to hook up the drain to my existing drain pipe coming out of the wall. I had to go to Lowes and buy PVC pipes and improvise.

What I really should have done is switch the disposal over to the shorter sink, and my old piping would work--in retrospect.
 
Completed a front end rebuild on my 65 Chevy Impala SS convertible. Installed new control arm bushings, ball joints, center control arm, tie rod ends, strut rod bushings, etc. While the front end was all apart I installed later model Corvette disc brakes with larger rotors and 4 piston calipers. Also bolted up a new fat ADDCO sway bar since I was already working in the area. No big deal, just about 9 hours total labor. Boy am I sore now, getting too old for that kind of work.

I'm impressed. I changed a leaking power steering pump on my PowerStroke diesel truck. It required pulling intercooler hoses, battery, air cleaner, etc. Put it all back together and it was still leaking. Replaced the power steering gear box, put it all back together and it was STILL leaking. The problem all along was a teflon seal on a power steering hose. Installed a new hose.

Now, it sounds as if there's no fluid in the power steering, and the brakes barely work. Come to find out, diesels don't have a vacuum and they use power steering pump thru Hydroboost system to assist in braking. The problem is there is air in my fluid, and I've now got to bleed the steering and brake Hydroboost system to get the air out. Then reinstall all the hardware on the engine.
 
Good job Tom on the front end rebuild. I have done that too, hope you had a press to help with the replacement bushings.

My recent repair was fixing the door latch on the washing machine. One of the front loader (actually has Kenmore brand, but is Whirlpool mfr'd). Something in the latch broke or must have lost the contact. Figured out I could make a short jumper for temp fix and then ordered up a cheap $10 delivered used ebay door latch assy that I installed a few days later. Lot better than the $55-65 for new part at appliance parts place.
 
Nice job on the Impala SS suspension work above!

I'm still on the 2003 Jetta diesel project (refurbishment) and the car now has 301,500 miles on it. Engine tuning. new timing belt and associated rotating parts, and turbo/boost hose work is complete.

Yesterday:

Now that I am done rebuilding the front suspension (struts, LCA bushings, ball joints, sway bar bushings, etc), I changed the top transmission/engine mount and the lower "dogbone" engine mount (bolts to subframe), both of which contained very poor quality rubber material (due to age, I would guess). Neither mount had failed but engine vibration was evident when pulling through the gears. The vibration is now gone.

Future:

Next project is the rear axle beam bushings which will be tough job as they will require me fabricating an installation tool and possibly dropping the axle beam. I'm waiting for cooler weather on this one, though.

Following this will be rebuilding the manual shift bushing points as I can sense some slop when selecting gears. This won't be a big job, just one of linkage disassembly and bushing replacing. Some parts vendors sell the bushing replacement kits for these cars.
 
Pocket door installed in 1988 came off its track one too many times. I pulled the door, cut a hole in the wall, removed the old single track, and replaced it with a new "box" track. I replaced the trucks on top of the door with the new three wheel ones, and voila, it glides as smooth as silk with no chance of coming off the track. I screwed the sheetrock back in place, and all that's left to do now is mud and paint the sheetrock.

Sent from my XT1254 using Tapatalk
 
I'm impressed. I changed a leaking power steering pump on my PowerStroke diesel truck. It required pulling intercooler hoses, battery, air cleaner, etc. Put it all back together and it was still leaking. Replaced the power steering gear box, put it all back together and it was STILL leaking. The problem all along was a teflon seal on a power steering hose. Installed a new hose.

Now, it sounds as if there's no fluid in the power steering, and the brakes barely work. Come to find out, diesels don't have a vacuum and they use power steering pump thru Hydroboost system to assist in braking. The problem is there is air in my fluid, and I've now got to bleed the steering and brake Hydroboost system to get the air out. Then reinstall all the hardware on the engine.

My 99 GMC gasser has brake hyraulic booster as part of the power steering pump circuit. Sometimes jacking up the front and turning the vheel lock to lock and applying the brakes a few times will clear tha air. At least it worked on mine.
 
I got my riding mower stuck in the ditch and had to pull it out with my car. It slipped sideways as it was coming out and before I could stop the car one of the mower wheels caught on the edge of the culvert. I bent the wheel and the connecting rod that holds both of them together....both wheels were pointing different directions. :LOL:

I pulled it apart and straightened the bent pieces in a vice...it all went smoothly and only took an hour.
 
Started modifying my new woodstove for secondary burn. A 12" 3/4" diameter iron pipe with may holes drilled for extra air and installed near the top of the firebox. Still need to do the the downpipe and air shutoff in case of chimney fire.
 
Lead foot.

Lucky you didn't pull something off the car too ... :D

I wasn't going that fast :D 
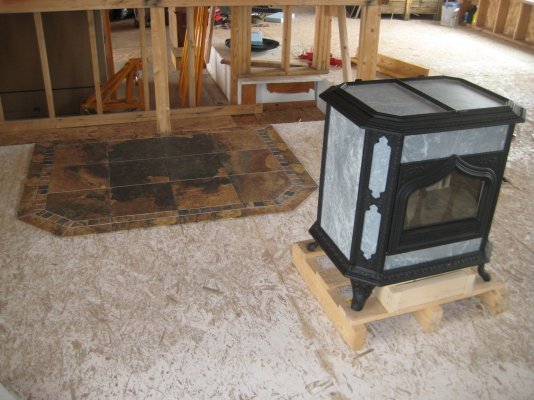
Plus I was using the tow hook which is connected directly to the frame of the car.

It's not an excuse (maybe it is, lol), but my view was partially blocked by a tree so I didn't see it until too late.
 
Started modifying my new woodstove for secondary burn. A 12" 3/4" diameter iron pipe with may holes drilled for extra air and installed near the top of the firebox. Still need to do the the downpipe and air shutoff in case of chimney fire.

My woodstove has a catalytic converter to kick off the secondary burn at about 500 degrees. I'm anxious to see how it works this winter. I still have to get the tile put down (its cut and ready in the picture) and install the flue pipe between the stove and the chimney. I understand ones without the catalytic converter need to get quite a bit hotter before they start working.
 

Attachments

  • IMG_1046.jpg
    IMG_1046.jpg
    595.4 KB · Views: 19
That is a nice looking stove. Looks like soapstone. Hope it works well. Modern stoves are bit hard to get going. Cheap trick is to leve the door cracked open a bit until a good draft is established, then close it fully.

Mine is a craiglist find, a basic box stove. It has only a simple baffle in it. The idea with mine is same as the fancy EPA approved stoves. Add air over the fire to light off the hot gases which otherwise would cool and coat the chimney and the great outdoors. It is for my mancave. Another experiment.

At the house I have one of thr earliest EPA approved fireplaces. Country Comfort. It has the baffles with air holes for secondary air input. Looks like a gas grill upside down when it lights off the gases. It also had a catalytic converter which was clogged when bought the house. Not worth $300.- yo replace. I removed it and added an extra baffle some years ago. Works well, next to no smoke once up and running. Sucker can heat most of the house. Has blowers in it too.
 
My dish disposal just died so I'll be calling the plumber today

Sent from my SPH-L710 using Early Retirement Forum mobile app
 
Re: Dishwasher repair
Here's what happened. The fingertip handle (lock) on our Maytag dishwasher broke. It's an involved interaction of several plastic parts that cracked and left the door locked. It was Saturday, and the repair guy wouldn't come till Monday.
With a screwdriver, and ulp.. a hammer, I opened the door. Used the screwdriver to break apart all of the plastic parts.
Hmmmm... the door closes and the spring keeps it closed. And.. the dishwasher still works normally.

That was two years ago, and we're still using the dishwasher with absolutely no problems, and it's easier to open and close the door. :dance:

Excellent..

This is sort of how I "fixed" the old camry ignition switch.
The switch would refuse to turn often and you had to wiggle the key and pray. Sometimes a lot.

Finally I pulled out the switch (watched a you tube video as to how).
You can start the car with a screwdriver at that point, but I knew DW would not go for that :nonono:

Then I removed all but 1 or 2 of the keyway pins from the ignition lock.
Put it back together and now it nearly never sticks.
Been fine for over a year now.

Yes, it is slightly less secure, but really nobody inside a car is going to pick the ignition lock, they are just going to remove it or pull the wires from the back. Besides the car is 18 years old, not exactly a beacon for stealing.
 
I fixed the power adapter for an external IOmega hard drive. This is a nice RAID drive with an internal mirrored pair, so I would hate to lose it. A replacement adapter would cost around $25 on eBay.

So, with nothing to lose, I cracked the case open along its seam with a woodworking chisel. This adapter looks like a power adapter for a laptop.

Once the case is opened, it's clear as to what went bad. The capacitors inside are all bulging, on both the 12V and 5V sections. I happened to have suitable replacements on hand, so it was just the matter of replacing them. It took a bit of work due to the internal heatsink being in the way, but I got it done.

I taped the two clamshell halves of the case back on, using black electrical tape for now. When I am sure, will epoxy them together. Good like new!
 
Our outdoor backyard tap had frozen and broken the pipe inside the wall, but the break was after the shutoff part so no leakage.

Today I decided to fix it.
First cut a hole in wall in bathroom to reach it, oops it's too high and awkward.
So cut a hole in dining area to access it.
Filled some pails with water and turned off the house water.
Used a small tube cutter to cut the pipe, and pull out the old tap and little pipe.
Heated up the old one, to pull off the old pipe out of it, which included the corner, cleaned it up and soldered it into the new one (after pulling out the guts of the shutoff).
Burned my thumb as couldn't see the flame outside in the bright light :eek:

Stuck the pipe in a pail of water and blew air into it to check it was air/water tight. As I wanted to lessen the number of times I would be doing this :D

Realized I might set the house on fire as the space was very tight. :(

So I got a full pail of water I had saved earlier and put it near me.
Made a heat shield out of a big coffee can and screwed it to the 2x4.
Put on the flux and soldered it on (the lowest solder with the big drips ) :)
Then I cooled the pipe down with a wet cloth and then some ice cubes, installed the guts of the tap and turned on the water.
No leaks .. :D :D
Screwed the outside part to the house so it's steady.

Now I have drywall to fix.

First photo shows my heat shield, Second one shows the completed work.

The photos uploaded on their sides, should be rotated 90 degrees clockwise.
 

Attachments

  • WP_20160809_13_34_09_Pro.jpg
    WP_20160809_13_34_09_Pro.jpg
    377.5 KB · Views: 17
  • WP_20160809_13_34_57_Pro.jpg
    WP_20160809_13_34_57_Pro.jpg
    394.3 KB · Views: 17
Status
Not open for further replies.
Back
Top Bottom