Your recent repair? 2013 - 2020

Status
Not open for further replies.

Donzo

Full time employment: Posting here.
Joined
Apr 17, 2006
Messages
944
I have a 20 year old Magic Chef (maytag) kitchen range. It still looks good, the burners all light right away. But the oven was slow to ignite and would not always restart after getting to requested temp and turn off. I shopped around and all the ovens I liked were $800. + and then would be $200. more to convert to propane and deliver! $1000.+ tax!!
I got online and read about this oven start issue. Turns out oven electric igniters get "weak" over time and don't accept the necessary amps for the regulator to release gas. I got splayed out on the floor, found the igniter way back in the oven. Removed it with some yoga like positions, found a new one on ebay for $22. shipped. The new one was here in 2 days I did the road kill and wounded possum positions and installed - oven now works perfect! :dance:

I did a deep clean of the unit and we are good for another 20 years. I find this kind of repair very enjoyable and rewarding!

Anyone else have a repair success that makes them smile?
 
My front loading Sears "elite" washer sprung water leakage from the gasket. It would leak out huge amounts of water onto my cellar floor with each load. It is about 8 years old.

I was ready to replace the gasket til I read on line a) the price of a new one and 2) the difficulty/rigamarole of removing the old one and installing the new one.

THere was a 1/2" x1" piece of of the rubberish gasket missing. I cut a strip of rubber off a garage floor mat, and used JB Weld glue to glue it in place. Used two Binder clips to hold the repair to dry for two days, then held my breath....


It worked!!!!! No more leak, the repair cost about 6.00 in glue and the rubber patch was free!!!

If it matters, I am a 57 YO single woman.....I also change the filter, oil and blades on my riding mower. I was scared to death of removing the mower deck and then one day just followed the instructions in the John Deere manual and was amazed how well it went....

And YES it feels great to accomplish something like this washer repair....I smile every time I approach the washer at end of cycle and the floor is dry!!!!
 
GREAT idea for a thread! Why didn't I think of this?


So here's a recent contribution, and the washer has been fine for 3 months now, I need to set a reminder to update each year!

http://www.early-retirement.org/forums/f27/crazy-to-try-to-fix-a-27-yo-wash-machine-67469.html

The quick version - This 27 YO Maytag washer has served our family of as many as five, w/o a single repair up until this one. A very simple/cheap belt replacement was all it took.

I'm always fixing things, for a number of reasons. For one, it is often cost-effective. I also hate shopping, and often the replacement is worse than the old unit (sometimes it's the opposite though). It's 'green' to keep something out of a land fill. And I like the challenge.

I had a recent failure though. A two year old toaster would not latch consistently. Man, these things have gotten complex! The latch is an electromagnet, controlled by a bunch of circuitry. It was tough to get apart, and tough to troubleshoot, so I gave up after a few tries and bought a new one for $15. It was more the learning experience, but I'm not sure the new one will hold up any better. I think the electromagnet is a safety thing? Looks like any fault condition causes it to unlatch and shut down?

-ERD50
 
Several years ago the old water heater started leaking and needed to be replaced. So I set the old unit to drain and went to buy a replacement. When I got it home I asked one of my roommates for some help in moving it into position. He expressed amazement that I knew how to do the replacement, saying a plumber would charge several hundred dollars for the job.

One thing I always remembered was reading a number of years ago was the ability to fix stuff was nothing more than the willingness to take stuff apart carefully, to see how it works.
 
Replacing Ceran cooktop heating element

Recently, one of the heating elements of our cooktop burned out while I was using it. With the old exposed coil heater, one can just unplug it and put in the new one, but this was a radiant heater.

I had not replaced a heating element in a smooth cooktop, where the radiant heater was below the ceramic flat surface, but after 15 years, it was time for this to happen. It was a front burner position, which of course had been used the most.

As it turned out, it was super easy as only 2 screws needed to be removed to allow the cooktop to be flipped up from the stove, much like opening the lid of a top-loading washing machine. After a few more screws, the broken heater assembly could be swapped out. For expediency, I swapped into its place a back burner that of course was hardly used.

All that is needed is a Phillips screwdriver. And this reminds me that I still need to buy a new coil to put in that back burner position. Cost will be about $85.

PS. Most of the time, if one searches youtube, there will be someone doing a community service to show exactly where the screws are that you need to remove to open up something.
 
Last edited:
I recently replaced the CMOS battery in my Asus eee netbook (the one that I typically use only while traveling). This battery provides the juice to keep the internal clock powered even when the unit is turned off.

It got to be such a pain to both remember to and then actually reset the clock every darn time I booted up the netbook (which was rather often when traveling). :nonono:

I found a new battery on eBay for less than $10 (including shipping). And YouTube had a couple of useful videos that walked through all the steps of disassembling the netbook and accessing the battery.

And now I feel rather happy every time I turn on that computer and don't have to mess with the BIOS settings. :dance:

omni
 
Replacing refrigerator condenser fan

A few years ago, while we were on an RV trip, my son who was living at home told us that our refrigerator was not working right, and that its internal temperature was getting high.

However, as he was technically inclined (he'd better be, as he was studying mechanical engineering), he also determined that the compressor was running, but the fan that blew air across the condenser coil had quit.

As you might have noticed, the fridge of the old style had a black gridded coil in the back. That's the condenser coil that uses passive convection air cooling to liquefy the compressed Freon, before it gets pumped up to the evaporator in the freezer.

New fridges have a smooth back, and the condenser coil is now made smaller and hidden at the bottom. That smaller coil cannot work by passive convection, and needs a small fan to blow air across it.

So, my smart son (I was proud of him) pulled the fridge forward, and put a small 5" desk fan back there to circulate the air in place of the broken fan (they are about the same size). He told us that it seemed to work fine as the freezer worked again, and I should not worry about it.

When I came home after the RV trip, I took the broken fan to an appliance supply store to get a replacement. Cost was something like $30-$40.
 
Last edited:
I have a repair that makes me smile and another that does not. We were recently hit with a power surge that knocked out our oven,cooktop, a ceiling fan, our water purifying system, and a few surge protectors. Our insurance co asked me to get reports from repairmen. I called the guy we bought the appliances from 20 yrs ago and he came over. He explained that he just looked at an oven just like ours that was blown out during the same storm as ours, and that it was repaired by replacing an electrical board in the oven. Since we are starting a kitchen remodel, I told him that I would buy new appliances from him if his report came back with our oven being irreparable. He didn't get the hint - he got it fixed with a new board for around 400 (under our deductible). So I spent 400 fixing an oven that I'll replace within a couple of years.

But our $1500 water system- fixed it with a 25 cent fuse
 
The great thing these days is that many folks put out repair videos on you tube and other sites. Rather that just reading instructions or viewing illustrations, you can actually watch someone take something apart step by step and fix it.

I used this to remove my riding mower deck and replace various parts on it - easily saving me $500+ in repair costs. DW accidentally knocked off car size view mirror, the auto shop was going to charge $170 until I found a video showing how to replace it for the same make/model - cost was $15 for the part and about 30 minutes. Those video has also helped me with replacing headlights.

I enjoy putting together and repairing computers as a hobby (I have an insane amount of systems in our house), and I've been able to help friends and family members. When I retire and have more time I may start also contributing videos showing some basic computer repair/maintenance actions.
 
Replacing laptop LCD screen and CPU fan

My daughter and I used to have the same Toshiba laptop.

I broke the LCD screen on mine by pinching it with my thumb when I stupidly picked it up by the screen.

My daughter's CPU fan quit because she did not know to program her laptop to go into sleep mode when inactive, and she just liked to leave it running 24 hours.

Taking the laptop apart and peeling off layers of parts to get to the CPU fan took some work! Replacing the LCD screen was a bit easier.

I would not know the steps if it weren't for the info that I found on the Web. The work required some dexterity, and a bit of a feminine touch else you would break the delicate tiny connectors and flat-ribbon cables inside. These things are truly technical marvels. And I am saying this as an electronic engineer working in aerospace.
 
... Since we are starting a kitchen remodel, I told him that I would buy new appliances from him if his report came back with our oven being irreparable. He didn't get the hint - he got it fixed with a new board for around 400 (under our deductible). So I spent 400 fixing an oven that I'll replace within a couple of years...

I think he knew what he was doing. His profit margin on a new oven might be $100, but he might have a bunch of obsolete stockpiled boards that he could make $400 out of the repair job.
 
The great thing these days is that many folks put out repair videos on you tube and other sites. Rather that just reading instructions or viewing illustrations, you can actually watch someone take something apart step by step and fix it. ....

I used YouTube videos to repair the water pump in my boat motor and dismantle and clean the radiator in my car. Next up - I'm going to remove a computer board that controls traction/ abs systems and send it to a guy that solders bad contacts. Overall savings could be 2k coated to the dealer fix
 
...Next up - I'm going to remove a computer board that controls traction/ abs systems and send it to a guy that solders bad contacts. Overall savings could be 2k coated to the dealer fix

Let us know how that goes. Many times, the automotive products are 'potted' - sealed with epoxy or some other goo that makes a re-solder job a real challenge. Worth a try though, esp if this guy has experience.

+1 on the youtube videos and other on-line sources. Back in the old days, all you had was the library copy of a Chilton's manual, and I don't think they lent them out, they were 'reference books'. Now you can take your laptop right to the repair, and use the camera to snap pics as you go.

-ERD50
 
Replacing electrolytic caps in a big-screen TV

A more complicated electronic repair job I did recently was to disassemble a 55" Mitsubishi DLP TV to replace a dozen electrolytic caps.

This TV was discarded by my nephew, and though it was 5-6 years old, still had very good picture (to me), and had some fancy features for its time. I think it cost my nephew $4K, and it was much better than my first 42" HD TV that I paid only $2K a few years even before that. Yes, I still have that TV too. Mine had longevity because it was manufactured before the "capacitor plague" that caused billions of damage to the electronic industry.

What happened was that a Taiwanese component maker tried to mimic the proprietary manufacturing process invented by a Japanese capacitor maker. Its components had a short life because some key ingredients were missing. Electronics makers who bought the cheaper parts suffered horrendously when these 20-50 cent parts failed in their TVs and computers worth thousands of dollar.

See: Capacitor plague - Wikipedia, the free encyclopedia.

Anyway, to locate, unsolder and replace the dozen capacitors were easy. Getting to these caps was not!

The capacitors already failed looked like this.

220px-Blown_up_electrolytic_capacitor.jpg


When having the whole thing taken apart, one would replace all the big caps that were in the power supply section. It's just too time consuming to replace the hundreds of caps that were in less critical places.

Taking the guts of this TV apart, and to put it back took me 3 days. It is not as simple as opening up a desktop PC and swapping out a board. I think a TV technician who has done this before would still take a day or more. Hence, most of these nice TVs got trashed.

Being a frugal guy and having some time on hand, I just had to spend the time to repair it, rather than seeing it going to the landfill. My nephew already bought a new one, else I would give it back to him.

So, I took my older and not-as-good TV to my 2nd home, and put this better TV in my main home. Neither has been turned on for some time now.
 
Last edited:
A few years after purchase our Maytag gas dryer would heat intermittently. I hate that word "intermittent" when trying to diagnose things - sometimes it checks out fine and sometimes not.

Looked up the symptoms and found the fix, a $20 gas valve actuator bought locally, and that took care of it. The only tools needed were a screwdriver, needle-nose pliers, and an ohmmeter.
 
A more complicated electronic repair job I did recently was to disassemble a 55" Mitsubishi DLP TV to replace a dozen electrolytic caps. ...

I'm impressed. I would not have the patience or dexterity for that. I tried to replace about 8 caps on my dead iMac motherboard (same cap issue), and I failed. That one hit the recycle center.

I replaced it with a cheap e-machines laptop that I've loaded Ubuntu (Xubuntu now) on. That one developed some funky, intermittent display noise a few months past the warranty period. I figured that was going to be it. But I kept narrowing in on the place I could tap it, and the picture would clear up. Found out how to take that area apart (simply pry the cover up - but I wouldn't have figured that out w/o on-line help), and then just pushed the ground clips around and it was fine for a year or two. Then I just repeated it, cleared again.

-ERD50
 
I replaced the broken handle on my over-the-range microwave. Sounds simple but it wasn't. I had to undo several layers of the door assembly in order to find the screws that held it in. Luckily, I found a Youtube video tutorial, and a replacement handle on ebay. I'm sure a service call and full-price handle would have been very expensive. Proud of myself!
 
Did the oven igniter on our Maytag, it needs me to do the cooktop igniters now!
 
I have a small flat roof, 2' x 15' with a roof pitch of 0.5 (1/2 inch drop per foot) that's been a problem for the last few years. It was a torch down roof that was cut a little short along some of the edges and had peeled up a couple years ago and started leaking into the ceiling since it ponds water. I caulked the edges and the leaking stopped. This year I noticed I had a rotting fascia board in a small area where the water had come in so I repaired that last month. I decided to add a 4/12 pitch to the roof and installed shingles over the area. Built in 1963, not sure why someone thought it was cool to built a roof with this low a pitch. I now have to consider the bigger 17' x 50' that also has a 0.5 roof pitch.
 
The agitator quit on our 17-year-old basic Kenmore top-loader washing machine. Husband looked into the cost of service call and parts. Instead, he went to an appliance store and bought a small $8 part, installed it himself, and our washer is working again!

We've saved thousands, over the years, with his repairs.........on our fixer-upper houses, on appliances, on bicycles, on all kinds of stuff. When he was a boy, his job was to carry the tool box behind his dad whenever a repair had to be done. He had to hand Dad the tools, and eventually help Dad finish up the jobs.

I never knew any of this before I married him. When we bought our first house, I walked in after we signed the papers. There he was, tearing huge sheets of fake maple paneling off the living room walls. I thought he was destroying the place. Instead, I came back the next day to a bright airy room, looking bigger with its new coat of off-white paint!

DIY helped us to RE!

:D
 
...

DIY helped us to RE!

:D

It would be interesting if I could tally up all the cost savings from DIY. I know some frugal people who just aren't good at this stuff, and they end up calling a repair guy for the simplest things. I try to encourage them to call me first, but I guess they don't want to trouble me. Heck, I'd be glad to help, they help us in other ways.

OTOH, there was the time I tried to fix our mini-van by replacing the thermo-stat... boy that bolt is tight.... wooooops, it broke off. So I try to drill it out and use an ez-out, and I end up with a hole in the manifold. :facepalm:

Oh well, it was burning oil and needed a valve job anyhow, so my 'ooops' didn't add that much cost to the total repair. Turns out the thermostat problem was a blown head-gasket, so this would have run me some bucks anyhow.

And another time, after I figured out that the part that drives the igniter in our stove was bad, I figured I could just jumper it to get it started for dinner, and then go order the part. Turns out that I jumpered something that limits the current in the gas valve, and that blew the gas valve and then I had to buy a $150 part in addition to the $10 part that was bad! double :facepalm: :facepalm:

Oh well, I'm still way ahead.... I think?

-ERD50
 
Bad caps are plague of electronics, whole site devoted to it Badcaps.net - Badcaps Home

Several Dell PC lines were hit with it and many motherboards replaced.

The Web site you cited was for PC motherboards, and I also saw a similar site for TV. It was reported that the problem cost Dell alone $420M. The total cost to all electronics makers would run in the billion dollars. When I researched the problem with Mitsubishi TVs, I saw sites where people were ranting about their expensive TVs crapping out after just 1 or 2 years, and costing a lot of money for repair.

There was a lot of damage to reputation of electronics makers, and the consolation was that nearly all of them got hit. For example, not just Dell but HP also was affected. Consumers were raving mad, but there was no brand that was spared.

I'm impressed. I would not have the patience or dexterity for that. I tried to replace about 8 caps on my dead iMac motherboard (same cap issue), and I failed. That one hit the recycle center.

This TV job required more patience than finesse. There was plenty of space inside, so the components were not crammed tight on the boards. Connectors were larger and easier to handle. However, because of the space, the wiring harnesses were thrown out like a rat nest, and components were not arranged as neatly as inside a laptop.

My nephew said that this TV had been repaired once under warranty. So, initially I was reluctant to attempt to fix it, because perhaps the faulty caps had all been replaced, and the problem now would be something less elementary, which I would not be able to determine let alone fix.

But I had some time and decided to take a look inside to see what I could learn. And as it turned out, the initial repairman did not replace all the critical caps, and more caps failed after that repair. This TV was quite complicated, and besides the main power supply, each of its boards had its own switching regulator section. One of the boards was overlooked by the repairman, and its cheap Taiwanese caps were not replaced as they should be for a cautionary measure.


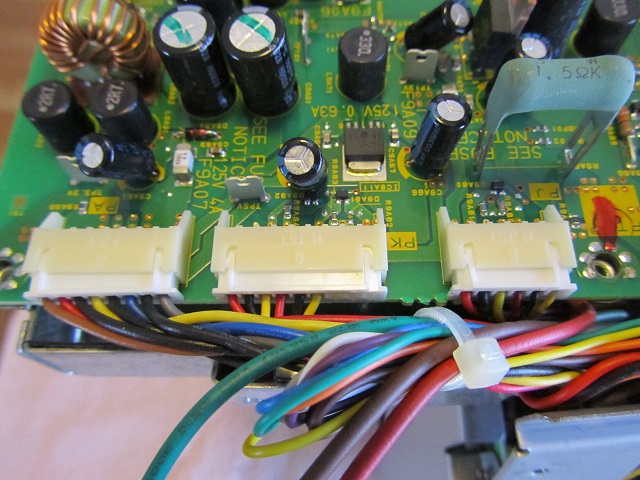
When disassembling, I took time to label all connectors or take pictures like the following to document the connections and relative positions of subassemblies.


The main chassis assembly, taken out of the cabinet, looked like this on my kitchen table.


Further disassembly got me to the main power supply. Blue marks on some caps indicated that these caps were not original from factory, and I verified that the solder joints on the other side were obviously done by hand and not by machine soldering.


Here's a subassembly signal board that got its caps replaced earlier. No problem here.


I finally got to a board that had its caps bulging indicating failures. I was so happy to finally find the smoking guns, hence did not take pictures.

I ordered replacement caps from Digikey, buying the best high temperature Japanese caps that they carried. Electrical values aside, it took a bit of time to study the specs to make sure that they would be physically compatible to go in the same mounting holes.
 
Last edited:
I think he knew what he was doing. His profit margin on a new oven might be $100, but he might have a bunch of obsolete stockpiled boards that he could make $400 out of the repair job.

Maybe his profit is less on a new oven than it is for a repair. He sent the bad board back to the mfg. The mfg fixed the board and sent it back to him. He claimed that he couldn't report that it was beyond repair because the insurance co would question him
 
Let us know how that goes. Many times, the automotive products are 'potted' - sealed with epoxy or some other goo that makes a re-solder job a real challenge. Worth a try though, esp if this guy has experience. +1 on the youtube videos and other on-line sources. Back in the old days, all you had was the library copy of a Chilton's manual, and I don't think they lent them out, they were 'reference books'. Now you can take your laptop right to the repair, and use the camera to snap pics as you go. -ERD50

FYI - http://forums.corvetteforum.com/c5-...stly-repairs-through-absfixer-or-fleabay.html

But I'll let you know how it goes. I read that corvettes will generate various warnings when voltage gets low, but I changed the battery and still get warnings. I'll attack this when I putt in the garage for the winter.

I know what you mean about manuals. I bought my mercury outboard service manual for around $60, but didn't need it - I found YouTube videos that explained the repair better.
 
Status
Not open for further replies.
Back
Top Bottom