Souschef's switch engine project

Thank you for your suggestion, I do appreciate it. However, the bell housing is a separate part from the generator.
I think the suggestion was that a motor shop knows where to get similar castings repaired.
 
Good Day!

Today was the day we were to manually turn the engine. Last week we poured a little oil in the cylinders to help loosen the engine up.
We tried doing it with a big pipe wrench, to no avail. I went over to the railroad steam shop and borrowed a 2 1/4 inch socket, an extender, and a breaker bar.
We tried turning the engine, but it stuck after about a half turn. We then tried turning the engine both directions, and all of a sudden it turned:dance:
We made a number of revolutions to get the oil distributed on the cylinders.
Later this week we plan to put a little transmission fluid in the cylinders as a penetrating oil.
This was a major step in the restoration of the engine. The next step is to fabricate an adjustable bracket to support the back of the engine and remove the stress from the bell housing.
When we jacked up the back of the engine last week, we could see the cracks closing.
 
I vote for furnace brazing AND a supplemental support bracket. Alignment of whatever coupling is in the bell housing is usually critical. Have you had an opportunity to see inside the bell housing ? Any access plates ?
 
Last edited:
Tomorrow, I am going out to the engine armed with the original wiring diagram and an envelope of wire markers to trace the modifications done to the engine.
I just discovered much to my surprise that the engine has a positive ground system. I was alerted to that by a man who maintains the engines at the Kilohana Plantation in Kauai. Strangely enough, I rode that train in 2011 and took pictures of his engine!
 
Yes, I use a different screen name there. The people at RPN have been very helpful with advice.
 
Tomorrow is going to be the big day. We designed a support system using one inch pipe, pipe flanges and a one inch threaded rods with nuts and washers to jack up the rear of the engine. Total parts cost was about $50.
I will post a picture when we are done.
We are also going to put a little oil and transmission fluid in the cylinders to lubricate them.We will then turn the engine manually to distribute the oil.
The next step will be to remount the starter and reinstall the injectors. We have the engine manual that details how to set them.
 
Tomorrow is going to be the big day. We designed a support system using one inch pipe, pipe flanges and a one inch threaded rods with nuts and washers to jack up the rear of the engine. Total parts cost was about $50.
I will post a picture when we are done.
We had to redesign the support brackets to shorten them and change the orientation of the angle brackets. I had to buy this monster 1-1/2 inch open end wrench to turn the nuts.
We installed the brackets and jacked up the back of the engine to a point where the cracks closed up. We then went to the rear of the engine and were able to easily turn the engine over with a wrench.
 

Attachments

  • IMG_6315.jpg
    IMG_6315.jpg
    689.2 KB · Views: 20
  • IMG_6314.jpg
    IMG_6314.jpg
    525.3 KB · Views: 22
Good that your supports are closing up the cracks. That indicates you are applying support in the correct direction. Will the supports stay in position once the engine is started and vibrations are present?
 
Good that your supports are closing up the cracks. That indicates you are applying support in the correct direction. Will the supports stay in position once the engine is started and vibrations are present?
Thank you for your comment. We are planning to bolt the supports to the engine with 3/4 inch bolts to prevent them from moving.
 
We just wire brushed the crack areas to make sure no attempt was made to weld them. We sent pictures to a company that specializes in cast iron repairs to get a quote.
I am hoping their quote is affordable.:(
 
We just wire brushed the crack areas to make sure no attempt was made to weld them. We sent pictures to a company that specializes in cast iron repairs to get a quote.
I am hoping their quote is affordable.:(

Out of curiosity, I just followed some links and watched some youtube videos on welding cast iron. Very challenging, and lots of variables to deal with. The heating from welding often causes other cracks, as cast iron can't take much elongation.

Hope your guy can handle it!

One of the links was "Welding Cast Iron Will Make Preacher Cuss!" :)

-ERD50
 
Wow!! I can weld most metals with various technologies (mig, tig, stick,carbon, etc) I also know how difficult it is to get a "true weld" into cast iron. But the link you supplied is a really good answer to this issue. Very, very, clever!!!

Here is a snippet form the linked article....... Very impressive!

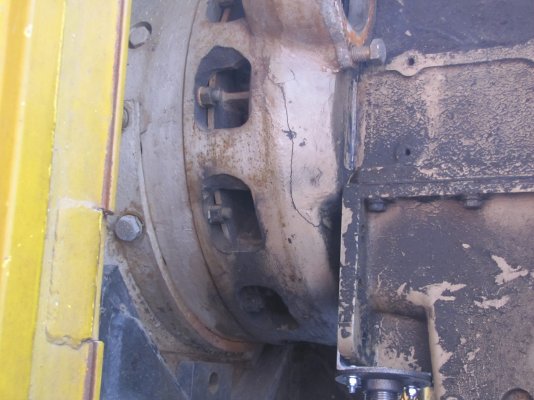
The repaired, metal-stitched area is gas and liquid tight to create a pressure tight repair. In addition, metal stitching Dampens and Absorbs Compression Stresses. It also spreads tensile strains and distributes the load away from the original failure point, while maintaining the alignment of the original surfaces.
 
That particular link is in error. It appears to be a "double http". Here is the same link. Hopefully it will work better.........

Precision Metal Stitching Repair - Turlock, CA - LOCK-N-STITCH Inc.

Thanks, link was not working for me either.

In the process, I found this video - ~ 1:40 in you get a clear view of how they 'stitch' across a crack. The other videos had me confused, seemed they were just drilling out the crack and putting threaded inserts in place - I didn't see how that would hold anything together - but that looks to just be to get rid of the cracked material, and then those cross 'stitches' are the key to hold it together. Looks time consuming - I won't expect this to be cheap! But it does seem to get the job done.

Similar to butterfly keys in woodworking.

A Lesson in Butterfly Keys - FineWoodworking


-ERD50
 
Thanks, link was not working for me either.

Looks time consuming - I won't expect this to be cheap! But it does seem to get the job done.
Similar to butterfly keys in woodworking.
-ERD50
I got a quote of $25,000 to do the repair:facepalm: Needless to say we will not have them do the work. I came up with a simple design using screw eyes and bolts that will hold everything together.
 
Last edited:
I got a quote of $25 to do the repair:facepalm: Needless to say we will not have them do the work. I came up with a simple design using screw eyes and bolts that will hold everything together.

$25? How can anyone do anything like this for $25? Maybe they are giving you a very low price (materials?) as a charitable thing, since you are part of a volunteer organization?

-ERD50
 
$25? How can anyone do anything like this for $25? Maybe they are giving you a very low price (materials?) as a charitable thing, since you are part of a volunteer organization?

-ERD50
I screwed up I left out the K or 3 zeros:facepalm:
 
I screwed up I left out the K or 3 zeros:facepalm:

OK, figured that was a possibility but then it kind of messes with the whole :facepalm: thing.

But yeah, it looked like an expensive process. $25K qualifies.

Good luck with the screw eyes and bolts. It's not like you are going to run this under heavy loads for decades.

-ERD50
 
For 25 grand they could sand cast a new part.
 
I drove out to the Rochelle Railroad Park today. It's about 2 hours due west of Chicago.

The park was built at the intersection where the mainline of the Union Pacific crosses the mainline of the Burlington Northern.

diamond_crossing.jpg


I was there for about an hour and 5 trains rolled through. They average 70-80 trains a day through this intersection. It's a great place for train buffs.

They also had this engine on display in the park. It's not a switching engine, but I immediately thought of this thread when I saw it and so snapped a picture.

UNADJUSTEDNONRAW_thumb_1a3b.jpg
 
Back
Top Bottom