Corian Lithopane

davemartin88

Full time employment: Posting here.
Joined
Aug 26, 2008
Messages
812
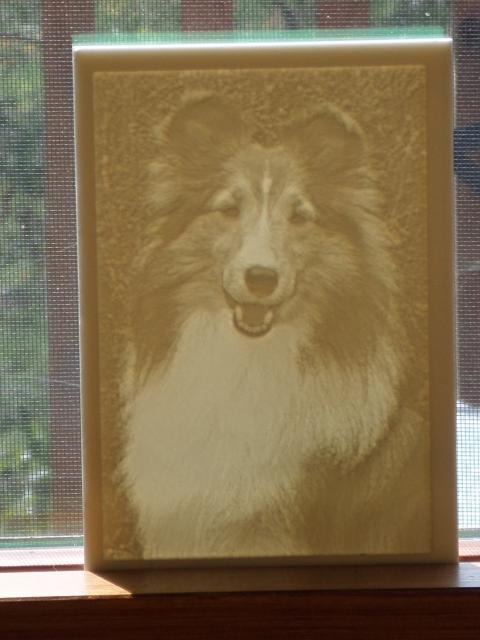
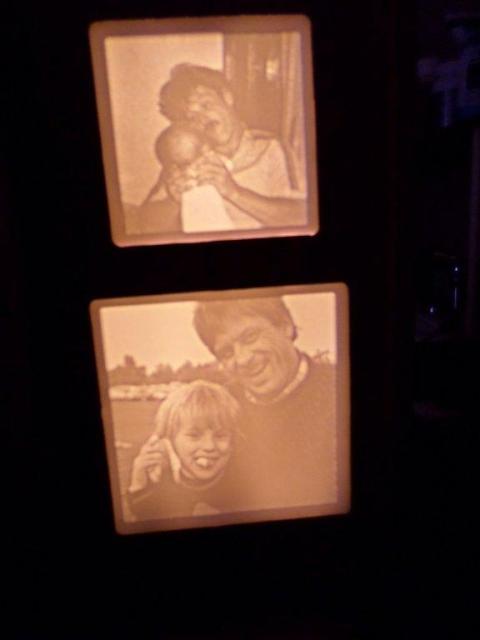
I posted a picture of a lithopane in another thread and had a couple of people ask about some more examples- this is the latest carving I did today. I'm using a software program called PhotoCarve to convert a photo in to a format that can be fed to my computerized router. I've just started learning about these but has been a lot of fun. The carving is done on to a 1/4" thick piece of white Corian counter top material, once it's carved, a light from the back will reveal most, if not all of the original details of the original photo assuming you made the conversion correctly.

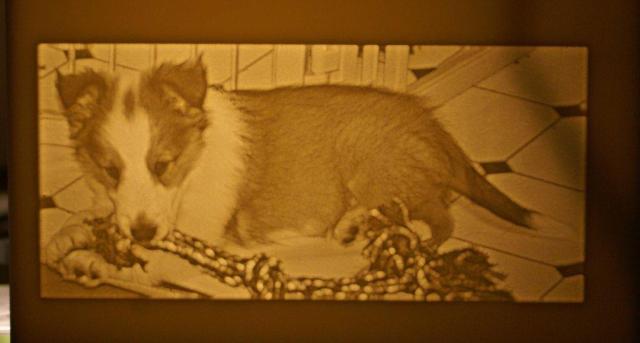
This one took about 3 hours for the machine to carve. I started it carving and then went off to cut and split some trees I've taken down to open up our view, stopped every 30 minutes or so to check on progress.

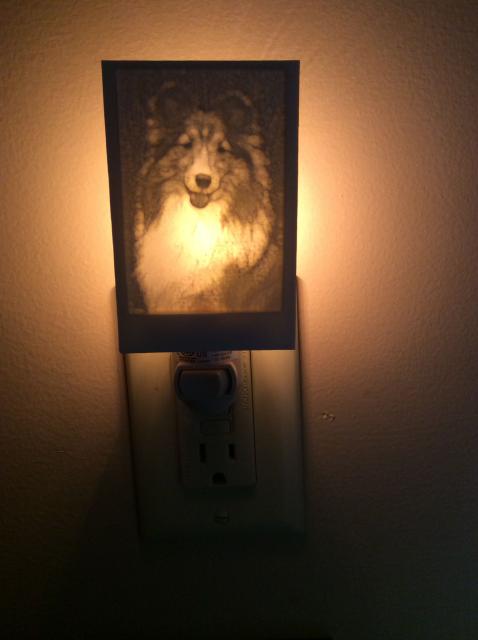
The puppy is named Sparky, he was a foster dog that DW and I took care of last summer before finding him a home. He's deaf so presented a few challenges with training but we really fell in love with him. He is the center of attention in his new house- he turned out to be a really nice looking dog but is pretty large (not obese, just big!) for a sheltie- he just kept growing and growing! Guess he couldn't hear anyone telling him that he was getting too big to be a sheltie. His mom and dad weren't unusually big so just one of those things.

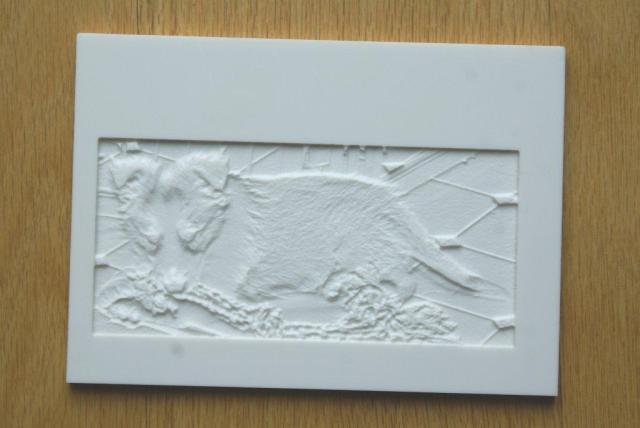
Anyway, here are two pictures, first one is the carving just off the machine, doesn't look like much.

img_1485778_0_c4bf9e0111390280cede54b839d1aa03.jpg


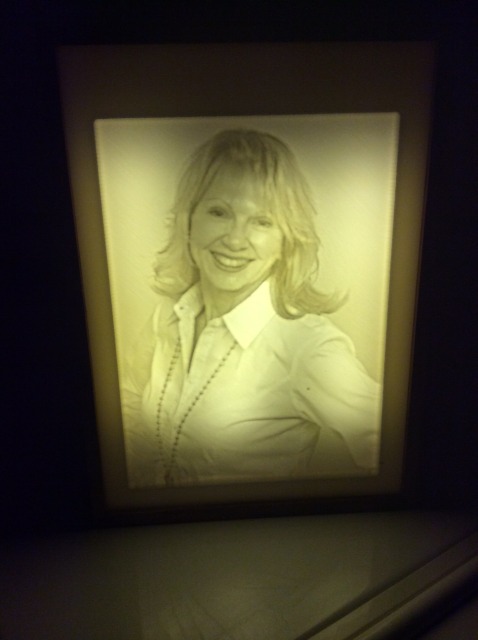
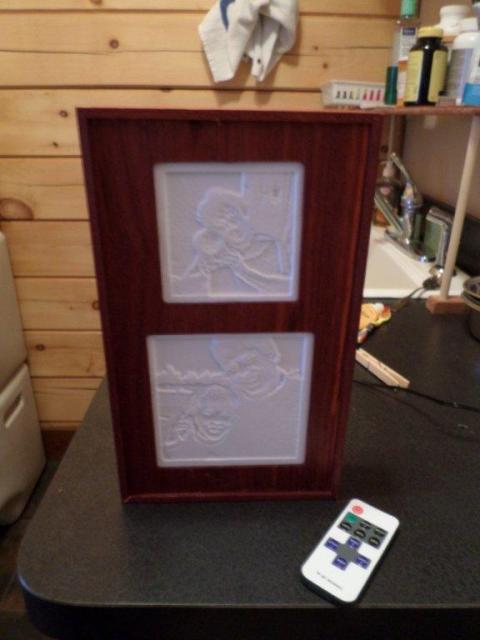
This one shows what it looks like after a light is shined on the back, working on some wood boxes to frame the carvings and hold some LED lights. Enjoy.

img_1485778_1_c8eac140695456ea3c826fec16441038.jpg
 
That is too cool! The light parts get cut deeper than the darks so present as a B&W photo when lighted from behind. What a different effect that is!
 
Right, when getting the photo ready to be converted, you select an option to invert the light and dark areas since the lighting will be from behind. If you're going to carve in to wood or another solid medium, the lighter areas will be the most shallow cuts. I'll try to do a similar carving in wood to show the difference.


Sent from my iPad using Early Retirement Forum
 
Very neat. Q: How thin are the lightest parts?

There is an old ceramic (porcelain?) German beer mug in our family, and when you tip it up and look through the bottom towards a light, it has an image of a face in it, similar to these carvings. I don't recall if it is different thicknesses or not, or if there is some darker areas embedded in the ceramic.

-ERD50
 
Very neat. Q: How thin are the lightest parts?
-ERD50

The deepest portions of the carvings are .12 inch so takes away about half of the 1/4" thick material. From what I've been able to learn, that is about the optimum amount for the 1/4" Corian although I've seen posts in a CNC forum that say they cut almost .2 inches. I haven't tried one that deep. At over $5 a pop for the piece of Corian, haven't wanted to experiment too much, lol.

The first carving I made was only .05 inches deep and the lack of detail and contrast compared to this one is very noticeable. When I posted that carving on a the CNC forum, I received some really good tips about the number of lines that should be carved as well as the depth of cut and the carvings are much better.

It seems like it would be a reasonably straightforward process to add some kind of design to the molds for a cup or mug and if the material of the cup was translucent enough, you would see the same effect?
 
I have a NextWave Automation CNC router, I think my version is called the Pro HD- bought it from Rockler online. The software to convert the photos is called PhotoCarve and is from Vectric Software. Lot of fun, expensive equipment but keeps me out of mischief!
 
Here are a couple of new lithopanes. First one is a picture of a sheltie, will donate it for a silent auction we're having at our Rescue group picnic tomorrow. It was carved about .18" deep in to the .25" thick Corian and I think it made the image just a bit grainer?

The second is the same picture but made smaller to use as a nightlight.

img_1497521_0_afb0e4f05d125bd1a13376a001f45d3c.jpg


img_1497521_1_1fadd6e73e1463aa506a715dbbae81d2.jpg
 
What a unique night light, it is probably safe to assume there are none other like it in the world. The other one should bring a lot at the auction.
 
Very neat. Q: How thin are the lightest parts?

There is an old ceramic (porcelain?) German beer mug in our family, and when you tip it up and look through the bottom towards a light, it has an image of a face in it, similar to these carvings. I don't recall if it is different thicknesses or not, or if there is some darker areas embedded in the ceramic.

-ERD50

We have the same type of mug, but the picture is a naked woman.
 
That's incredible, thanks for sharing.
 
Didn't stay until the end of the picnic but looked like we were going to raise around $75 for the two items so I was happy about that. Also had a lot of people asking me to make something for them so will see how that pans out. It was kind of funny as a couple of people asked me if I could do something "other than a sheltie". Must admit, it will be more fun to do some of these with different photos. Going offer seemed to be about $10-15 for the nightlight and $20 for the big litho using their picture.

I've always done woodworking and other hobbies and often get asked to make another item of the same type for friends or family- my usual answer is I don't really like to do the same thing more than once but there are still quite a few cutting boards and keepsake boxes of similar design in my family where I couldn't make that answer work.

These lithos really only take 10 or so minutes to get set up, then the router does the work and I can do something else. The nightlight took about 1 hour to carve and the bigger litho (5"x7") about 4 hours. I could probably speed things up by tweaking some of the settings to carve slightly less detail and have the router move faster but afraid I might end up breaking the bit- probably should buy another one as a spare just in case.

Thanks for the comments.
 
So that means an 8x10 would be ~9-10 hours to carve, going by the square inches not to mention material cost. One example of when doubling the size fully justifies quadrupling the price.
 
Corian is an expensive material, if I remember correctly. I just priced a small 1/4" thick piece, and 2 square feet was more than $60. Unless you are getting the material for free, I'd say doing these types of custom art pieces is worth a good deal more.
 
Corian is an expensive material, if I remember correctly. I just priced a small 1/4" thick piece, and 2 square feet was more than $60. Unless you are getting the material for free, I'd say doing these types of custom art pieces is worth a good deal more.

There are several sellers on Ebay that sell small pieces of Corian and the 1/4" 5"x7" pieces come out to be a bit over $5 each. I'm sure these are leftovers from other, larger jobs as the larger pieces are more expensive like you saw. I may try listing a couple of these on Etsy or somewhere at a higher price to see if there is interest. The ones I would do for folks from the rescue group would cover my costs and I'm still in the learning stage and they would be pretty tolerant of any small glitches, etc.

There is some art in getting the photos ready and while I'm happy with how these are coming out, I've seen some examples from others that are even more impressive! If I get too many orders, I'll raise the prices to cut down the volume so this doesn't seem like a job!

Walt, you're right, the machine time goes up quite a bit based on size of the job. As I mentioned, some careful experimenting with options might make a 10-20% difference so will continue to explore. I'm using a 1/16" ball nose bit for these which has to make multiple passes to get to the final depth in some cases. I talked with someone in an online forum who says they use a sharp pointed V-bit that can cut to depth in one pass at very little loss of resolution. The first litho's I did were with a V-bit and I don't see a major difference in the outcome but the photograph itself certainly makes a difference. I see a lot of these done by others where the background of the photo is removed as well which takes out a lot of carving, for a portrait or the sheltie head, this would probably be a good option as well to reduce the carve time.

Thanks to all for the comments!
 
Look at your energy costs also. For instance, I was reading this, and came up with a $2/hr estimate.

Even though you are buying Corian scrap at a very good price now, that could change in the future. Then you would have to buy sheets, and pay market cost of the material.

It really is an interesting hobby, and the high cost of the equipment will keep a lot of competitors at bay.

I think you should develop an overhead cost (energy, equipment, shop), and add a material cost depending on the size of the piece.
 
...
These lithos really only take 10 or so minutes to get set up, then the router does the work and I can do something else. The nightlight took about 1 hour to carve and the bigger litho (5"x7") about 4 hours. ...

If I were going to make these for profit, I'd consider the amortization of the router, bits, and maybe the router table itself if this works creates any appreciable wear on that. Those routers spin so fast, I would think that hours of continuous use would take their toll on bearings and brushes at the least, and then the motor commutator.

Look at your energy costs also. For instance, I was reading this, and came up with a $2/hr estimate.
...

That's looking at an industrial setup with industrial vacuum pumps. I doubt his setup is using even one kW, so 4 hours might be 44 cents at the average 11 cent/kWhr rates.

-ERD50
 
Last edited:
Interesting information- I like the Woodweb site, have lurked around there in their sawmill and lumber forums for a long time! My CNC machine is much smaller, a laptop for the controller and a single 120v router- I'd estimate I'm not using more than a KWhour per hour of use as I don't even run the router at full speed on the Corian. I know there are other costs like shop and machine but believe me, I will never go back to working for a living or having to buy full sheets of material! My personal time is about 30-45 minutes of active work. A little of this is at the start to get the photo ready, set up the material, start the job and come back when it's done to pull it off and put it in a box to ship. I charge extra for shipping so not losing money there. If I started to get interest in these beyond friends, family, or people we know through the rescue group- would probably try to get a higher price for "stranger markup".

Will post some more of these if I get some interesting photos to play with!

If it starts to feel like work, I'll move on.
 
Did another lithopane for my SIL to give as a gift. I tweaked some of the settings used when I carved this one and it cut in about 2 1/2 hours- about 90 minutes faster than the last one I did of similar size (4"x6"). Main change was to allow the bit to move through the Corian material at a rate of 100" per minute as opposed to 50" per minute I was using.

Talked with some folks who do many of these and basically, they said you can cut these much faster because the router bit is only moving a very small amount when it cuts the next line so you are cutting a really small amount of material with each pass. Makes sense as this image was cut in over 1000 lines, starting at the bottom left and moving across at a 45 degree angle.

I don't notice any difference in quality, this one was cut with a 1/8" bullnose bit. I tried a 1/16" bullnose bit on an earlier photo and saw a bit of increase in the detail but not enough to justify the extra cutting time. Here's a picture of the finished picture in a cherry frame using LEDs for backlighting- this has 18 LED's inside the box, should have used just a few more to get it more even but have to get this one in the mail.

img_1528811_0_fd059b3fd56e5fcdee0f32c3bddacad0.jpg
 
Thanks, found out later that this was a picture of the sister of the person who will get the litho. The sister passed away earlier this year.

This one has 18 LED's and for the next one this size, will probably add about 3 more to even out the lighting. The lights I'm using come in a 16' roll and you can cut it to size between 3 lights- there are copper pads that you then use to connect the wiring and the LED strips together. It's hard to make a tight radius turn with the LED so for this one, I used 3 strips of 6 lights each, I will move them up a bit inside the case and add a row of 3 across the bottom next time and get a more even light but I was still happy with how this one turned out and needed to get it done so it could go in the mail!

I also used some connecters that are sold that connect to the LED strip copper pads to make the connections without soldering. the lights are covered with a rubber type coating that make them too thick to fit the connector so it has to be trimmed, but it's hard to trim off enough to allow the cover to close without running in to a diode. I got rid of the cover and once the connection was made, secured it to the connector with hot glue- the hot glue was used to secure the lights to the back of the case as well.

Thanks for the nice compliments.
 
DD is doing shadow boxes with similar back lighting and lighting issues. Her boxes are in the 8" x 10" range. With a 1" depth, the battery holder would not fit inside the box. How are you solving the power supply position? A link to your LED supplier?

Hermit
 
I'm using a 12V wall transformer to power the LED's. I wired the LED's directly to the transformer leads and used an in-line lamp switch for on/off. I've done others using a remote controller but they didn't want anything that "fancy" for this one. I thought about going the battery route but wanted to stay with inexpensive 12V lights and didn't want to deal with the issue with handling the batteries and making them easily reachable.

Here's a link to the LED's I'm using bought from Amazon.

http://smile.amazon.com/gp/product/B00JSHD8PK/ref=oh_aui_search_detailpage?ie=UTF8&psc=1

I just realized when inserting the link above that they sell a "non-waterproof" version of these lights that are cheaper and don't look to have the covering that interfered with the connectors. May want to look at those!

Bought the remotes on Amazon as well, ship free from China and received them in about 10 days for less than $7 each.

Amazon.com: E-Goal Mini LED Controller Dimmer with RF Wireless Remote Control DC 5~24V 12A R107 With E-Goal Ribbon: Musical Instruments

Thanks.
 
Last edited:
Here's the most recent Lithopane I put together. This one for a friend of my son. Shows pictures of her as a little girl with her dad- the pictures were a bit blurry so pretty happy with how it turned out. Mounted them in a frame made of cherry. I used the non-waterproof LED's I found in my last post, much easier to use.

img_1542304_0_ee47f9029c83a7b0b7adc685a986abf7.jpg


And here's a close up with it lit up.

img_1542304_1_86a8fdc6cfc2847e4f5829ae937d2bef.jpg
 
Back
Top Bottom