Your recent repair? 2013 - 2020

Status
Not open for further replies.
Yes, the hard-start cap definitely helps. However, there's a difference between mechanical generators and the inverter-type like the new breed of generators.

Mechanical generators will get bogged down for a few seconds if overloaded momentarily, and if the circuit breaker does not pop off, they will recover. The inverter type will shut off extremely quick if its electronic circuit is overloaded.

By the way, I was wrong about the EU2000. A pair of them will run the RV AC with no problem. The hard-start cap does help some people to run the AC on a single EU2000. However, they still have a bit of problems on a hot day (AC refrigerant pressure is higher), or at a high altitude (generator is weaker due to thin air).
 
Last edited:
Recently replaced the solenoid for the ice maker and water dispenser on the fridge. The part cost about $40 and was a pretty straight forward installation, with the help of a U-tube video. Just the service call out would have been $80 not counting the part and repair time. Figured conservatively that I saved myself $100.
 
Our outdoor backyard tap had frozen and broken the pipe inside the wall, but the break was after the shutoff part so no leakage.

Today I decided to fix it.
First cut a hole in wall in bathroom to reach it, oops it's too high and awkward.
So cut a hole in dining area to access it.
Filled some pails with water and turned off the house water.
Used a small tube cutter to cut the pipe, and pull out the old tap and little pipe.
Heated up the old one, to pull off the old pipe out of it, which included the corner, cleaned it up and soldered it into the new one (after pulling out the guts of the shutoff).
Burned my thumb as couldn't see the flame outside in the bright light :eek:

Stuck the pipe in a pail of water and blew air into it to check it was air/water tight. As I wanted to lessen the number of times I would be doing this :D

Realized I might set the house on fire as the space was very tight. :(

So I got a full pail of water I had saved earlier and put it near me.
Made a heat shield out of a big coffee can and screwed it to the 2x4.
Put on the flux and soldered it on (the lowest solder with the big drips ) :)
Then I cooled the pipe down with a wet cloth and then some ice cubes, installed the guts of the tap and turned on the water.
No leaks .. :D :D
Screwed the outside part to the house so it's steady.

Now I have drywall to fix.

First photo shows my heat shield, Second one shows the completed work.

The photos uploaded on their sides, should be rotated 90 degrees clockwise.

Nice work. I have to admit that I have gone over to SharkBite and Pex for this. Don't have to worry about setting house on fire or burning self. SharkBite gives a thermal break and the Pex is less likely to rupture in cold weather or conduct cold. Also like that the SharkBite fittings turn freely.
 
The RV generator project

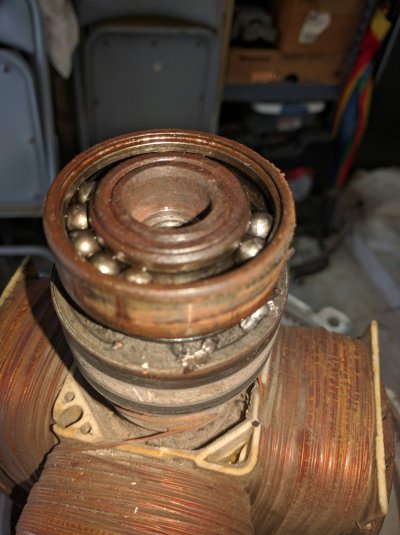
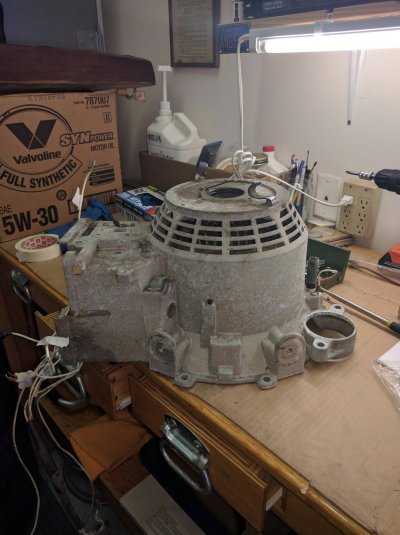
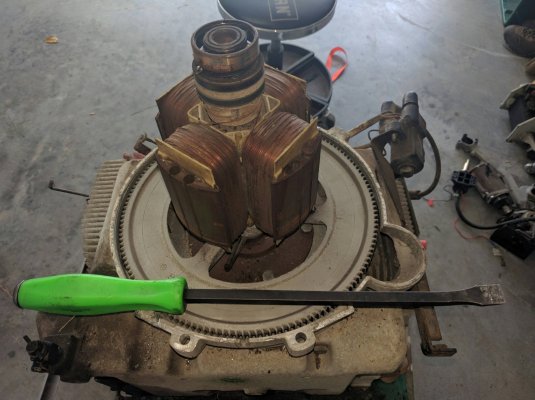
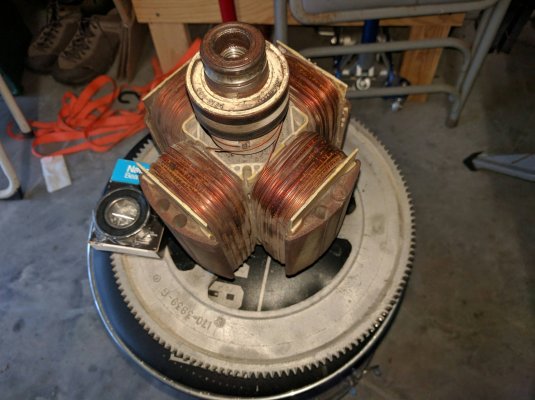
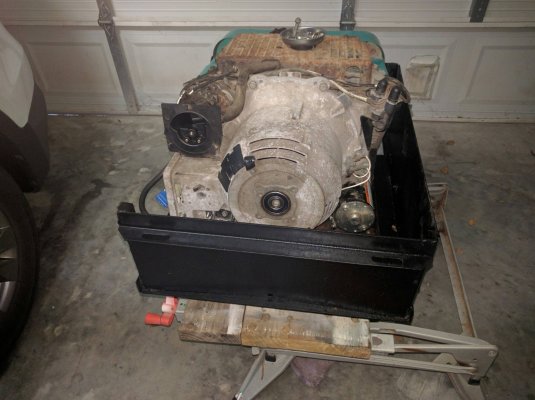
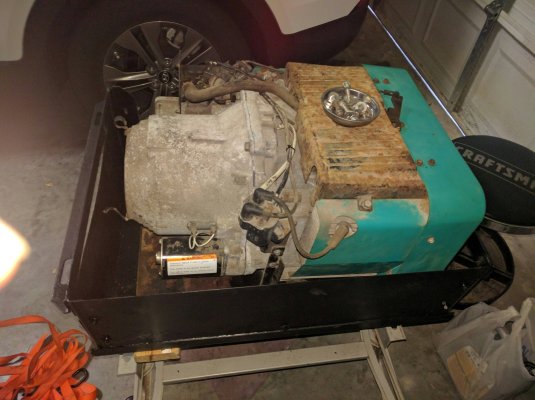
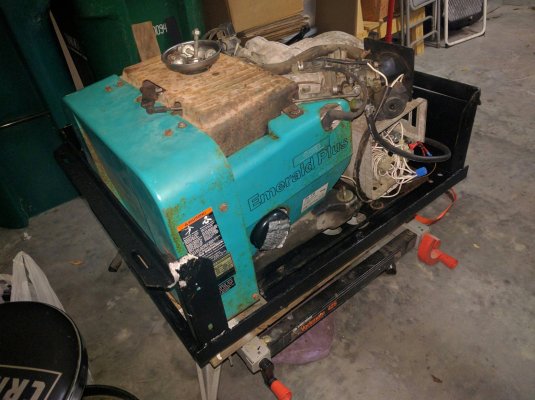
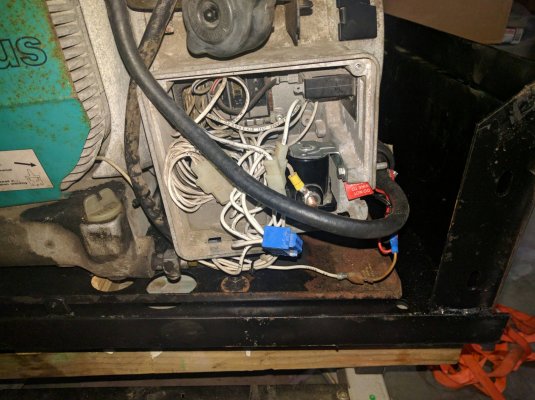
Today was dedicated to pulling the generator stator/rotor housing. It took some pry-bar work due to the housing bearing outer race being held in it's seat with a light press fit. Now the bearing is going to be removed once we find a replacement. Here's some photos of the progress:

IMG_20160813_125706.jpg

IMG_20160813_125720.jpg

IMG_20160813_125737.jpg
 
Great job! Must be a labor of love. Or curiosity.

If you clean up the sides of the bearing's races, you might find an SKF or other manufacturer's number. That would sure help in getting a replacement. Or call Onan with the model #, they might be able to give you a prt #. Their parts are hugely marked up.

BTW I have a 30 or so year old Onan 3KW at my camp. Runs just fine, has about a 40% overload capability, voltage drops to about 100 VAC for short periods of gross overload. It does take a hefty battery to crank it in subzero temperatures along with a spritz of starting fluid.
 
Last edited:
Nice work. I have to admit that I have gone over to SharkBite and Pex for this. Don't have to worry about setting house on fire or burning self. SharkBite gives a thermal break and the Pex is less likely to rupture in cold weather or conduct cold. Also like that the SharkBite fittings turn freely.

I had considered using Pex, but I don't have any Pex tools and this is inside a wall, so naturally I worried about leakage later.

Quite frankly when thinking of Pex, I thought I could connect it in the basement and run about 10 feet up to the outside tap, but alas, the pipe that I fixed runs down the wall and then goes between a bunch of plastic drain pipes to join a 3/4 pipe, and it would be harder to reach it there.
I didn't think that I could put in a 1 foot of Pex to make the joint :facepalm:

So the short story is Pex seemed like too much trouble and expense this time.
 
Great job! Must be a labor of love. Or curiosity.

If you clean up the sides of the bearing's races, you might find an SKF or other manufacturer's number. That would sure help in getting a replacement. Or call Onan with the model #, they might be able to give you a prt #. Their parts are hugely marked up.

BTW I have a 30 or so year old Onan 3KW at my camp. Runs just fine, has about a 40% overload capability, voltage drops to about 100 VAC for short periods of gross overload. It does take a hefty battery to crank it in subzero temperatures along with a spritz of starting fluid.

And now you know who to call when the time comes :LOL::LOL::LOL:
 
Great job! Must be a labor of love. Or curiosity.

If you clean up the sides of the bearing's races, you might find an SKF or other manufacturer's number. That would sure help in getting a replacement. Or call Onan with the model #, they might be able to give you a prt #. Their parts are hugely marked up.

BTW I have a 30 or so year old Onan 3KW at my camp. Runs just fine, has about a 40% overload capability, voltage drops to about 100 VAC for short periods of gross overload. It does take a hefty battery to crank it in subzero temperatures along with a spritz of starting fluid.

Pulling the bearing off (first attempt), the outer race split and the remaining balls went flying all over. So what's left pressed on the shaft is the inner face and it's against a shoulder. I may try to cut it off or bring the rotor to a machine shop and have it removed and the new bearing pressed on at the same visit.

Onan is now Cummins and I do have the part number so a replacement bearing can be picked up locally next week. More later.
 
And now you know who to call when the time comes :LOL::LOL::LOL:

If this one dies it is going to the scrapper. The backup to this is a 6KW Onan marine diesel. It is only 20 years old:D And can be cranked/started with a lawn tractor battery. :) At least in the summer time.
 
Today: Found new bearing at auto parts store (National bearing #6205ZZ). Made tool to remove the rotor and successfully did just that. Seeing I don't have a large shop press, this is going to the local machine shop tomorrow for the bearing install.

New bearing is ready.jpg
 
Today: Found new bearing at auto parts store (National bearing #6205ZZ). Made tool to remove the rotor and successfully did just that. Seeing I don't have a large shop press, this is going to the local machine shop tomorrow for the bearing install.

View attachment 24501
Is there a simple way to know how healthy the rotor/stator windings are (overall resistance check, etc). I hate to knock on doors if there's likely to be a monster behind one, but while you've got everything apart, if a re-winding is needed and not too costly, maybe this is the time to do it?

Apologies if that is a dumb question.

Not a dumb question at all. The old manual I found has a series of electrical tests that can be done with a multimeter. Mostly looking for shorts and opens. There are also some resistance (ohm) values that are part of the test of the stator and rotor.
 
That winding looks good to me, not burned (no dark varnish), slip rings look good too. Replace the brushes of course.
 
Today I got the new bearing pressed on at a local machine shop ($10 fee). I also ordered a new brush set and air cleaner element. I also partially assembled the generator and associated wiring. Waiting on brushes now.
 
New brushes are in and the odds and ends from previous maintenance events (missing bolts, loose wires, split hose ends, etc) have been sorted out. We mounted the unit on the shelf plate and it is ready to be installed. That will happen tomorrow afternoon with pictures.

IMG_20160820_183858.jpg

IMG_20160820_183933.jpg

IMG_20160820_183946.jpg

IMG_20160820_183956.jpg
 
Last edited:
I guess it takes additional work if the generator is to make a test run before installation. It would give me a warm and fuzzy feeling. I don't know how much of a hassle to mount and dismount the generator.
 
I guess it takes additional work if the generator is to make a test run before installation. It would give me a warm and fuzzy feeling. I don't know how much of a hassle to mount and dismount the generator.

It's not practical to try to set it up for a test run outside of the RV as I have no load wiring to attach, no fuel tank, and a 12V battery would need to be wired. It is not too hard to jack it up with my floor jack and slide it into place in the RV and tie in a few wires and plugs, the gasoline line and the load wiring.

Our plan is to bring the RV to my house tomorrow afternoon and install it then give it a whirl. I don't anticipate any problems as long as the new brushes seat with no problems and I didn't re-wire anything wrong :)nonono:).
 
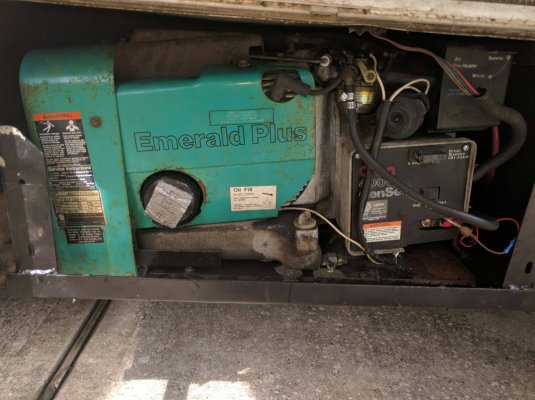
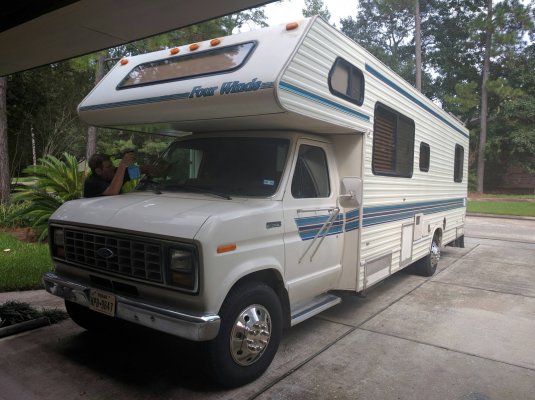
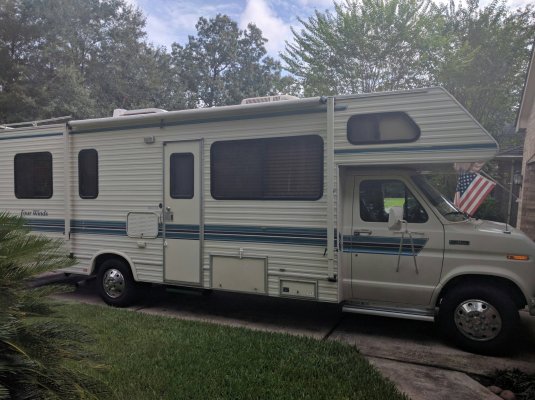
Generator is installed. It fits in a framed location a bit back from the driver's door side. It took two of us about two hours to work it in place with a floor jack and then hook up the fuel line, load wiring, accessory plugs, air cleaner and misc bolts and fasteners. She started right up and was not running smooth until I adjusted the carburetor (it needs to be rebuilt). But I did get it running pretty smoothly and the generator side works as it should. Here's a few pics of the end of the project:

IMG_20160821_155230.jpg

Generator installed and running (above)

IMG_20160821_161827.jpg

IMG_20160821_161857.jpg
 
Nice job!

Thanks!

I just totaled up the parts cost and it was $89.12 for the following:

New ball bearing,
New brush set,
New Air Filter element,
3 foot threaded rod (7/16" dia, coarse thread) - make a tool for rotor removal,
One 9/16" dia X 2" long bolt - Use with rod above,
4 quarts 10W 30 Motor oil/new oil filter,
One tube of Permatex form-a-gasket for the install of the intake manifold.

Labor to press old bearing off and new one on was $10 at a local machine shop.

So we have around $100 into the repair. Not bad, given a new generator is around $4250 installed.
 
Status
Not open for further replies.
Back
Top Bottom