Hammocks

ScooterGuy

Recycles dryer sheets
Joined
Feb 12, 2007
Messages
150
In my travels, I've taken to carrying a lightweight hammock, which weighs about 1 lb. & packs into a space about the size of a half-loaf of bread. This isn't the dreaded lawn hammock with a 'spreader bar,' the butt of jokes and overturnings. Mine is just a very comfortable fabric-supported pocket (I'm 6' 8" tall and weigh 275 lbds. -- my hammock supports up to 400 lbs.), supported between two trees, posts or similar strong upright things. See www.treklightgear.com

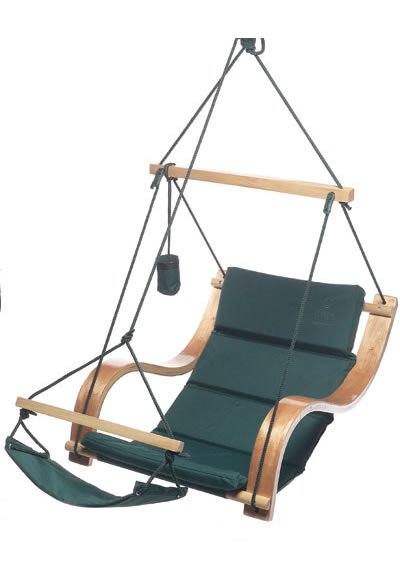
It is entirely possible to sleep flat, or on your side, just by getting on the diagonal. Folks with 'bad backs' have found hammocks to be more comfortable than beds. When resting, I also use my hammock as a suspended 'lounge chair,' sitting sideways. Hammock ties can be ropes or my favorite, motorcycle tie-down straps (breaking strength 1000 lbs.). I carry mine in my maxi-scooter, a Suzuki Burgman AN650. It could just as easily go in a bicycle, backpack or in a car.

I use it locally, to rest comfortably. I also used it several times during my recent trip to Hell and back (Hell is in Michigan), over a 6 day, 1400 trip. I have a 2nd hammock, permanently strung up in a spare bedroom, upstairs, which I use after a strenuous rowing session on my ergometer.

While I don't camp anymore, a hammock-camp system eliminates a tent and ground system, and is a lot more comfortable than sleeping on ther ground for my old bones. See HENNESSY HAMMOCKS.com: ultra-light line of jungle hammocks, ultra-comfortable camping hammock /chair/ tent combo

Anyone else here had favorable (or un-favorable) experiences with hammocks, before or after ER?
 
I've used them when camping for years. Mostly with great success. Recently the old back has kept me from sleeping in it all night, but it still can't be beat for a nap. I've got an old (analog) picture around somewhere of me snoozing in my hammock with a can of beer balanced on my forehead. You can't do that in a bed. :cool:
 
Can someone recommend a hammock and stand set up suitable for napping in the living room?
 
Oh, yeah we got your hammocks here!
We've got the classic Pawleys Island style (made here just up the road a piece) on the front porch for napping.

Then we've got a cotton string one from Guatemala that we string between a couple of trees in the back yard when we have parties and finally the wonderful nylon string one we used on the front deck of the sailboat to catch a breeze when we lived aboard one summer. It hung between the mast and the roller furler, with a nifty little band to hook around the furler that a friend made for me.

We would love to take the lightweight ones with us to the music festivals, but alas, it is hard to find good attachment points. I have seen and envied your style of hammock at outdoor shows, they are very cool!

We also have two Outback lounger hanging chairs for the back porch--they were a splurge, but wonderful for reading in.
 

Attachments

  • o_lounger_green.jpg
    o_lounger_green.jpg
    25 KB · Views: 4
Here's a pic of me lounging in our hammock on one of our camping trips.

Makes me wanna go camping again soon!
 

Attachments

  • DCP01030.JPG
    DCP01030.JPG
    376.8 KB · Views: 8
Hammocks -- where the aint no trees!

Chain-Link-Fence Support & Erection for a Hammock:
Where there ain’t no trees!

I started experimenting with support for a cheap & simple hammock support where there were no available trees or other solid upright things to be attached to, but where there was a chain-link fence – trials were successful 2x (sorry, no photos):

  • I used two 2” diameter white PVC pipe segments, each 21” long (smaller diameter segments might collapse under the compression strain).
  • I drilled out a series of closely-spaced ½” holes, in the circumference of a longer pipe.
  • With the cut-off saw (or hand saw), I sliced through the middle of the drilled holes, to give one end of each 21” pipe a ‘serrated’ look – so that the pipe could ‘grab-onto’ the fence wires, even if these cross-hatched wires were mismatched or un-even – this can be done ‘by eye,’ as the exact placement of holes isn’t critical.
  • I drilled 2 holes at the other end of the pipe segment, all the way through the pipe end (making 4 holes in all, at right angles to each other) at the other end – this can be done ‘by eye,’ as the exact placement of holes isn’t critical.
  • I passed straps/ropes through 2 of the holes in each strut end, and with an overhand knot inside the pipe, to hold the rope/strap in place – One rope/strap goes to the top and one to the side for each pipe (forming two right-triangles, when set up).
  • I knotted smaller ‘S-hooks’ on the ends of each rope/strap (4 hooks in all)
  • The two side ropes/straps were each 30” from strut to ‘S-hook.’
  • The two top ropes/straps were each 24” from strut to the ‘S-hook.’
  • I labeled each strut for a top rope/strap – I labeled each side rope/strap as ‘R’ or ‘L’ – I labeled the hammock ‘S-hook’ hole as ‘H
  • Set up this way, the supports took my ~275 lb. weight without breakage or apparent damage (the hammock itself is rated to 400 lbs.).
  • Set-up and take-down took about 3 minutes, each.
  • I would replace any ropes with tie-down strapping (1000 lb. breaking strength)
  • Let someone else figure out how to make the struts telescoping/break-apart and to be made lighter, perhaps using exotic materials.

- - - - -

CLF-Hammock Set-Up

  • Choose a spot on a Chain-Link Fence (CLF), 6’ or more in height (if enclosing a structure, better to move your attachment position around to the side or back, to be more out-of-sight from ‘officialdom’).
  • You may use ropes or motorcycle tie-down tapes – tapes generally have a much higher breaking strength.
  • Put up either the left or right strut ‘serrated’ end against the fence at about eye-level & hang the top strap ‘S-hook’—this is the “1st strut.”
  • Attach the horizontal rope/strap ‘S-hook’ from the 1st strut to the fence, out to the side – continue to hold the strut with one hand.
  • Attach one of the hammock hooks to the H opening of the 1st strut – continue holding the strut with one hand.
  • Unfold the hammock out of its container sack, keeping a little strain on the 1st strut to the side toward which you are moving.
  • Temporarily attach the other end of the hammock to the fence by its own hook, keeping a little tension on the hammock and the 1st strut.
  • Temporarily set up the “2nd strut” in the same manner as the 1st.
  • Attach the hammock end to that 2nd strut.
  • Move the 2nd strut further to the side opposite the 1st, so that the hammock is stretched a little.
  • Re-position the 2nd strut’s vertical and side ropes/straps, so that the strut is about a hand width up from level and out to the side.
  • Go back and re-position the 1st strut in the same way (about a hand width out to the other side & up from level).
  • The hammock should now be level and taut .
  • Carefully sit down in the hammock: if done correctly (with a little practice), both struts should be drawn to the level and horizontal position by your weight – the hammock should ‘sag’ to its normal, loaded position – your ‘butt’ should be about a foot or so off the ground – the fence surface should be distorted a little (this distortion is normal and is the reason why both struts were set ‘up’ and ‘to the side’) – the ropes/straps should be very tight.
  • Lay down in the hammock – your hips should be about 4” to 6” away from the fence surface – you are now comfortably suspended ‘where there ain’t no trees!’
 
Hammock stand

Look in Instructables.com for 'DIY Hammock Stand'

This is NOT portable, but appears cheap and easy to do. I haven't personally built it, because I'm so tall and heavy, but a more 'normally-proportioned' person would benefit.

The one I have upstairs is attached to 2 eye-screws, well driven-in to two oak studs (it's an 80 year old house), as the pull on the ropes/tapes is VERY strong.
 
Back
Top Bottom