Your recent repair? 2013 - 2020

Status
Not open for further replies.
For my friends who are concerned... Thank you!
My camp is shut for the winter, and won't be opened again 'til spring. Since I don't really trust the "approved" guys who are authorized to work in the campground I'll bring in someone from outside.
Both of the men I asked for quotes seemed confused about where to start, and indicated that it might take a very long time to find the problem... One said it might be necessary to tear off some of the siding. I don't mind spending money for work being done... just don't like the thought of paying for "experts" to learn. So the question... "at most, what do you think this could cost?" $500?, $1,000? more:confused: and the answer "could be more" didn't inspire confidence. Since there isn't much work in the campground in the winter, giving an open-ended OK, doesn't work with me...
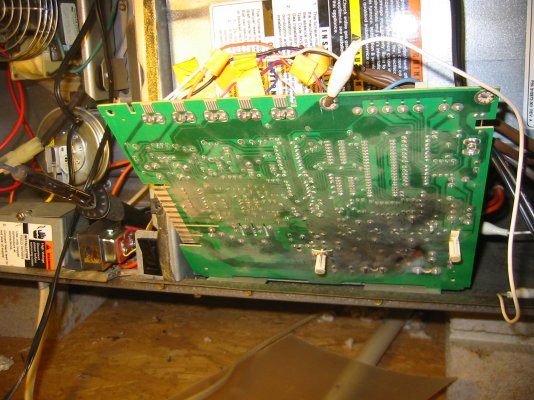
Still, it seems to me that there must be a way of putting a test meter on the circuits to find where the problem may be.
Will let you know in the spring... :)
 
Electricians doing service work charge by the hour. I had a guy find a loose neutral inside a panel, he charged me $65, but he had done the original installation so he knew how it was wired. That eliminated uncertainty about how competent and "standard" the work was to begin with.

There are troubleshooting techniques and tools they use, including using branch circuit breakers to isolate as you suggest. Their thinking caps are the most important tool as usual. Shops that do mostly service work instead of new construction are usu. the best bet. If your buildings were wired by somebody who didn't follow the rules and bootlegged it, or there is hidden damage from some alteration, it may take considerable time to find the fault. If no damage, and done per nec, it shouldn't take long. Have you polled the utility? They might help narrow it down.

I try to ask others in the area of the job who is capable and fair, and you can reduce much uncertainty that way. You may have to buy a few beers or cups of coffee, but you know the drill. An electrical supply might be one place to start.You do have some time to work it.
 
I'm no expert. If the rest of the internal pipes are copper, I'd probably just try to stick with copper as far back toward the well as I could go (dielectric union to the galvanized, with a good bridge for grounding assuming that the pipes serve as a ground right now).

These fittings are pretty versatile, and will come back apart with a special tool.

Push-Fit Coupling Fittings: SharkBite U004LF, U006LF, U008LF, U016LF, U020LF

It is kind of a mess between where the 3/4" copper line to the rest of the house exits and the well tank. I have a shut off ball valve, a T fitting to the well 1" PVC, a connection for a 1/2" NPT pressure gauge, a 3/8 NPT connection for the pressure switch plus a drain valve, then the connection to the tank. I can kind of see why it was originally plumbed with galvanized, as I don't see a clean work around. The pipes do not serve as a ground, there are separate ground wires terminating in two 10' grounding rods.

Good point about the dielectric coupling - that is missing and may be the problem.
 
It is kind of a mess between where the 3/4" copper line to the rest of the house exits and the well tank. I have a shut off ball valve, a T fitting to the well 1" PVC, a connection for a 1/2" NPT pressure gauge, a 3/8 NPT connection for the pressure switch plus a drain valve, then the connection to the tank. I can kind of see why it was originally plumbed with galvanized, as I don't see a clean work around.
I've got a setup that sounds similar: PVC from the well-> rubber couplings with hose clamps to more PVC elbows-> copper to the pressure tank and house, but a small galvanized "T" to the pressure switch. Lots of corrosion evident on the galvanized, but so far it's not leaking. I'm moving the pressure tank, switch etc in a few months (away from my garage door, deeper into the garage so I can get 2 cars in there and the pipes are less likely to freeze). As part of that, I'm going to replace a lot of the copper with PEX, look into a replacement for the iron pipes to the pressure switch, etc. I'll be lucky to get it all done in a day.

I'm sure you know this, but if a house is old and subject to previous alterations/"good ideas", it's possible somebody did just clamp onto a copper pipe for use as a ground at some branch circuit, appliance, etc. I've got some of that in my house, am adding a separate ground wire whenever I can.
 
Nice work, Ronstar.

I've also found that good liquor cabinet placement is crucial for a job like yours.


Thanks - working in the liquor cabinet was a great incentive. And now I have to go in there periodically to check transformer temperature.


Sent from my iPad using Early Retirement Forum
 
I've got a setup that sounds similar: PVC from the well-> rubber couplings with hose clamps to more PVC elbows-> copper to the pressure tank and house, but a small galvanized "T" to the pressure switch. Lots of corrosion evident on the galvanized, ...

Thanks for mentioning this. As I was reading this thread, I was thinking that what I thought were the only two pieces of galvanized I had have leaked. One of them being at the well junction, and it cost ~ $800 to have dug up and replaced (plus my pump running 24/7 before I realized it). It really PO'd me that they would use galvanized below ground for that - didn't they know 35 years ago that galvanized corrodes? It was replaced with brass.

The other leak was the piece going into my pressure tank - but a slow leak that I caught early, no big drama. Was time for a new tank anyway. I used regular black pipe this time (the lady at Menards actually seemed to know her stuff, and told me galv was not right for this application).

But now I realize there is galvanized at the pressure switch - and I have that all wrapped with insulation to avoid condensation in summer, so I'll peel that back and check it out.


Very nice! Brave to cut into ceiling drywall...getting that flat again can be a challenge.

Drywall is my scourge. I can get it done, but it takes me so many tries it really gets frustrating. Apparently, DD has 'the knack', she did some patching at the home she bought, and she said it was easy and came out perfect (and she is picky like me). I should have had her doing it all along! ;)

-ERD50
 
ERD50 - drywall is my scourge as well. It took me a lot of tries and I'm starting to get it now. I found that thinning the drywall mud with water really helps. Its tough to get the knack of feathering out the compound. Also use the mesh tape.
 
Don't know if this counts as a repair.
My dyson randomly turned off the other day while I was running it. I looked for obvious clogs, made sure the house circuit breaker hadn't popped, sniffed for electrical issues... Nothing obvious.

I googled and found that the unit is designed to shut down if it overheats. So I did the filter maintenance and then started looking for less obvious clogs.

These vacuums are highly modular - take-apart-able. Turns out there's a tube from the where the beater brush is to where it feeds into the "ball" of the vacuum... You have to have the ball's filter off to see it... but you can disconnect this tube and poke inside it... Big clog of dog hair around one of those little plastic clippy things that come on bags of bread. (Not a twist tie - a plastic square with a hole notched in it.)

Vacuum running better than ever. Repair was free. I was worried I was looking at a new vacuum.
 
Yes, rodi - that counts as a repair. Thanks for the tip - I'll file it in my brain for when the vacuum cleaner shuts down
 
Got a pair of coil "helper" springs and installed them over the rear axles of my old Ford Explorer. Air shocks were shot. Got some new, regular, shocks to install but didn't get around to that yet. Did replace the front sway bar links. Much better ride now! Several hundred $$$ saved in repair bills for about $100 in parts and less than an hour under the vehicle.
 
I've been busy with several minor DIY jobs for my daughter in her new house -- well, new to her but the house is old. But I tackled my own repair last night:
One of the two bolts holding the toilet tank to the bowl spontaneously broke a couple of weeks ago. That replacement was easy. But despite my valiant efforts could not loosen the other bolt. So I chose to let that sleeping dog lie.
Alas, apparently those efforts resulted in a very slow dripping. More valiant efforts were in vain until I did the smart thing: I took a break, went on the internet and voila! found the solution. Good ol' fashioned hacksaw cut that bolt in about three minutes, and now I have a leak free toilet. Sometimes you gotta take a break to clear your head, and the answer will come to you.
 
Replaced the idler wheel in the dryer. Less than 30 minutes and it runs like new! Took the time to vacuum out the lint while it was apart. Strongly suggest, especially if you have a gas drier, to pop the bottom cover and vacuum the lint out of the base. Fire hazard you know!

Second repair--Got a call at 9pm Sunday that a renter had shut water off to commode. Seems they had been told earlier in the week by the water co. they had a leak. So, of course they waited until 9pm Sunday to call! Found "somehow" the excess chain to the flapper had gotten unhooked and was under the valve so the toilet was always running. (Nice new furry tank and seat cover I despise was installed.) This was on the other side of the wall from their bedroom and even though they heard it, they ignored it for about a month. How do people like this survive? 5 minutes hooking the chain and done.
 
....flapper had gotten unhooked and was under the valve so the toilet was always running. (Nice new furry tank and seat cover I despise was installed.) This was on the other side of the wall from their bedroom and even though they heard it, they ignored it for about a month. How do people like this survive? 5 minutes hooking the chain and done.


Loud snoring or noisy sex. Or both:D Remember they reproduce :cool:
 
Loud snoring or noisy sex. Or both:D Remember they reproduce :cool:

Don't remind me! They also were pushing for me to cover their water bill. I would normally pick up at least part of it if it was really broken but it wasn't. This didn't happen by itself. Personally, I can't stand to hear the water running thru the pipes if I don't know something is on. My hearing isn't perfect anymore but even I know when water is going thru the pipes. You think they would complain about the lack of water pressure if nothing else!
 
This has been my most recent repair job. I checked and replaced tubes, replaced all capacitors, cleaned switches, etc.:
Restored Grundig Konzertschrank 9068 from 1958. - YouTube

Most recently I repaired the electrostatic tweeters:
10670142_10203151302897594_81431136516399312_n.jpg


1507758_10203151302977596_4541532522902113774_n.jpg
 
It was a cold night last night! The furnace quit.

Today I soldered a thick twist of copper from the burned-out relay terminal to the circuit board. These are "before" pictures...I didn't take an "after".
 

Attachments

  • IMG_7791.JPG
    IMG_7791.JPG
    983.5 KB · Views: 18
  • IMG_7792.JPG
    IMG_7792.JPG
    680.6 KB · Views: 19
It was a cold night last night! The furnace quit.

Today I soldered a thick twist of copper from the burned-out relay terminal to the circuit board. These are "before" pictures...I didn't take an "after".

I had a similar problem with my furnace/AC. Apparently, the blower motor had a 'dead spot' on it, and would very occasionally stall upon start-up (maybe zero to a couple times a year?). This would draw a lot of current, and melt the solder at the relay and/or burn the copper trace. I made several repairs to the PCB over the years. Two things to fix this:

1) They wired the furnace into a 20 Amp circuit, and the furnace states it must be on a 15 Amp breaker. I'm pretty sure the relay and board would have held at 15A, and tripped the breaker instead. But that's not much margin, so maybe not. Anyway, I wired in a 15 Amp breaker right at the furnace switch.

2) The motor started squealing a few years back, I was able to take it apart and lube it, but started making noise again a year later. Got a new motor for $100, and not too bad of a repair job. No stalls with the new motor.

-ERD50
 
Sister has 2.5 year old a POS Samgsung :mad:front load washer , with "steam". About $950 new. Constantly stopping with various error codes. The start switch is getting flaky now, ( part of a $120 circuit board ) takes 2 weeks to get circuit board.

Repair solution, BUY ANOTHER WASHER .GE/Hotpoint still make a top load , agitator water hog model. Hotpoint w/ plastic drum $399 , GE with stainless drum, $539 on sale, Both Lowes and Home Depot , same price. Has Dynasor style Electro-mechanical controls , user can set load/water level. Apparently they sell a lot of this model, almost always to pissed off former front loader owners and only discount a few bucks off list $. Washes in about 1/2 hour , vs an hour or so for "energy saver top or front load" models.

The Samsung has been a real POS . Parts service info/support from Samsung :mad: is pathetic.

If you are in San Diego and want a 2 year old POS SAMSUNG :mad: WASHER , needs a little work , send me a PM

Great phones , and TV's , But Major appliances ?, avoid Samsung :mad: like the plague
 
..

Most recently I repaired the electrostatic tweeters:
10670142_10203151302897594_81431136516399312_n.jpg


1507758_10203151302977596_4541532522902113774_n.jpg

Can you fill us in on any more detail on the repair of those electrostatics? Looks interesting.

-ERD50
 
2) The motor started squealing a few years back, I was able to take it apart and lube it, but started making noise again a year later. Got a new motor for $100, and not too bad of a repair job. No stalls with the new motor.
When I was in there, I saw that the motor is to be lubricated every 2 years. It's been 18, and no lube :facepalm:
 
When I was in there, I saw that the motor is to be lubricated every 2 years. It's been 18, and no lube :facepalm:

Mine was 'permanently lubricated', which I translate as - 'when the lube runs out, the motor dies, so the lube is good for the life of the motor'.

But actually, I found instructions on how to disassemble the end plates, and re-saturate the thick felt pads with oil. If it wasn't for the other problem I was having (the dead spot creating stalling), and the fact that the motor was only ~ $100, and it takes a bit of effort to get it in and out, I might have tried another re-lube. But $100 later (well, I bent the fan taking it out, so another $50 oooops), I have a new motor, no stalls and no squeaks, and a warm house.

-ERD50
 
Mine was 'permanently lubricated', which I translate as - 'when the lube runs out, the motor dies, so the lube is good for the life of the motor'.

Basically that's it. When I was doing heating/A/C service in the early '70's most motors I saw did have oiling ports. They were supposed to be lubed either every six months or annually, which of course almost everyone forgot to do and then they complained about the motor bearings wearing out.

But if lubed as instructed (usually 20 weight motor oil) those motors would last "forever".

But the sealed bearing motors would last "long enough" if they never got any attention so that's what the manufacturers went with.
 
Status
Not open for further replies.

Latest posts

Back
Top Bottom