How do I figure out solar or battery powered lighting with a timer?

Ah, panel sizing, that's the hardest part. Let me point you to this excellent Web site that has actual data for the US that was logged for 30 years. Theoretically, the solar power is a function of latitude, but in reality the cloud cover and atmospheric condition have huge effects. See: U.S. Solar Radiation Resource Maps.

How do you use this? Let's select 1) Minimum radiation, 2) Month of January, and 3) Flat plate tilted south at Latitude+15 degrees. The last selection means that a person near Denver (40 deg latitude) would tilt his panel to 55 degrees off horizontal, and facing south, to maximize the power collection.

The chart shows the daily insolation at northern Colorado being 3-4 kWh/m^2/day. So, how do you use this to size the panel? The standard radiation used to rate panels is 1 kW/m^2. This means that the panel gets an equivalent of 3 to 4 hours of direct sunlight each day. The daylight hours are longer than 3 hours, but the oblique shining plus the atmospheric condition reduce the power to only 3 hours of direct sunlight.

So, let's say you want 50 Wh each day, then the solar panel rating is 50 Wh / 3 hr = 17W. Round it up to the next size of 20W then.

Now, if you want to have power for 2 or 3 cloudy days in a row, then you need to upsize the panel and the battery accordingly.
 
Last edited:
I just looked up my generation for January. 272 KWH. I have a 3.6 KW system on the roof.

272 KWh for 31 days, so that is 8.77 KWh/day.

Your solar panels have a rating of 3.6 KW. This means they get an equivalent of 8.77 KWh/day / 3.6 KW = 2.4 hr/day of direct sunlight.

Of course even in January you have more daylight than for 2.4 hours. However, the cloudiness and the fact that the panels do not track the sun, plus your suboptimal roof orientation reduce the power that is received. They, in effect, are equivalent to a panel working optimally for 2.4 hours each day.
 
Last edited:
Ah, panel sizing, that's the hardest part. Let me point you to this excellent Web site that has actual data for the US that was logged for 30 years. Theoretically, the solar power is a function of latitude, but in reality the cloud cover and atmospheric condition have huge effects. See: U.S. Solar Radiation Resource Maps.

How do you use this? Let's select 1) Minimum radiation, 2) Month of January, and 3) Flat plate tilted south at Latitude+15 degrees. The last selection means that a person near Denver (40 deg latitude) would tilt his panel to 55 degrees off horizontal, and facing south, to maximize the power collection.

The chart shows the daily insolation at northern Colorado being 3-4 kWh/m^2/day. So, how do you use this to size the panel? The standard radiation used to rate panels is 1 kW/m^2. This means that the panel gets an equivalent of 3 to 4 hours of direct sunlight each day. The daylight hours are longer than 3 hours, but the oblique shining plus the atmospheric condition reduce the power to only 3 hours of direct sunlight.

So, let's say you want 50 Wh each day, then the solar panel rating is 50 Wh / 3 hr = 17W. Round it up to the next size of 20W then.

Now, if you want to have power for 2 or 3 cloudy days in a row, then you need to upsize the panel and the battery accordingly.

Extremely helpful! Thanks.
 
I like this idea, it's cheap and he could run the wires inside that low cost plastic conduit pipe all sealed together or even a garden hose to make it more water proof.

Sounds like this would be worth looking into. Will have to do some reading.
 
You already mentioned the simplest solution: move the coop closer for the winter. We had chickens when I was a kid, and that's what we did. It allowed us to access electricity to power lights and made it easier to get in to feed/water/collect eggs. We averaged 200" of snow a season-- it saved a lot of shoveling to keep the coop close to the garage in the winter.

But if you are enjoying the solar project, by all means carry on.
 
The quail will huddle up and stay warm when it gets cold. The challenges I face in the winter are that I need to keep their water from freezing and I need to ensure they have 14 or more hours of light a day to keep them laying. ....

But if you can't address the water freezing problem (and yes, that would take a LOT of solar and battery), then solar for the lighting seems moot. You will need to move the coop or get electrical out there anyhow.

Or some other solution for the water? A large-ish insulated tank, heated by propane (and I know you have propane and burners) to ~ 100 F would probably stay above freezing for more than 24 hours.

That soda can solar heater is questionable. Air has so much less mass than water, and for cold weather you need good insulation on those sorts of systems.

-ERD50
 
That soda can solar heater is questionable. Air has so much less mass than water, and for cold weather you need good insulation on those sorts of systems.

-ERD50

I can insulate pretty well and I would insulate both the water and the solar heater if I went that route. It would be a technical challenge and frozen water would be a nuisance, but correctable. I would make a soda can heater with a lot more than 50 cans, for sure.

In any case, it is pretty clear solar isn't going to work without a lot more cost than it is worth. So either I run low voltage dc out there and use a largish incandescent to heat the water, or I move the coop close to the house for winter and have access to AC power. The latter choice would save us trudging through snow to collect eggs, so that might be the optimal choice.
 
or I move the coop close to the house for winter and have access to AC power. The latter choice would save us trudging through snow to collect eggs, so that might be the optimal choice.

I had a similar need a few years ago and took the easy way out. Went to Home Depot and got a 100 foot heavy duty extension cord. Worked great (you want the heavier gauge wire to avoid too much voltage drop).
 
Note that if you have a battery, and a bunch of cloudy days, you could always move the battery to where you could charge it from 110 if needed. Or get the 14 g extension cord, if you dont already have one for a trimmer, and run it to the battery with a 110 v charger.
 
I had a similar need a few years ago and took the easy way out. Went to Home Depot and got a 100 foot heavy duty extension cord. Worked great (you want the heavier gauge wire to avoid too much voltage drop).

+1
And a little more work.
If this is a long term project, 110v AC will give the best service - light + heat. After optimizing site location (2 locations for the coop, winter/summer), consider direct burial cable protected by GFCI breaker.

Cerrowire 100 ft. 12/2 UF-B Wire-138-1602CR - The Home Depot
 
A store near me is selling 250W solar panels for $105 each. I have been tempted to drive there to pick up another one to put up on my RV. With a 2nd panel on the RV, I may be able to run the absorption fridge on AC, and save a bit of propane. During a long trip, looking for a place to buy propane is a bit of a hassle.

I already built my own circuit to auto-switch the fridge between the inverter and the propane source depending on the state of the batteries. However, with a single panel which cannot keep up with the power drain (350W), the two house batteries get depleted way too fast.

The additional cost is more than just the panel though. It will take another charge controller, and some additional hardware to save a bit of propane. It is more for tinkering than saving money. The existing single panel provides me with plenty of power for lighting. I can even run the microwave for a few minutes, using a 2-KW pure sine wave inverter.
 
Last edited:
We ran electric to be able to run lights for the months that are short light. However, my chickens still didn't lay. Just now laying again
9ba258e00c8663c71ea46acc1edb1cde.jpg
.
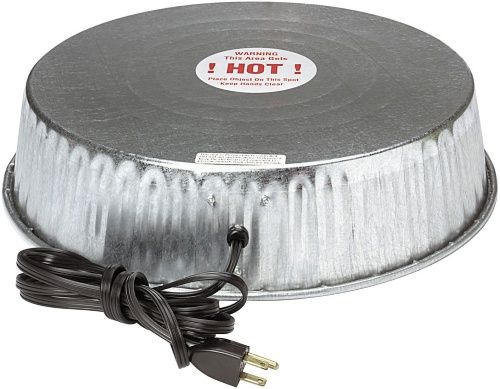
I used this during the winter under the water and it worked great.
 
Back
Top Bottom