OP
OP
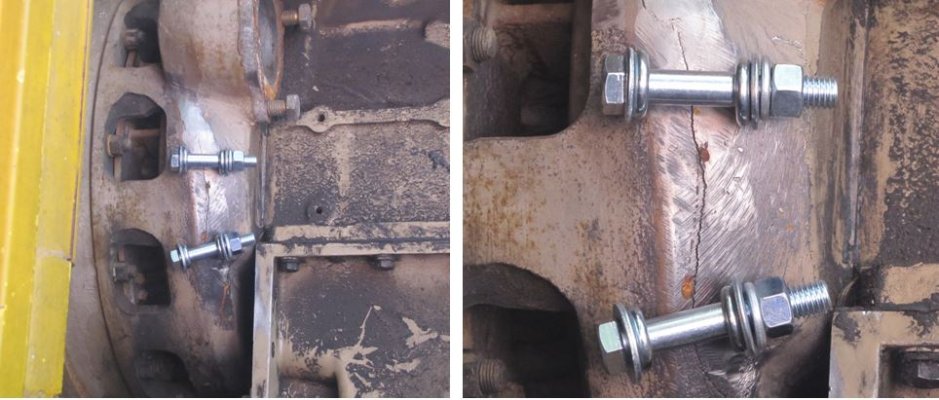
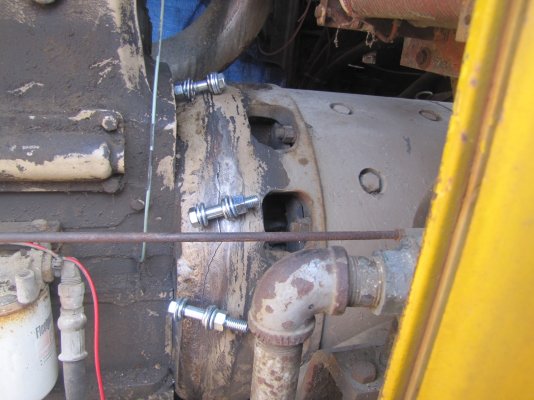
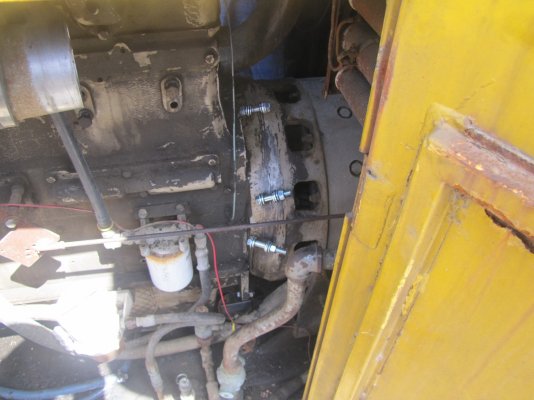
Souschef, That is an interesting fix. From the looks of it, the eyebolts are made of formed steel, not cast. Generally that is a very soft and weak grade of steel. It will easily bend in use. If so, I would weld the end of the loop to the shank. I would have also added a spacer sleeve cut to fit each bolt between the 2 eyebolts to make it stronger.
Actually, I would have taken some steel straps, maybe 1/4 to 3/8" thick across the break instead of the eyebolts. Thinking more about what you did, I think you used the eyebolts as a tool to pull everything together. You might think about adding the straps between each set of bolts now that things are in place.
Nice work!
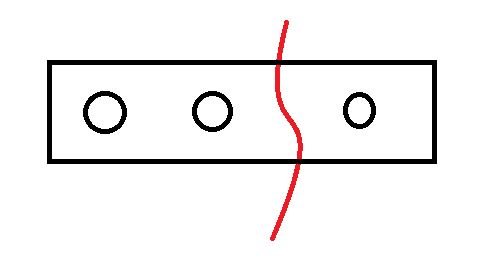
Yes, I see your concern that the eyebolts are probably pretty soft metal, and may bend over time and vibration. Though I'm sure Souschef will be monitoring that crack for any signs of it growing. It may be just fine for the loads it will see. Hard to say.
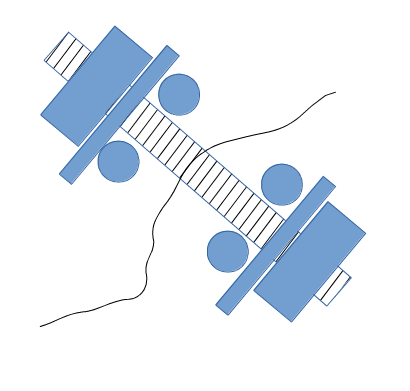
But what might be better, if this doesn't hold up, is something like the drawing I'm showing here. In place of eyebolts, he could use a pair of hardened pins/bolts, with a hard steel plate and hardened bolt (or 2-3 bolts, going on each side of the pins) to tie it all together.
-ERD50
Thank you for your encouragement. We have done all the preliminary work to get the engine going. I just ordered a new filter for the air cleaner.. We have some reassembly work to do, then start with reinstalling the injectors.I've got extensive experience with large engines primarily Fairbanks Morse 8 1/8 OP's. But also with FM DLA, Pielsticks, . Love to see the old iron being restored. Keep the pictures and progress updated please.Love it!
Looking forward to this update.Once we get the engine running ...
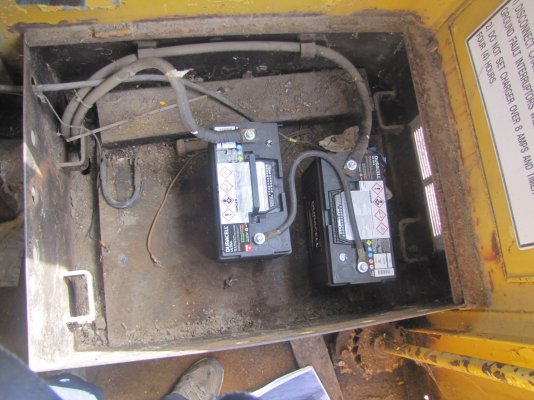
I hope we can. I just bought two batteries and a big 1-3/4 inch wrench to turn the engine over so we can set the injectors.Looking forward to this update.
Will you be able to post a video?
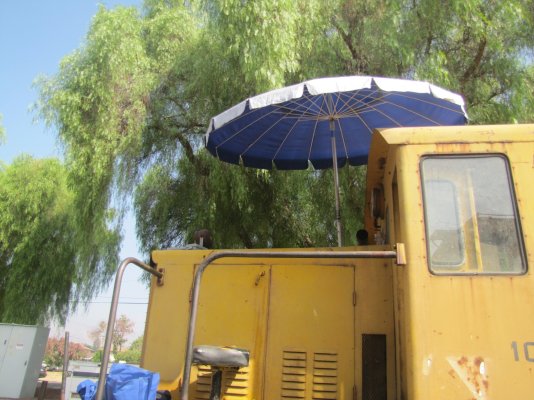
Wouldn't that be "if not, THEY will have to buy new ones?"It finally cooled off enough to start back on the engine. My genius wife suggeted we use our beach umbrella to provide some shade while we worked. It really helped.
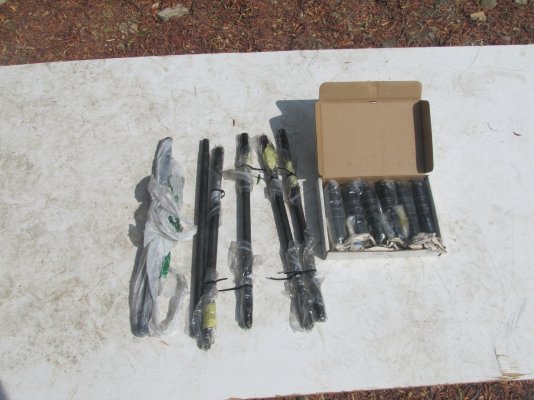
We got out the injectors and the pushrods and all the attaching hardware and installed them. Much to our dismay, we found that the injector pushrods were missing!
I called the company that repaired them, and told them to find them. If not we will have to by new ones.
I got an e-mail from the company saying they were going to ship the parts todayWouldn't that be "if not, THEY will have to buy new ones?"

The parts arrived today!!I got an e-mail from the company saying they were going to ship the parts today
Installed the injector links and turned the engine. I wire brushed the pulley and found the other 2 timing marks.
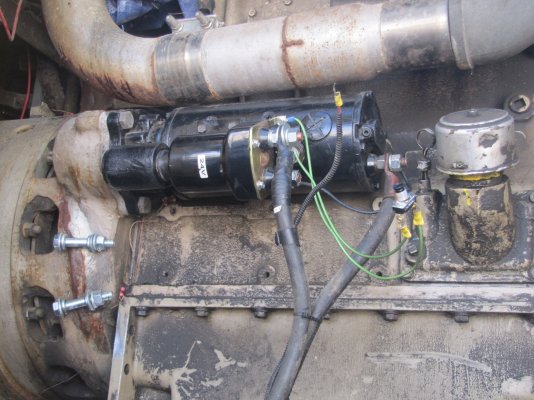
I bought a push button to hook up to the starter. Unfortunately, I thought I had a lug crimper but did not. I will do it another day.
We are getting closer to the day we will try to start the engine
Going slow and getting everything as right as you can is probably the best approach. Good luck when it is time to get it started!
+
Might get me motivated to make a visit to the nearby Union, IL RR museum, haven't been there in decades.
-ERD50
")

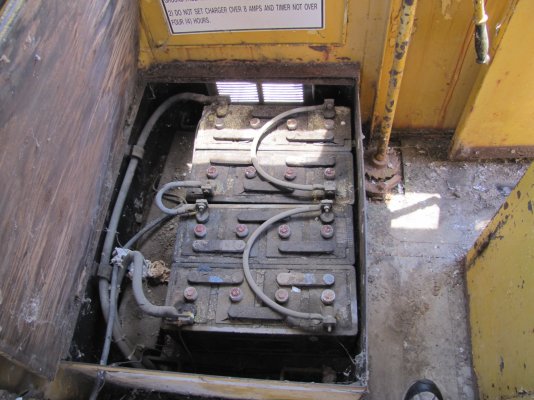
We installed the batteries and the starter. We also connected the pushbutton to the starter solenoid. We pushed the button, and the engine turned over easily! SUCCESS!
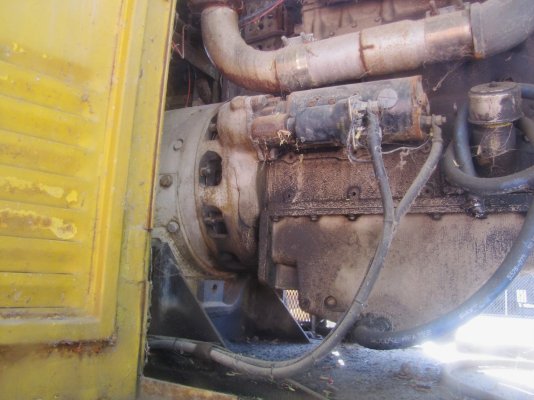
Below are the before and after photos of the battery box and starter