target2019
Give me a museum and I'll fill it. (Picasso) Give me a forum ...
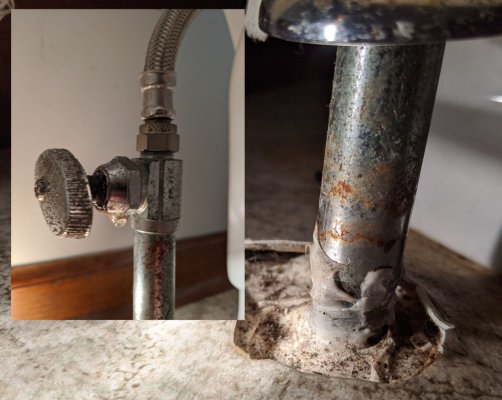
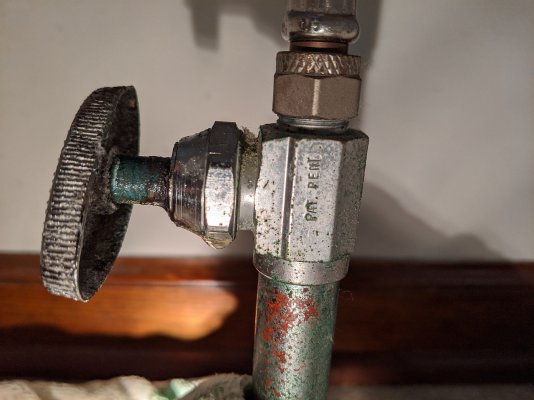
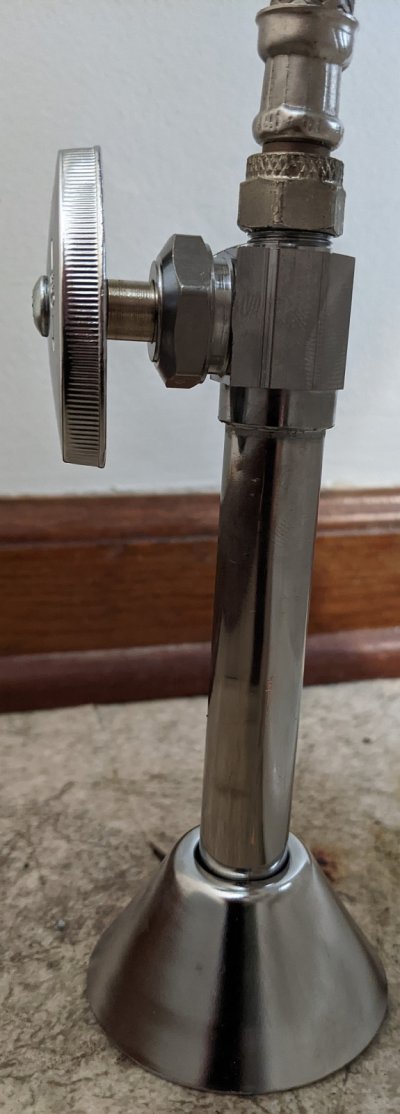
The picture shows a problem we've had for 25 years. There is a water supply to toilet on first floor which comes up through a concrete slab. The stainless steel pipe O.D. measures more than 5/8-in (or 10/16-in) but less than 11/16-inch.
I think this 5/8-in pipe is actually sweated onto a 1/2-inch copper supply. This is somewhat discernible in the picture. I also think it is stainless steel.
On the pipe is a supply valve with 3/8-in threads for a typical 3/8 x 7/8 connection to the toilet. This is shown in the inset.
There is a drip from around the stem. Each time I've used this valve, say 6 times in 25 years, this drip occurs but eventually stops. Since this time could be different and the drip may not stop, I'm thinking ahead to what I may need to do very soon. These are my options if I have to take action to stop the drip:
1) Shut off main and try to remove the packing nut and re-pack.
2) Cut off old valve and use a sharkbite solution. There is about 4-5" to work with on the pipe.
3) Call a plumber.
Even if I decide on #3 I want to make sure that I know exactly what is going on with the material composition to make a good decision.
So I am looking for useful information, not necessarily posts that say call a plumber. I do understand that notion.
Thank you for your help, all.