I'm presently gathering all the material/supplies to redo a main bathroom and am at the point of picking out a bathtub. I'm going to take down a wall to extend the 60" X 31" tub to either 72" or 66" by 34", but am finding that the price doubles in price since it's not a standard size anymore. OK, I'll have to live with that since I really want a larger tub.
In 1990 we bought a 48"x72" Jacuzzi-brand whirlpool tub from a local dealer for $3000. This was back before the era of Lowes & Home Depot and we basically paid through the nose for the name and the convenience, but the tub has held up very well. Never had a problem with the pump or the jets or the plumbing or the fiberglass, but there was a pump-switch problem. Never had a problem with "stagnant water" in the plastic lines that move the water around, but the house has a water conditioner so there's no problem with minerals. Of course mildew can accumulate under the nozzles and the suction filter just like any tub. The tub has done fine with tenants in our rental.
In early 2003 in our "dream house" we went with a 48"x72" from Plastic Creations (
www.whirlpoolbath.com/) in Georgia. You can tell a lot about a company by whether they're willing to ship to Hawaii (let alone how much they charge for it), and our total price was just $1655. We learned that you have to have a good plan to get a tub that big up a stairwell (we had about a quarter-inch to spare turning the corners) and an even better plan to get an old cast-iron tub down the stairwell. We looked at 54"x72" and 60"x72" models but I think they're just too big for the average master bath. Good thing we felt that way because we hadn't thought about the stairwell issue.
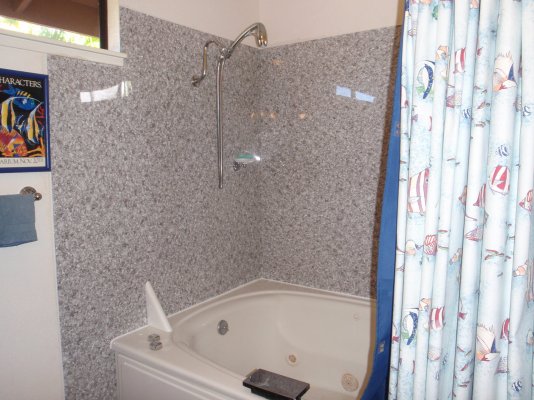
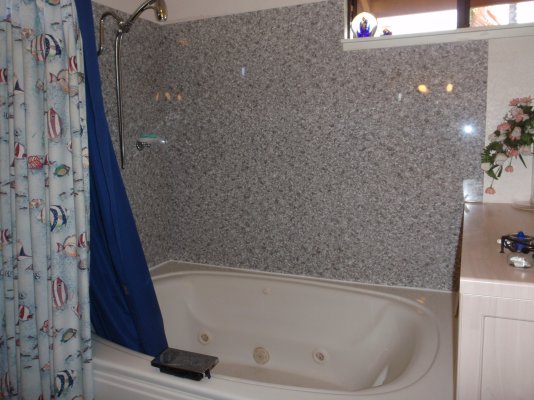
Plastic Creations custom-built the tub with raised flanges on three sides and a regular rounded rim on the room/open side. That way we could rough in the tub against the studs, put drywall or cement backer board above the flanges, and know that the tile/plastic could come all the way down to the top of the tub for a good seal without having to worry about water getting underneath. (If water gets behind the seal it's still held back by the raised flange.) We cared because we added a shower diverter to the tub and didn't want problems with shower spray. (We got rid of both the old tub and the old glass-enclosed shower so the new tub needed the shower.) One side of the tub isn't up against the wall-- instead it's up against a waterproof (rigid thermofoil) cabinet. The raised flange butts right up against the cabinet and looks fine while making it easy to get a caulk seal. They also made the tub without holes for faucets or spouts so that we could drill our own. That way we could install the faucets & diverter/spout on the open/room side of the tub, which greatly simplified the plumbing & installation.
Instead of an 80-gal or 120-gal water heater (or a tankless heater) you might want to look into a whirlpool pump with its own heater. When the tub is full (about 50-60 gal) the pump heater can raise the temp about five more degrees in 10 minutes. It's enough to run the pump 10-20 minutes out of every hour and keep things from cooling off. The pump is very quiet but you can surround it with a small enclosure of drywall or Acoustiblock to make it nearly silent. (If the pump heats up in the enclosure, well, it pumps hotter water.) Bubblers come with just about every pump, but the problem with bubblers is that they're circulating cool room air into the water you're trying to heat. We don't use the bubbler unless the water gets hot enough.
We learned a few installation tricks for working with tubs mounted next to walls. It's worth fussing with the 2"x4" frame that holds up the tub rim on the walls. You don't want that to flex at all when you fill the tub with all that water (and people), or the wall's grout/caulk line at the tub will eventually separate to let water behind the wall. To err on the safe side you could mount them 1/8" or even 1/4" high (which tends to lift the tub) and then put the bottom of the tub in a 2" bed of thinset. When the thinset cures then the sides of the tub won't flex and the bottom is fully supported against squeaks or groans. Of course if you someday wanted to remove the tub then you might need a jackhammer to get it out of the thinset.
If the tub is going against the wall then consider whether you want the rim to be flat/horizontal with drain grooves molded into it, or whether you want it slightly tilted toward the inside of the tub. The former is better for wineglasses and candle holders while the latter is great for draining off the water after a shower (easy cleanup/drying). Worst of all is flat without grooves, because you'll have to squeegee or mop up after every shower.
While you're going with a custom configuration, see if you can have the pump switch (and the bubbler knob) mounted inside the tub instead of on the rim, and on the open-room side instead of up against the wall. The water level inside the tub won't get high enough to cause problems with them, the rim of the tub stays cleaner, and if (heaven forbid) the switch breaks then you can more easily replace it. Our Jacuzzi has an air-bellows pump switch on the rim against the wall and it's always getting puddles drying around it. When it broke I thought I was going to have to go through the wall from the outside of the house to remove it, but I finally got it out. But maybe a modern tub will have low-voltage electronic controls instead of pneumatic.
See if they're flexible on the location of the pump/heater. You want it on a side of the tub where you can actually get at it if it develops a leak or trips its overload or burns out a motor. Otherwise you'd have to consider building an access door into the bathroom wall or even the side of the house. We ended up having our pump/heater on an end near the cabinet and putting a small access door in the side of the cabinet. But in seven years we've never had to touch it.
Most tubs are made with a textured bottom to keep your feet (or other parts of your anatomy) from slipping around. You want something that looks good and doesn't build up dirt or mildew in its channels. Our rental's tub has a cross-hatch pattern that looks OK but doesn't have a firm grip. Our home's tub has a random pebbled look that does much better.
We went with light gray in the rental, which is a perfect color for hiding soap scum and mineral stains. We went with white in our home, which looks snazzy but should have been colored "red dirt" instead. OTOH cleanup isn't too bad-- a couple times a year with Tilex and a fiberglass-safe scrunge pad. If we were buying a new tub we'd go with almond or gray/beige instead of white or dark.
Even if you live in a warm climate with a big water heater, insulation around the tub will help keep the water warm and avoid excessive heater/pump use. We used fiberglass batts around the sides and filled in the cracks with expanding foam.
Go with the expensive quality brass overflow/drain and faucets/spouts. Access is nice if there's a problem but you'd rather avoid problems in the first place. A brass overflow/drain will have a better plunger lever on it to prevent the tub drain from leaking after you fill it, and it might be easier to work on if it ever does start leaking.
Consider plumbing the tub with 3/4" pipe instead of 1/2". It'll take a little less time to fill so that you don't have to plan way ahead (or so that the party buzz doesn't die off before it fills). If installation access is awkward then it might be easier to use Sharkbite or Gatorbite solderless connectors on copper pipe.
If you use a shower diverter then make sure the shower pipe is tightly screwed down under copper brackets before finishing the wall. Over the years, pressure surges and water hammer will vibrate against the cheaper nail-in brackets and eventually loosen the shower pipe. I also mount the shower pipe at 78" or even 84" because I hate having to crouch down under a shower nozzle to rinse my hair.

")