nphx
Recycles dryer sheets
- Joined
- May 31, 2007
- Messages
- 345
With at least a year of procrastinating.. engine and tranny is out. A very productive weekend.

There's a big water spot on the 12' sheet rock ceiling out in my garage. I've had a drip drip in the shower faucet directly above that spot.
The grandson took a long shower in the other upstairs bath today, and there's water dripping down from my kitchen ceiling downstairs.
I've got to tear out the sheetrock to get to the underside of the shower/tub(s) to see if the problems are leaking drain or leaking faucet. If it's a simple plumbing repair, I'll do it and get a professional drywall person to hang new sheet rock.
Hanging sheet rock on 12' and 9' ceilings and finishing it is a job for a professional. The pros do such jobs effortlessly where it's best reserved for someone that does the job daily.
I must have been busy and missed this! That big slabby fender looks familiar, and you mentioned engine AND transmission out. So I looked for an unmistakable THM (Turbo HydraMatic) 425 transmission... and there it is, sitting on a tire!With at least a year of procrastinating.. engine and tranny is out. A very productive weekend.
I had thought to use the sticky 'r' key as an excuse to order a new M2 chip Macbook. But, the old one just keeps chugging along. Slow, but once again very reliable.
") Small task that has been on my to-do list for the last couple years.
Small task that has been on my to-do list for the last couple years.


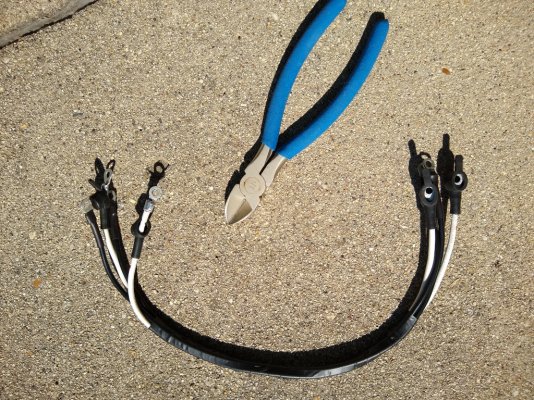
Did this last summer, but it's holding up well. Had a hole in the vinyl siding. Rather than replace the piece, took an old scrap and made a patch. Glued in a wood backer first, held temporarily with paper clips. Once adhesive dried, glued the patch to it and sealed edges with heat gun. Looks great.
.....
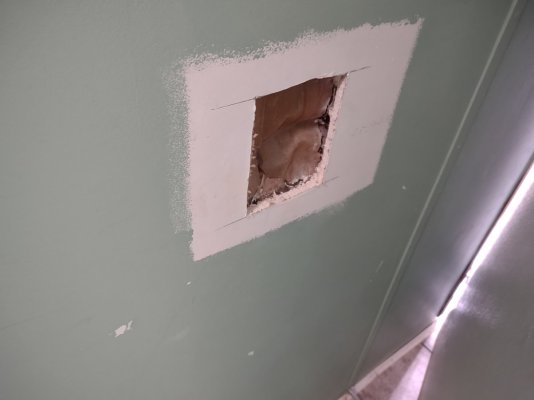
Recent disaster relief trip ended up also dealing with typical 3/8" drywall repairs, i.e. the "disaster" of the heavy nephew tripping and falling in the hallway and having his elbow contact the thin drywall.
I used a technique I've never tried before. Cut the patch 2" extra wide all sides, peel off the gypsum to the proper hole size, so the gypsum fits in the hole, and you have a paper "collar" to fit outside the hole.
...... It also deals with the problem of matching 1/4" or 3/8" drywall with 1/2" drywall. You really can't use backing wood with the mismatch. This works best.
..

I think this will fit in well with the siding discussion above.
Recent disaster relief trip ended up also dealing with typical 3/8" drywall repairs, i.e. the "disaster" of the heavy nephew tripping and falling in the hallway and having his elbow contact the thin drywall.
I used a technique I've never tried before. Cut the patch 2" extra wide all sides, peel off the gypsum to the proper hole size, so the gypsum fits in the hole, and you have a paper "collar" to fit outside the hole.
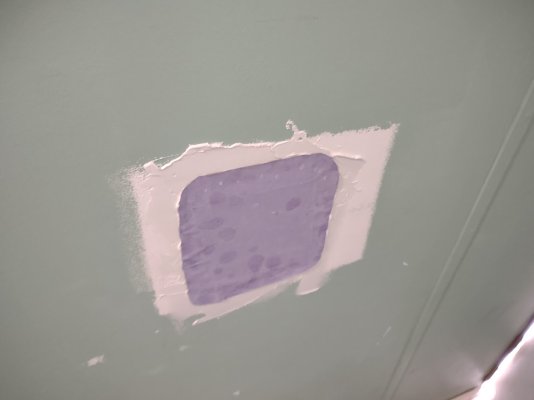
I almost got this right, but I had the paper crinkle on me. I did two coats and our clients were pleased beyond belief. I think in three coats, I could have made it absolutely disappear. I will use this technique again for drywall holes.
I always used to use backing wood (much like the siding repair a few posts back) for this kind of repair, but the disaster construction manager suggested this technique, and it is something we talked about in the drywall class I took, although we didn't practice it. (Yep, an actual class sponsored by our local community college.) It also deals with the problem of matching 1/4" or 3/8" drywall with 1/2" drywall. You really can't use backing wood with the mismatch. This works best.
I will use this technique again!
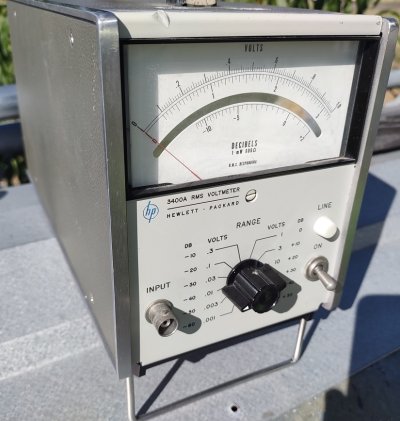
.I bought a working RF meter off Ebay, it didn't work. Kind of expected it.
The seller was responsive and knocked $60 off the $90 original price.
I found the range switch was oxidized, I cleaned it with DeoxIT and ran it back and forth 100 times, then I cleaned off the DeoxIT and lubricated it with LPS1*. That solved a lot of the problems, but I still had to troubleshoot and found two bad capacitors that were mostly low value resistors
Did a calibration with the equipment I have and it works great.
I'm now working on a second HP3400, that has a defective unobtainable part, but, I found a solid state replacement circuit online that I've started building.
*I read in an electronics forum that if you don't clean off DeoxIT, the the contacts will turn blue. So I checked some items, especially my DVM leads and found they were blue, I'm suspecting that is why I can measure just the resistance of the leads but an additional 5Ω to 15Ω. I have to mess around with them to get them to read lower. A repair job for another day.
*I read in an electronics forum that if you don't clean off DeoxIT, the the contacts will turn blue. So I checked some items, especially my DVM leads and found they were blue...
That HP 3400A looks a lot like the HP 400FL of which I used many. Oh that was long ago!
The HP3400 has one Nuvistor tube as the input amp. Cute little metal tube about 3/4" tall. Now it would be a simple fet input. I'm sure someone has developed a mod to replace the tube. Yes, I saw a recent discussion questioning whether that initial needle kick was a problem, it always has one full scale kick and couple smaller ones. I'm happy to have a decent RF meter, 10MHz is plenty for me, anything higher is magic and you need to be an artist to minimize strays.I think they were tube-type, it's been so many years ago. I vaguely remember turning them on, and after a short delay, the needle would give a kick.
Pray tell, how do you clean off DeoxIT? Do you use another type of spray?
I recall that I used to have another spray that was based on Freon. It did not have the oxide cleaning power, but perhaps would wash the DeoxIT off.
Fixed a badly leaking outdoor faucet. I could hear water running in the wall and had checked all of the faucets, but I didn’t disconnect the water hose, as no water was coming out of the other end. When I couldn’t figure out where the water was running, I disconnected the hose and a pretty good stream of water was coming out of the faucet, just not strong enough to get to the end of the hose. Replaced a small rubber washer at the end of a long stem in the faucet assembly and leak was fixed. Cost about $3 for a package of the washers. Thank goodness for YouTube and a very helpful Lowes assistant!