Are Dell Laptop Batteries That Finicky?

Thanks for the update. I had a bad ram module once. Thankfully, the computer ran pretty well and I had a friend that’s super smart and directed me right to a ram checking program and sure enough, that was the issue.

However, the important thing is that you’re back up and running (or will be) and I’m break even on my diagnostics prognostications (wasn’t the battery).

The battery tested according to diagnostic as bad and should replace. I'll probably milk it out to the very last electron just for the heck of it. But I'll keep the new battery too that I bought.

Went ahead and ordered a replacement ram module. I bet the ram might be the cause of that frozen screen issue I had months ago. Perhaps.
 
Did you reseat the memory? That's an infrequent problem, but can happen.

The contacts can get corroded too. Use eraser to clean. Pop it back in.
 
Did you reseat the memory? That's an infrequent problem, but can happen.

The contacts can get corroded too. Use eraser to clean. Pop it back in.

Reseated ... no luck. Didn't think about eraser, but too late now :(.
 
Revived this thread as the issue of my laptop turning on, but not booting and needed me to do a hard power off still exists.

From what I've read, seems like the cause for this isn't a bad memory stick or weak main battery (though those were just coincidences that needed replacing on their own), but a depleted CMOS battery.

There isn't' a away CMOS battery status test on the laptop, but I read that when the CMOS battery goes on this laptop, the laptop can't boot up since the bios settings are lost. Sure seems like what I have.

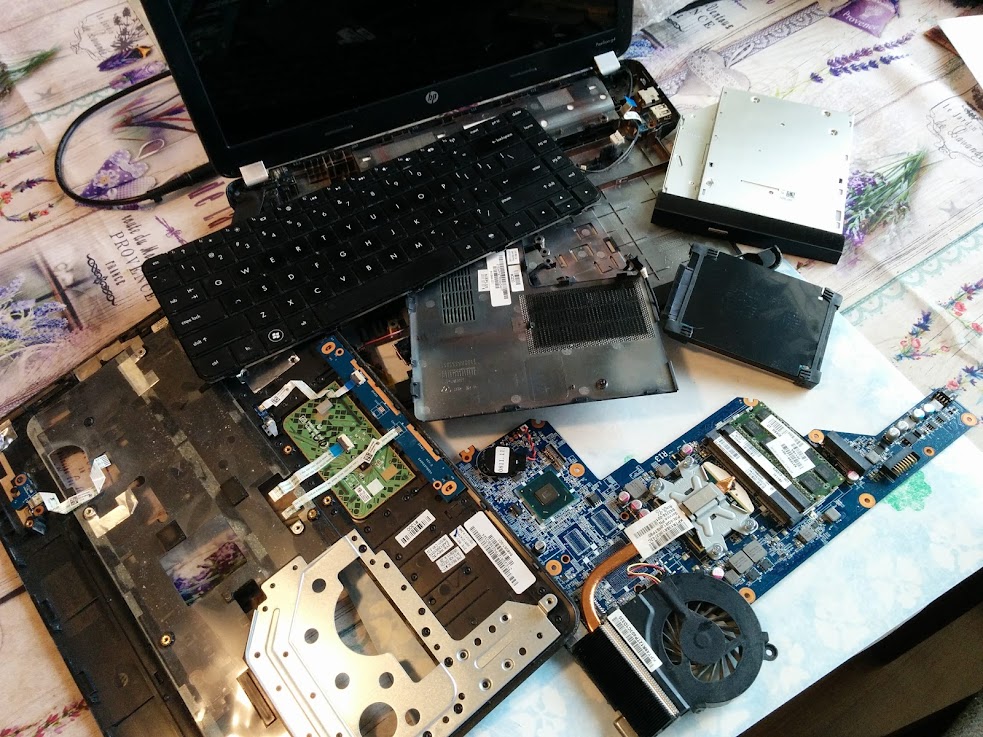
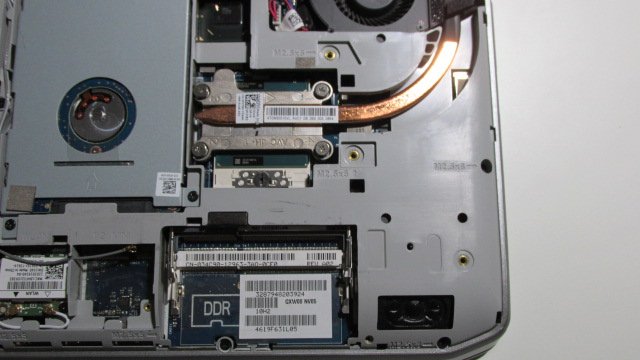
Well, common sense would dictate I just get a CMOS Battery, open up the bottom laptop cover and replace. But no. On this laptop, to replace the CMOS battery, I'd need to pretty much take the laptop apart. 23 Steps to be exact :facepalm:.

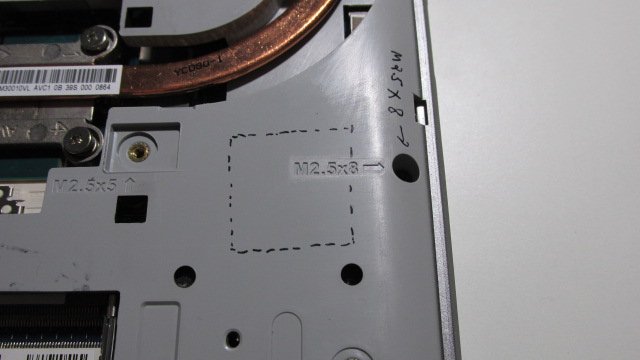
I may have to go with a plan B which is to do some surgery on the inner plastic housing to gain access to the CMOS Battery.


Looking at the how to video at seems almost like a practical joke ... it once again reminds me why I prefer to work on desktops.

 
4-minute proccedure according to a tube video. Lots of opportunity to break something and it may be a multiple hour procedure.

Doctor says case surgery is more fun!
 
4-minute proccedure according to a tube video. Lots of opportunity to break something and it may be a multiple hour procedure.

Doctor says case surgery is more fun!


There's a video of a guy doing the case surgery. I didn't post since he cussed like a drunken sailor.

I found out that the successor to this Dell laptop model has the CMOS battery location at very easy access. I bet from too many complaints.

My thinking is either whoever designed my laptop's model either made a big blunder by accident or that was a design to force businesses to send in the laptops for a hefty labor fee.
 
So, I try, just the adapter, no battery. No luck. Still either power button lights, then shuts down. Surprising to me as I'd think adapter alone should work.


I have never had a Dell, but all the laptops I ever had ran fine on the AC adapter with the battery removed.

In fact, even with a bad battery, they still ran on the AC adapter, but put up a notification that the battery was bad and could not be charged.
 
Last edited:
Revived this thread as the issue of my laptop turning on, but not booting and needed me to do a hard power off still exists.

From what I've read, seems like the cause for this isn't a bad memory stick or weak main battery (though those were just coincidences that needed replacing on their own), but a depleted CMOS battery.

There isn't' a away CMOS battery status test on the laptop, but I read that when the CMOS battery goes on this laptop, the laptop can't boot up since the bios settings are lost. Sure seems like what I have.

Well, common sense would dictate I just get a CMOS Battery, open up the bottom laptop cover and replace. But no. On this laptop, to replace the CMOS battery, I'd need to pretty much take the laptop apart. 23 Steps to be exact :facepalm:.

I may have to go with a plan B which is to do some surgery on the inner plastic housing to gain access to the CMOS Battery.


Looking at the how to video at seems almost like a practical joke ... it once again reminds me why I prefer to work on desktops.


I had an HP laptop that required near total disassembly like the above, to get to the CPU heat sink fan to replace it. My current HP laptop on the other hand was so easy to work on.
 
I have never had a Dell, but all the laptops I ever had ran fine on the AC adapter with the battery removed.

In fact, even with a bad battery, they still ran on the AC adapter, but put up a notification that the battery was bad and could not be charged.

I'm surprised that my Dell laptop doesn't work the same way of still running okay on AC Adapter alone. I'm thinking more a CMOS not found thing and thus no boot with battery depleted.
 
I'm surprised that my Dell laptop doesn't work the same way of still running okay on AC Adapter alone. I'm thinking more a CMOS not found thing and thus no boot with battery depleted.

Yes. It's most likely not the main battery.
 
Yes. It's most likely not the main battery.


I replaced the main battery not long ago.

I don't have a dremmel and was thinking of getting a rotary tool to make the case cut. But now I'm thinking, gently etching a circle to punch out with a spade or hole saw might be just as effective. Plus I have those tools.
 
I replaced the main battery not long ago.

I don't have a dremmel and was thinking of getting a rotary tool to make the case cut. But now I'm thinking, gently etching a circle to punch out with a spade or hole saw might be just as effective. Plus I have those tools.

Why not follow the instructions in the video (I have not watched it)?

The main thing I have learned is to be very careful with the tiny interconnect flex cables. You ruin one, and it's over.
 
There's a video of a guy doing the case surgery. I didn't post since he cussed like a drunken sailor.

I found out that the successor to this Dell laptop model has the CMOS battery location at very easy access. I bet from too many complaints.

My thinking is either whoever designed my laptop's model either made a big blunder by accident or that was a design to force businesses to send in the laptops for a hefty labor fee.
This was a problem at the time for HP too. All-in-one's have problems like this. Most manufacturers at one time or another have used the approach. It's why I left the Apple ecosystem in the 90's.
 
Why not follow the instructions in the video (I have not watched it)?

The main thing I have learned is to be very careful with the tiny interconnect flex cables. You ruin one, and it's over.


After watching you may see why I'm looking at another option :).

I'd have to pretty much disassembly the entire laptop just to change the cmos battery.

I chucked the hole saw or spade bit idea. The starter holes would be too deep.
 
edit/add: EZ solution - don't let the main battery become depleted! Should last a long time if OFF or sleeping, or just keep nit plugged in.

.... Looking at the how to video at seems almost like a practical joke ... it once again reminds me why I prefer to work on desktops. ...[/URL]

Some laptops are very easy to work on. Before I make a purchase, I try to find repair sites and see if the ones I'm considering make it reasonably easy to get to the memory and hard drive, as those are the things I'd be most likely to replace/upgrade.

My current (7+ YO) Lenovo G710, and older eMchines E725 are both easy to open (helps to clean out dust build up occasionally). Don't know about access to the CMOS battery - pretty sure that in modern laptops the settings are all in non-volatile memory, so the CMOS battery would only be needed to keep the clock active if the main battery was completely discharged/removed w/o external power. Not too big a deal anyhow.

-ERD50
 
I went ahead and ordered a cmos battery. Fixing a laptop is part necessity, part hobby.

I do have another working laptop in the meantime :).
 
After watching you may see why I'm looking at another option :).

I'd have to pretty much disassembly the entire laptop just to change the cmos battery.

I chucked the hole saw or spade bit idea. The starter holes would be too deep.


OK. I watched it. Bad, but not horrible.

The video you shared was 4:47 long.

About disassembly of my past HP G4 laptop, I forgot which video I followed, but just looked for one on YouTube. There are several of various lengths: 9:09, 11:21, 12:27, 19:13, 8:08, 5:57, etc...

Obviously, these posters worked at different paces, and some may have done it several times or rehearsed the procedure, but the 5:57 video is the shortest one.

Yes, you can do it, with the right tool, and touch. These guys don't always wear an antistatic wrist band, but make sure you do.

PS. Last year, for lack of better things to do during Covid lockdown, I ordered a better CPU for the above laptop and upgraded it. It was a lark, as I did not use it for anything, and am still not using it, preferring my newer and faster laptop.

PPS. I found the photo I took. It was in Dec 2020. The CPU I put in was 2x faster than the original one. However, it's still only 1/2 the speed of the one I am typing this on.

10965-albums222-picture2499.jpg
 
Last edited:
I surely would not be able to do what the guy did in the video in 4:47 minutes. Me thinks the video was edited for sake of speed.

It is doable following their instructions. The PartsPeople place is great with instructions. When I changed the screen from to as higher res 1600x900 screen, I printed out their instructions and followed along.

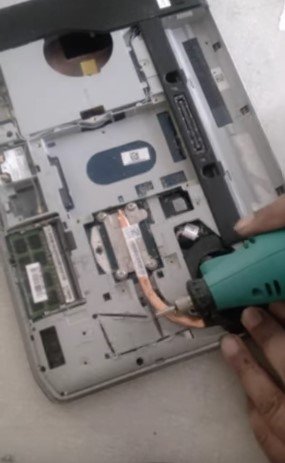
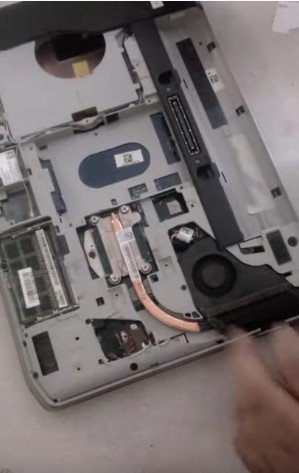
With that said, the dremmel method, I think would save so much time and possible frustration. Here's a couple of screen grabs of what little effort cutting is needed as shown by that guy with a terrible potty mouth.

Just some small cuts, then easy access to the cmos battery.
 

Attachments

  • dremmel on dell.jpg
    dremmel on dell.jpg
    26.1 KB · Views: 14
  • dremmel on dell 2.jpg
    dremmel on dell 2.jpg
    29.7 KB · Views: 15
The video of the guy taking apart the laptop forgot to mention it will take 3x as long to put it back together.

One really tricky part is going to be the antenna wire, the long wires he pulls out from within the machine. Pretty hard to shove a wire back in that pathway :eek:
 
The video of the guy taking apart the laptop forgot to mention it will take 3x as long to put it back together.

One really tricky part is going to be the antenna wire, the long wires he pulls out from within the machine. Pretty hard to shove a wire back in that pathway :eek:

Yes, the wires for me was the deal breaker. The disassembly/reassembly is doable but does not look like fun. Plus, I'd think my chance of something going wrong is lower with just cutting a piece off.

The question for me is do I want to go and treat myself to a rotary tool that I will most likely seldom use or go cheap (there are cheapers ways remove that plastic piece).

A reason why I got that laptop is because the beauty is supposed to be easy to service. Thus, I was surprised to see so many steps to get access to the CMOS battery. My thinking is either that greed theory of high service fees or expecting by the time the battery goes, that the laptop is obsolete (for businesses, at least).
 
OK. I watched it. Bad, but not horrible.

The video you shared was 4:47 long. ...]

I watched, and for a while I was thinking... OK, lotsa steps, but not so terrible, just take your time. But that was only up to the point that he got to the CPU, and it just went on, and on, and on, and on...

Wow, that was a lot of steps, and a lot of little cables to get apart (and of course, put back together). No, I will not call OP a "wimp" for not wanting to tackle that - I would pass as well.


I surely would not be able to do what the guy did in the video in 4:47 minutes. Me thinks the video was edited for sake of speed.
....

Yes, the wires for me was the deal breaker. The disassembly/reassembly is doable but does not look like fun. Plus, I'd think my chance of something going wrong is lower with just cutting a piece off.

The question for me is do I want to go and treat myself to a rotary tool that I will most likely seldom use or go cheap (there are cheapers ways remove that plastic piece).
...

It was a little scary to see him going at it with that Dremel cut-off wheel. Can you really be sure that wheel won't hit something hidden underneath?

I'd be less aggressive. Maybe one of those little pointed bits, and just slowly make a track around the cut line, going a little deeper each time, until it's paper thin and you can just pull it apart, or go just deep enough to go through. Or maybe even by hand with a razor knife? Or, if that plastic melts easy, use an old tip in a soldering iron (or a knife tip heated in a flame), and melt your way through. <<< Sunset beat me to it!

Bits like this:

https://www.amazon.com/Rokrou-Carbide-Tungsten-Woodworking-Engraving/dp/B0915SJFHX


61IeUTFvBSL._AC_UL116_SR116,116_.jpg


-ERD50
 
I just recall something. Usually, when the CMOS data is bad, the computer displays an error message to that effect. In this case, there's nothing on the screen, and the computer just shuts itself down.

This happened to an earlier Toshiba laptop I had. I was using it, then put it down for a few minutes. When I came back to pick it up, it was off. Tried to turn it on, but never had anything come up on the screen. It just turned itself off after a few seconds, and that was that.

I think it suffered from a more serious problem, such as a video hardware failure that kept it from displaying any error message. I found out that often the problem was not caused by a chip failure, but a bad solder joint on these sophisticated chips that used the ball-grid-array format.

There were places that had equipment to reflow the ball solder joints, and they charged somewhere around $150 if that was the problem. I thought about the repair, but decided that I needed a newer laptop anyway.
 
A rotary tool will produce a lot of shavings, how about using a solder tool to melt a line in the plastic :confused:

That's an idea.

I'm thinking if not rotary tool, to drill many teenie tiny holes. The use a pocket knife or small scissor to cut off the cut out shape.
 
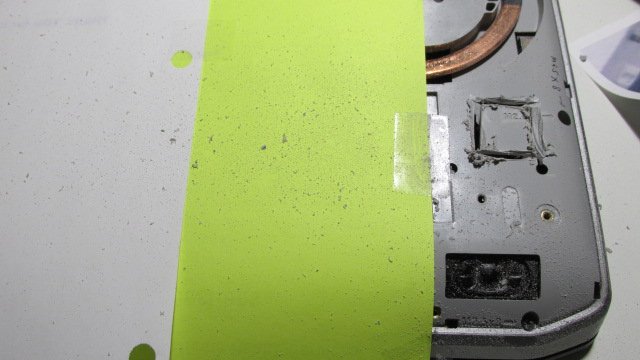
Surgery Is Done

Did the rotary tool cut of my laptop.

Don't have new cmos battery yet (should receive later), but made the opening to remove the old battery.

Here are some pictures.

Not the prettiest thing, but effective.
 

Attachments

  • one.JPG
    one.JPG
    85.3 KB · Views: 15
  • two.JPG
    two.JPG
    68.8 KB · Views: 16
  • three.JPG
    three.JPG
    80.8 KB · Views: 14
Last edited:

Latest posts

Back
Top Bottom