Better Soldering Equipment Needed?

TromboneAl

Give me a museum and I'll fill it. (Picasso) Give me a forum ...
Joined
Jun 30, 2006
Messages
12,880
A $5 garage sale HP printer, in which I'd invested $90 in ink, started acting as if ghosts were pressing the buttons. I found that literally thousands of people have the same problem, and it turns out its not actually ghosts but a bad capacitor.

F5HnZRX.jpg


So, I replaced it, and that fixed the problem, but I had a heck of a time getting the old cap out and the new one in. One of the connectors of the old cap wouldn't come out without lots of heat and lots of pulling. The solder didn't flow properly onto the new connectors/holes, and I wasn't sure that I had a good connection. I've done a lot of soldering, but very little printed circuit board stuff.

Here are the two soldering irons I used (12W and 40W):

img_1375389_1_b513ae16f84be39bf0c7a8c00d81899b.jpg


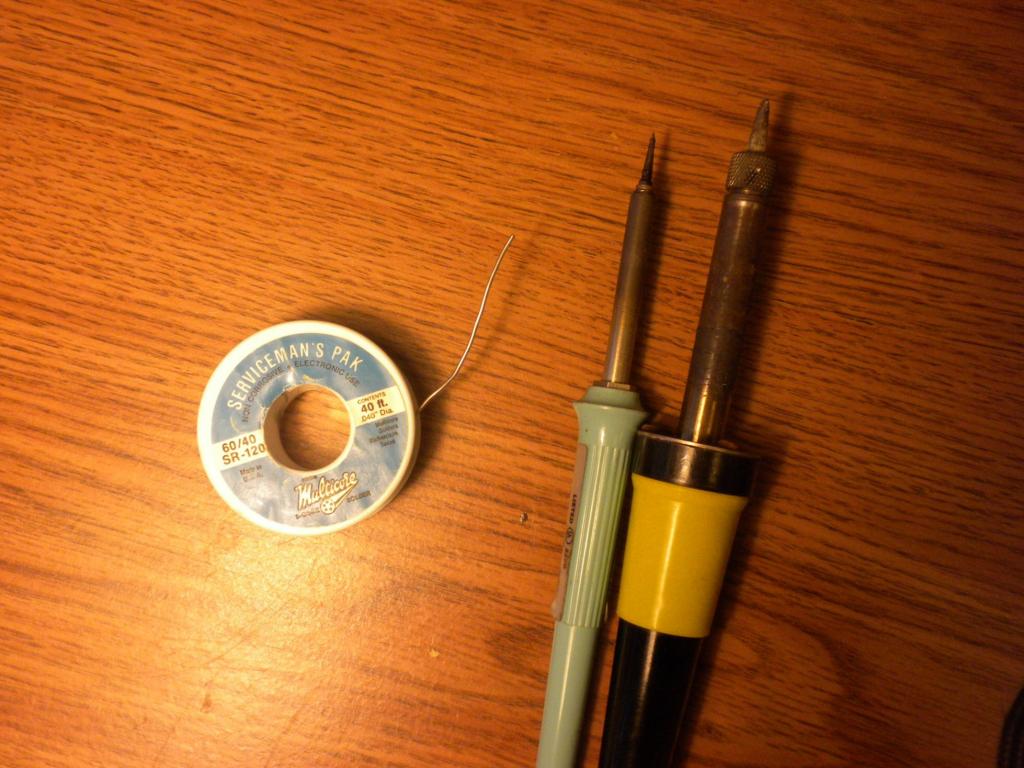
My question is: Would it have been easier with better soldering irons??
 
Did you remove as much of the solder as possible first, with something like solderwick? (Don't see it in your picture, it usually is copper braid with resin.)

Removing helps instead of just trying to flow and pull. At megacorp 1, back in the day, we had a lot of pin through hole work and had "solder sucker" machines. Actual vacuums that were also soldering irons. Very helpful.

You won't want that (too expensive), but the wick makes a decent substitute for small jobs.
 
It probably was lead-free solder. Nasty stuff to work with compared to the old lead/tin. Doesn't wick as well and requires higher temps - but it is not so toxic.
 
The 40w iron should have been enough. Sometimes adding more solder to the connection and then desoldering helps and using a solder wick helps too. Make sure the iron has a good thermal connection to the tip and the tip is clean.
 
Desoldering through-hole capacitors as shown in the photo can be tough. The real problem is that these are power supply decoupling caps, hence have electrical (read mechanical and also thermal) connections to the ground and power copper planes.

Copper is a very good thermal conductor, hence the heat supplied from a small soldering iron simply conducts away from the capacitor leads and does not raise the temperature enough to even melt it.

The bitty soldering iron shown in the picture would not stand a chance. The big 40W is the minimum, and I often have to use two irons.
 
Last edited:
+1 to what NW-Bound said. Soldering to the large masses of copper on ground planes can take a surprising amount of heat. Temperature-controlled irons work best for this, though it's hard to justify the cost for a single job like this. (I think mine cost ~$100)

Good solder-wick is very helpful at getting all the solder out of plated-through holes on circuit boards. If a wick doesn't seem to be drawing solder up very well, you can wet it with flux from a flux pen and it will miraculously start working.
 
There are spring-actuated solder suckers as well.
 

Attachments

  • image-1363913353.jpg
    image-1363913353.jpg
    713.3 KB · Views: 4
If the backside of the circuit board is relatively uncluttered, my de-soldering technique is to use my weller 200/260w pistol grip soldering "gun" to heat the leads one at a time, then a quick shot of compressed air from a fine tip nozzle. Works great. Any solder spray residue can easily be brushed off the board.
Of course you know the other rules when soldering electronics - rosin not acid flux and clean substrates/soldering tip.
 
If the backside of the circuit board is relatively uncluttered, my de-soldering technique is to use my weller 200/260w pistol grip soldering "gun" to heat the leads one at a time,
Be careful with transformer soldering guns (not sure if your Weller is of this type). They pass huge current through the tip, which can damage sensitive ICs.
"Pencil" style solder guns (like in Al's picture) are cheapest workable solution.
 
Be careful with transformer soldering guns (not sure if your Weller is of this type). They pass huge current through the tip, which can damage sensitive ICs.
"Pencil" style solder guns (like in Al's picture) are cheapest workable solution.

Thanks for the tip.
No problems with this technique so far. I will get a pencil type for future use. :)
 
In addition to what others have said, a cap like that has its lead crimped over by the insertion equipment. It can form a very solid mechanical connection, even w/o any solder. And since the leads are short, it's tough to get the cap out unless you are able to straighten the leads first, they can be very tight in there. The combo of solder and crimp is tough.

And the solder on the leads/copper would be lead free, generally with a higher melting point - I think the suggestions to try to add the 60/40 solder and then pull the mix, and repeat is a good plan.

BTW, I've purchased B&W lasers for family members for $99, a replacement toner cartridge rated for 2500 pages was $13. The printer comes with a starter toner good for ~ 700 pages. Unless you have an inkjet like mine, that takes the $1.50 carts, ink-jets are a poor economic choice, even at $5.

-ERD50
 
I use a spring loaded solder sucker, an old big blue plastic thing. Do it right and it leaves an empty hole and a loose capacitor that falls out. Sometimes takes a couple of tries, but it's not hard.
 
I have a couple of Soldapullts from the 1970's from my factory Technician days. The original ones, that the press handle shoots back when you hit the release. Not the wimpy "safety" ones developed later for the clueless who can't keep their face out of the way!

Desoldering and removing parts without board damage board after board was an art. Ripping out one plated-through hole while removing a part meant that the board would have to be scrapped, as any repair method would not meet the high QA standards.

A few tips:

To avoid ripping out the plated-through hole, either all the solder has to be removed first (always the first choice), or the part has to be removed with all of its leads heated at the same time (a hot pull).

For components that an automatic insertion machine folded the leads over - Heat up the lead, and while solder is molten, use a very small pair of diagonal cutters to unfold the lead, so it stands straight up again. Then solder can be sucked out.

If the part is going to be trashed anyway, often clipping off the leads from the top-side of the board (if possible) and then just slurping the solder and lead bit out the bottom side is quick and clean. This is good for axial-leaded parts.

If there is a power or ground or heatsink plane on the top side of the board, try heating it from topside if accessable.

If pulling out the solder didn't totally clear out the hole, more heat will not help, as the heat will just delaminate the copper off of the board. Resolder it, and try again. As somebody mentioned above, the solder will conduct heat from the iron.

Mechanical tabs, like a tab on the frame of a small transformer, take a lot of heat. Use a temp-controlled soldering iron with some guts, or step up to a bigger iron for that.

Larger diameter leads like the pins on a transformer tend to be a pain, usually tight clearance between lead and hole, so little room to pull solder out of. These were probably the number one part that killed a circuit assembly in the hands of the less-skilled (well, actually what killed many was poor troubleshooting which lead to many parts being replaced that didn't need to be, thereby increasing the chance of disaster).
 
Speaking of soldering irons, I forgot to mention that having the right tip makes all the difference.

I have very fine tips on a temperature-controlled Weller for fine SMD work. But for general electrical work, I have an inexpensive Radio Shack 45W iron on to which I can put these two tips. The big one has a large thermal mass, and I can put it at an angle to heat both leads of a capacitor at the same time. Would work great for the cap that T-Al showed.

 
Last edited:
As someone else mentioned, you want to add solder to the connection, not remove it. This will provide a thermal link to the solder inside the hole and allow it to flow. Usually then while bridging the soldering iron across both leads you can tap the circuit board against the table and the cap will just fall out. THEN you can use solder wick or a solder sucker to remove the solder from the holes.

A flux pen helps too...seems to help the solder reflow.
 
Hi: I am a EE in Electronics. I use a Weller Temp controlled Station with a fine tip. Weller WES51. When removing components it is best to save the PCB not the component :). I break the old CAP using cutters and once pins exposed use tweezers and the iron set at 750*F and get the wires out. Tweezers on topside of PCB and iron on bottom, may need some support for the PCB on it's side to do this. This will leave the PCB with no wires through but perhaps the solder will still be in the holes. Then I use a solder sucker tool to clear the holes. I am not a fan of solder braid. The rest is plain sailing.

Solder sucker ID: 148 - $5.00 : Adafruit Industries, Unique & fun DIY electronics and kits
 
I had used a bulb-type solder remover -- I forgot about the braiding.

I had thought the 40W was too much, but I see now that it was not.

If I ever have to do this again, I'll get some more equipment, and do some practicing on an unneeded board.
 
I had used a bulb-type solder remover -- I forgot about the braiding.

I had thought the 40W was too much, but I see now that it was not.

If I ever have to do this again, I'll get some more equipment, and do some practicing on an unneeded board.

Uh oh. I hope you did not ruin the board.

Talk about a solder suction pump with a teflon tip, one would need to heat that solder way above the melting point, so that it does not solidify and clog up the tip. I have a desoldering iron which has a heated tip and a suction pump, but that is beyond what most people want to get just for occasional uses. Even that desoldering suction iron gets clogged quite frequently.

The most common problem is not applying enough heat, and you are just cooking the board and components without getting anywhere. For smaller components like your shown electrolytic cap, it's better to apply plenty of heat with a large solder-wetted tip, so as to pull the cap out in a matter of 2 or 3 seconds. Then, use solder braid to clean up the vias to insert the new cap.

Larger caps with mounting tabs (these are up to 2-3" in diameter) or transformers like Telly described are the real bear to remove, even with my desoldering suction iron.
 
Last edited:
Back
Top Bottom