What We're Making

^ good idea. I have enough turquoise to do a partial fill. An initial partial fill of epoxy could give it a little more strength to resist cracking and the final turquoise fill would be good for looks.
Looks good and whack away. I don't think a person could whack hard enough to break it.
 
Nobody seemed impressed with my Christmas ornament. ;)

1925480.jpg
 
Nobody seemed impressed with my Christmas ornament. ;)

1925480.jpg

You posted too close to the cookies. Cookies are very distracting. :D

Your ornament and your work with glass looks very nice! Like the vase more than the ornament, but that’s just personal taste.
 
Thanks.

This isn't really a hobby. I studied glassblowing in college and used to sell through galleries and at art shows. I haven't blown glass in a few years. I had to help my father for a while as a caregiver, and keeping a glass furnace running isn't a part-time thing. I'm hoping to get back to making glass again, but it's hard to justify it as a hobby...
 
GreenEggs - that's stunning! You might try to find a glassblowing studio near where you live that would let you do work there (maybe in exchange for helping out with menial tasks). You've definitely got talent and skills!
 
GreenEggs - that's stunning! You might try to find a glassblowing studio near where you live that would let you do work there (maybe in exchange for helping out with menial tasks). You've definitely got talent and skills!


I've thought about that. A studio recently opened in Charlotte that rents blow time. I might try it and see how it goes. I'm sure it would be good for my social life if nothing else. (I've become a bit of a recluse. :rolleyes:)
 
Absolutely love your work! Especially that vase.
I have a real appreciation for your talent as I used to collect blown glass from Italy.
 
GreenEggs, your work is incredible!!!
I am fascinated by glassblowing and we have quite a bit of handmade deco items in our house. How tall is that vase?
 
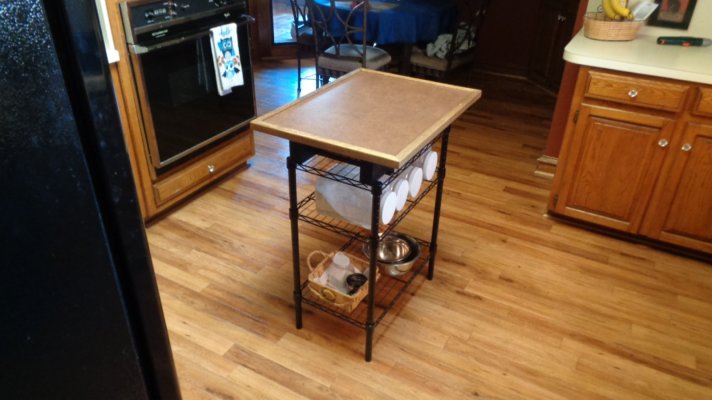
I've been wanting extra counter space and storage in my kitchen for some time now. My search for small utility carts, islands and even dressers came up flat. Either they were too large, had wheels or weren't the right style.

Then I remembered we have a small storage rack in the garage. I asked dh if he could put a top on it, he said he could. So, we ordered the rack from Home Depot (since we needed the one in the garage) and he completed the project yesterday. He had the wood and a small piece of Formica on hand. Total cost of 'mini-me'....$40. :D
 

Attachments

  • DSC01541.jpg
    DSC01541.jpg
    329.7 KB · Views: 110
Last edited:
Very clever. We have one of those racks downstairs. I'll have to make sure DW doesn't see this post..... haha
 
GreenEggs, your work is incredible!!!
I am fascinated by glassblowing and we have quite a bit of handmade deco items in our house. How tall is that vase?

Thanks. That one is about 12" tall. I called them the Ribbon series. The ribbons are made from a bundle of glass "overlay canes". I normally used 7 canes in the bundle, heated it up and would twist & stretch the bundle as I randomly draped it around the main colored core. There's a thin layer of silver foil under the ribbon which I'd wrinkle & overlap the sheets to add depth & visual texture, the silver sheets are 4x4" square that are turned diagonally so the corners create tips, which look like mountain tops behind the ribbons.

It's similar to how paperweights have decorations applied in layers, so they appear to float. The "trick" is to coat all the colors with a layer of clear, so none of the colors actually touch each other.

The "overlay canes" are made in a similar way. First I coat a core of clear glass with a layer of opaque white glass, then add a layer of gold glass, and finally a layer of clear glass. Then that gets stretched out, like taffy, into a long "cane". After the cane cools I cut it up into short lengths, about 3" long, and reheat 7 of them together to make the ribbon. The opaque white inside gets super thin so it becomes translucent.

After applying the decorations, I dip the piece into the furnace of glass again to encase the decorations, and while the last gather is still molten I pull it down towards the base so the base has an extra thick layer of clear glass.


Here's a cobalt one. It's about 15" tall.

795369.jpg
 
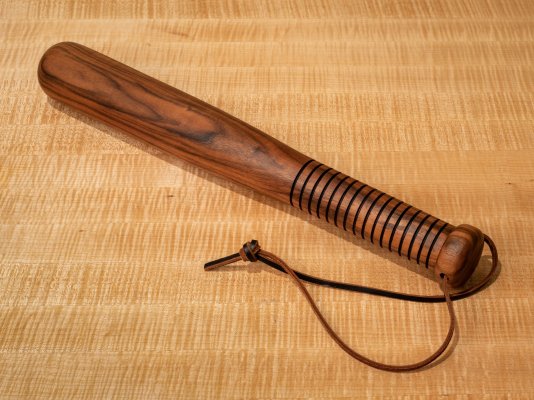
Made another billy club on the lathe. This one won't crack like the last one. The wood is from a European walnut gunstock blank that was cut down more than 50 years ago.
 

Attachments

  • billy club 1 5k.jpg
    billy club 1 5k.jpg
    854.5 KB · Views: 45
Simple to complex but good. Have 3D Printer will Make.... almost anything.

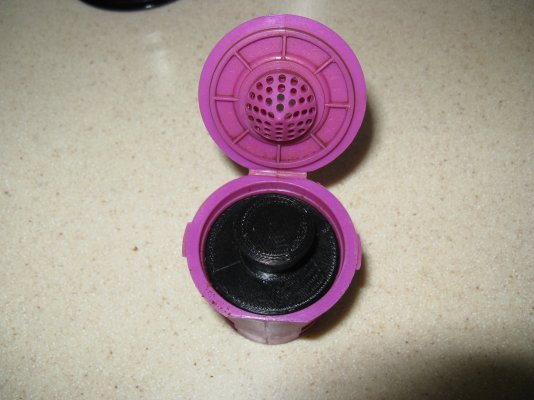
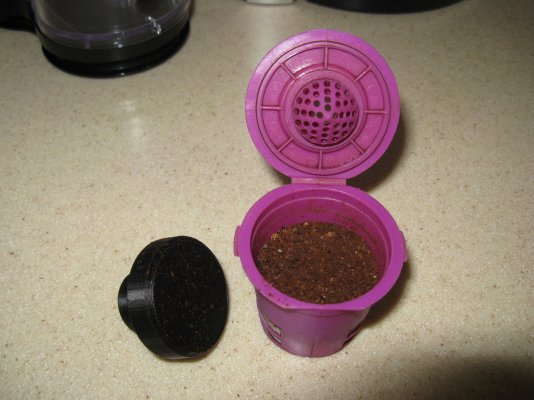
1) Simple Coffee Tamper for our Keurig K575.

We like to grind our own coffee, so we have a refillable 2.0 Keurig Cup. Coffee is usually a little better if it is tamped hard rather than loose in the cup. So I made a Tamper for the Coffee Cup. See pics Below.

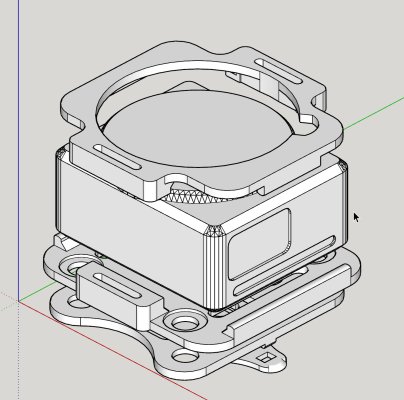
2) Drone Camera Mount for the new ADTi Surveyor Lite Camera Mount.

A friend asked me to do this, so I CAD'd it up and printed him one. It is designed for standard 8mm Rubber Cushion Dampeners for stabilization. Again See Pics and Link Below.

http://impconcepts.com/video/VelcroMountModel.mp4
 

Attachments

  • IMG_9461.jpg
    IMG_9461.jpg
    485.7 KB · Views: 36
  • IMG_9462.jpg
    IMG_9462.jpg
    572.7 KB · Views: 36
  • ADTi Survey Lite - 1.jpg
    ADTi Survey Lite - 1.jpg
    45.1 KB · Views: 37
  • 2020-01-14_11-03-21.jpg
    2020-01-14_11-03-21.jpg
    233.9 KB · Views: 39
Last edited:
Beautiful work and what talent there is!
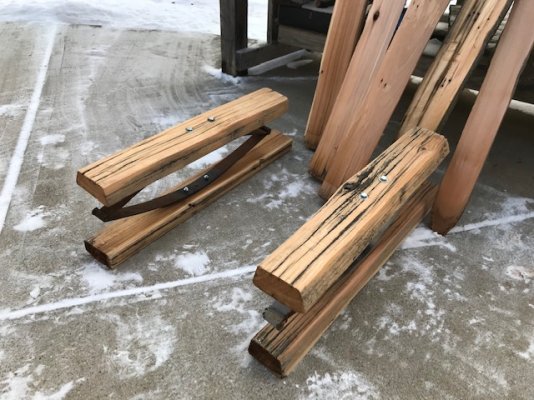
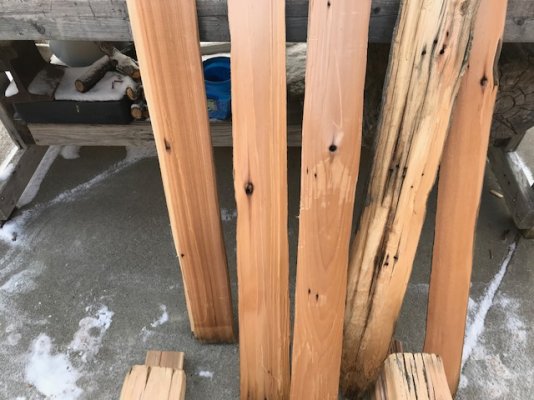
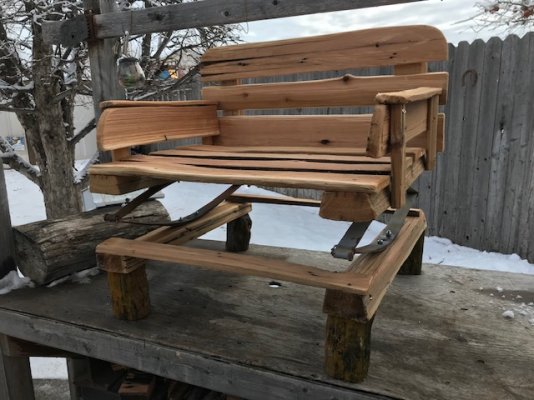
I'm starting a horse driven buggy spring seat chair. It will be made from 100 plus year old cedar fence posts from the ranch. The wood is absolutely beautiful when split and still a great smell of cedar. When oiled it has that western style look I love.
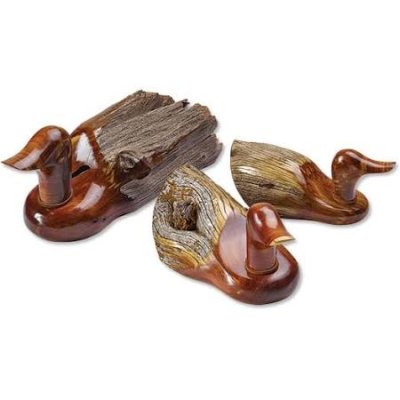
Here is the project I'm starting and a picture of what the wood looks like when oiled in the duck carvings. It also shows what the post looks like untouched.
 

Attachments

  • IMG_3747.jpg
    IMG_3747.jpg
    126.1 KB · Views: 45
  • IMG_3748.jpg
    IMG_3748.jpg
    130 KB · Views: 48
  • cedar ducks.jpg
    cedar ducks.jpg
    18.5 KB · Views: 49
Thanks. That one is about 12" tall. I called them the Ribbon series. The ribbons are made from a bundle of glass "overlay canes". I normally used 7 canes in the bundle, heated it up and would twist & stretch the bundle as I randomly draped it around the main colored core. There's a thin layer of silver foil under the ribbon which I'd wrinkle & overlap the sheets to add depth & visual texture, the silver sheets are 4x4" square that are turned diagonally so the corners create tips, which look like mountain tops behind the ribbons.


It's similar to how paperweights have decorations applied in layers, so they appear to float. The "trick" is to coat all the colors with a layer of clear, so none of the colors actually touch each other.


The "overlay canes" are made in a similar way. First I coat a core of clear glass with a layer of opaque white glass, then add a layer of gold glass, and finally a layer of clear glass. Then that gets stretched out, like taffy, into a long "cane". After the cane cools I cut it up into short lengths, about 3" long, and reheat 7 of them together to make the ribbon. The opaque white inside gets super thin so it becomes translucent.


After applying the decorations, I dip the piece into the furnace of glass again to encase the decorations, and while the last gather is still molten I pull it down towards the base so the base has an extra thick layer of clear glass.


Here's a cobalt one. It's about 15" tall.


795369.jpg


Absolutely beautiful! A real art piece.
 
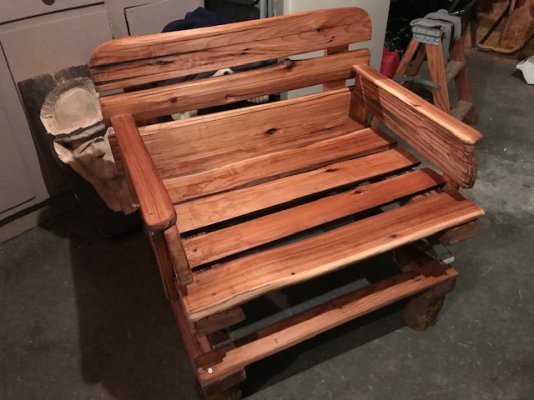
I finished a cabin chair made of old horde driven buggy springs. The cedar wood came from old cedar fence post from the ranch that are over 100 years old. They where actually used till last year still in the ground for fence. They were replaced last summer and will put more of them to good use. I just split them to make this project and nothing else done to the wood. I will take up to the cabin and use in in there.
 

Attachments

  • IMG_3783.jpg
    IMG_3783.jpg
    106.8 KB · Views: 56
^Very nice, unique build! Good repurpose of the cedar and buggy springs. That cedar looks brand new from here.

Your duck carvings are amazing as well. So did I read correctly that the duck carvings are of the same cedar, just oiled? What kind of oil?
 
Teak oil and shingle oil I will put on chair. Yes same wood from cedar posts.
 
I finished a cabin chair made of old horde driven buggy springs. The cedar wood came from old cedar fence post from the ranch that are over 100 years old. They where actually used till last year still in the ground for fence. They were replaced last summer and will put more of them to good use. I just split them to make this project and nothing else done to the wood. I will take up to the cabin and use in in there.

Very cool! Clever design
 
I'm looking forward to seeing the chair. That's a great use for antique wagon springs.

My inlaws had a wagon seat on spring that they used as a coffee table in front of their couch. It wasn't worth a damn for setting a coffee cup on, but being an in-law I always kept that opinion to myself.
Seeing your chair project makes me wish I'd asked for it when they were downsizing a couple of years ago. A chair like that would be great in our place in the mountains.
 
Here it is done totally, I took this evening. What amazes me is the beauty of the wood and quality of wood that has been in the weather for ~ 100 years. This picture really shows the color and wood quality. I haven't done anything to it but hand sand the edges where I made the cuts.
 

Attachments

  • IMG_3788.jpg
    IMG_3788.jpg
    90.3 KB · Views: 62
Back
Top Bottom