You are using an out of date browser. It may not display this or other websites correctly.
You should upgrade or use an alternative browser.
You should upgrade or use an alternative browser.
What We're Making
- Thread starter davemartin88
- Start date
Surewhitey
Thinks s/he gets paid by the post

Ronstar
Moderator Emeritus
^^Very nice!! I like that look.
Ronstar
Moderator Emeritus
skyking1
Thinks s/he gets paid by the post
Cedar strip? How do you fish out those sacrificial bulkheads?
street
Give me a museum and I'll fill it. (Picasso) Give me a forum ...
- Joined
- Nov 30, 2016
- Messages
- 9,543
Looks great! I have a cabinet in the kitchen similar to that even the same color but no lighten.Sorry for the multiple posts, but the lighting made it so much nicer looking.
Ronstar, I'm very much looking forward to following your kayak build. That will be a fun project!
Badger
Thinks s/he gets paid by the post
- Joined
- Nov 2, 2008
- Messages
- 3,413
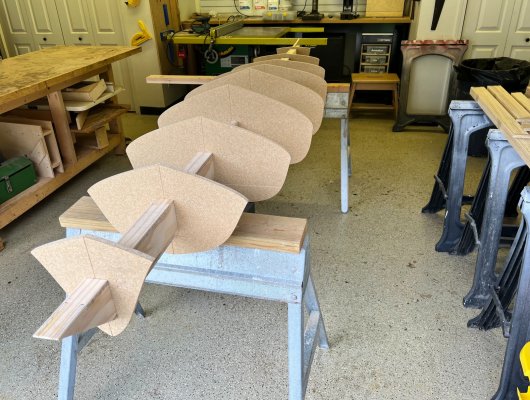
The beginnings of my kayak.
I always thought a strip built kayak would be a great project after trying out a canvas covered kayak in the 60's that a high school buddy made. I never developed the skills, had the tools, or had a place to build one so I hope you post progress pictures during the process.
Cheers!
I always thought a strip built kayak would be a great project
It's a wonderful project. I have a friend who has been working on his for over 15 years, ever since he realized that he couldn't get it out of his basement.

Surewhitey
Thinks s/he gets paid by the post
The beginnings of my kayak.
Very cool. Always wanted to do something like that. Do the forms eventually collapse & remove?
Surewhitey
Thinks s/he gets paid by the post
If I had the skills that some of you possess, I'd buy a building and setup a shop.
We did, it's called my garage...DW hates me for it
Ronstar
Moderator Emeritus
Cedar strip? How do you fish out those sacrificial bulkheads?
First strip and glue up the hull up to the widest part of the kayak. Then strip and glue up the top deck, not gluing the strips where the top deck and bottom hull sections come together. Then take the top off as a single unit. The forms and strongback then can be removed from the glued up hull since the top of the hull is the widest part of the kayak. Then epoxy/ fiberglass the insides of the hull and deck separately. Then clamp and glue the hull and deck together. Then....
eytonxav
Give me a museum and I'll fill it. (Picasso) Give me a forum ...
We did, it's called my garage...DW hates me for it
In your case, you are a pro, so totally justified.
Surewhitey
Thinks s/he gets paid by the post
In your case, you are a pro, so totally justified.
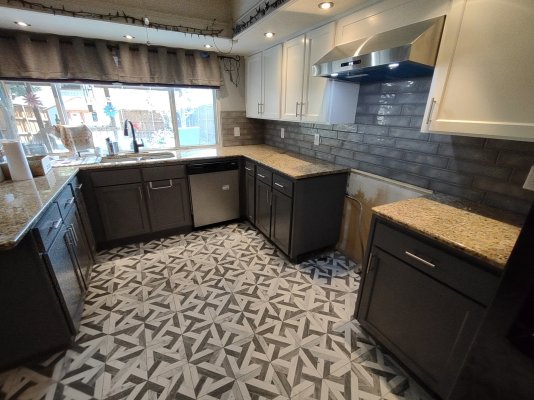
I just try to make her happy with the unexpected things. She left yesterday for Philly & Boston so I decided to do a new color on the lower cabinets to freshen up the place as they always get the most wear. About an hour after she left I decided to do it. Gambling a little with my picking the color...


Attachments
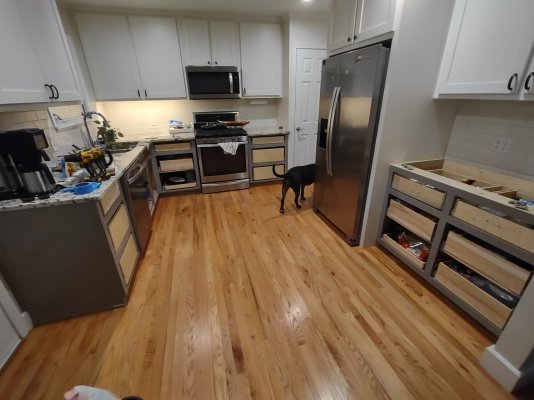
I just try to make her happy with the unexpected things. She left yesterday for Philly & Boston so I decided to do a new color on the lower cabinets to freshen up the place as they always get the most wear. About an hour after she left I decided to do it. Gambling a little with my picking the color...
Ohh boy --brave man right there!

Ronstar
Moderator Emeritus
I just try to make her happy with the unexpected things. She left yesterday for Philly & Boston so I decided to do a new color on the lower cabinets to freshen up the place as they always get the most wear. About an hour after she left I decided to do it. Gambling a little with my picking the color...
Very nice! But quite daring. My SIL does the same thing. When BIL goes on a fishing trip, she takes on a project. One was painting her cabinets.
I take it that your wife doesn't know you're doing this?
eytonxav
Give me a museum and I'll fill it. (Picasso) Give me a forum ...
I just try to make her happy with the unexpected things. She left yesterday for Philly & Boston so I decided to do a new color on the lower cabinets to freshen up the place as they always get the most wear. About an hour after she left I decided to do it. Gambling a little with my picking the color...
It's a nice contrast. Did you spray or brush on?
Surewhitey
Thinks s/he gets paid by the post
It's a nice contrast. Did you spray or brush on?
I only spray for kitchens and doors. Way smoother.
Very nice! But quite daring. My SIL does the same thing. When BIL goes on a fishing trip, she takes on a project. One was painting her cabinets.
I take it that your wife doesn't know you're doing this?
I've never done something like this, but, no she doesn't know. Tomorrow is the big reveal.
Ohh boy --brave man right there!
Brave or dumb... We'll see.
Attachments
Ronstar
Moderator Emeritus
^^ Looks great!
Surewhitey
Thinks s/he gets paid by the post
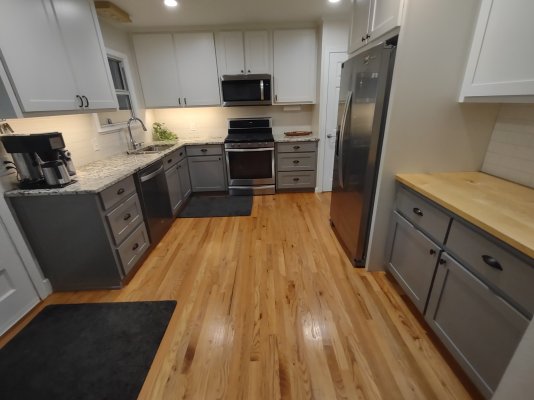
Floors made it a little busy, but the client is happy. Refacing, backsplash & vent hood installation is complete.
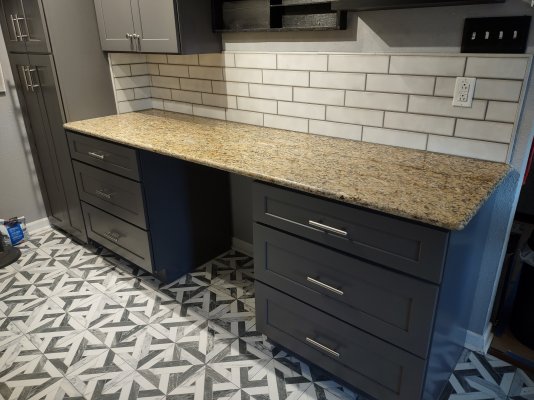
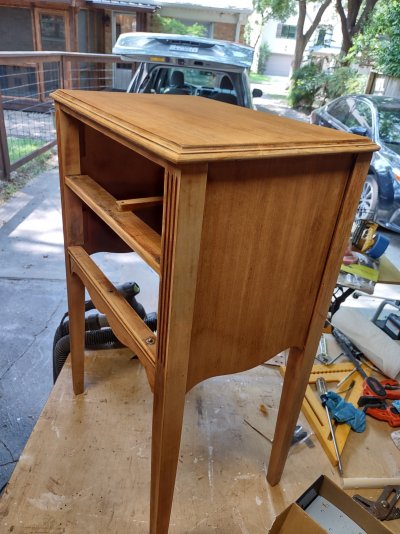
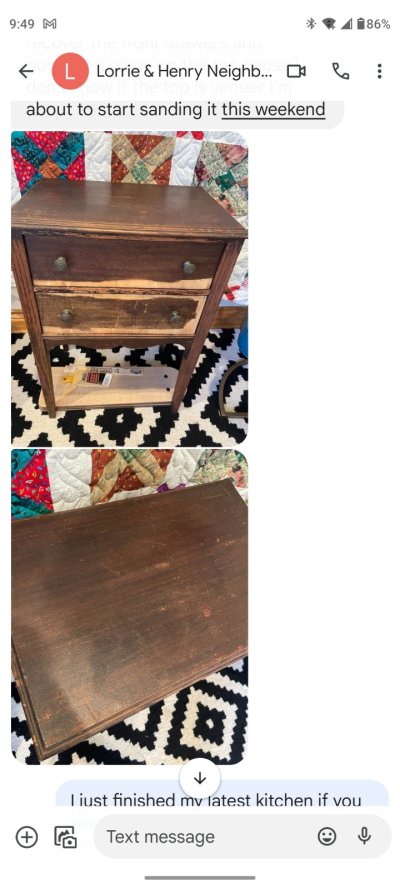
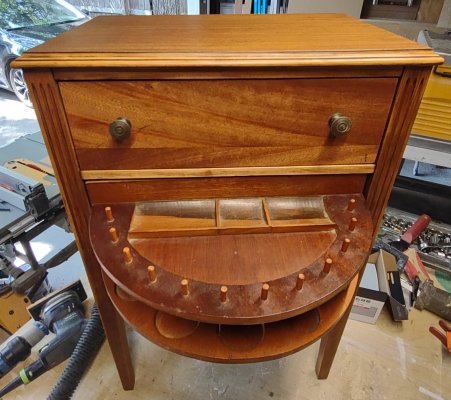
Starting a refinish & repair of a sewing cabinet for a neighbor too. Mostly mahogany woods built.
Starting a refinish & repair of a sewing cabinet for a neighbor too. Mostly mahogany woods built.
Attachments
street
Give me a museum and I'll fill it. (Picasso) Give me a forum ...
- Joined
- Nov 30, 2016
- Messages
- 9,543
Surewhitey, another beautiful project. Thanks for sharing your work.
Surewhitey
Thinks s/he gets paid by the post
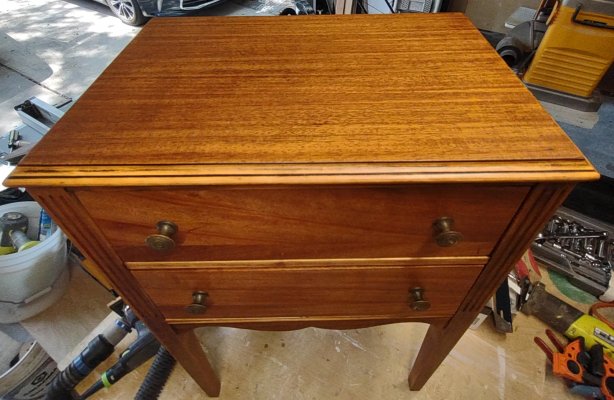
Before & after of a sewing table. Had to repair the drawer fronts & refinish everything. Old is new again. Thankfully I had 1 pc of mahogany from a friend in the biz... That's why you don't throw away stuff cause you'll need it one day.
Attachments
street
Give me a museum and I'll fill it. (Picasso) Give me a forum ...
- Joined
- Nov 30, 2016
- Messages
- 9,543
Interesting project! Looks like a completely different table. Very nice.
Surewhitey
Thinks s/he gets paid by the post
Interesting project! Looks like a completely different table. Very nice.
Yeah, the neighbor knew what it was when she saw it on bulk trash day down the street. I saw it, just didn't want to bring it into the house... She's a professional quilter & knew it was a sewing cabinet for thread spools.
Ronstar
Moderator Emeritus
Nice job on those cabinets and sewing table. That mahogany is going to look even better as it ages.
Similar threads
- Replies
- 67
- Views
- 4K
- Replies
- 14
- Views
- 910
- Replies
- 136
- Views
- 11K