What We're Making

Ronstar I'm sure you will build some beautiful creation from that cedar.

Here are 20 some vases that I did for center pieces for my future DIL. I did plate/bowls to go alone with these vases but I didn't take any pictures of them.

Most all work done on these vases is hand rasping/filing and then sanding. I have shown a few pictures of them but here is the whole works.
They took them a week ago.
 

Attachments

  • IMG_5983.jpg
    IMG_5983.jpg
    60.5 KB · Views: 273
Those look awesome! I may give something like that a try. Maybe some bowls. I'm ok with a rasp and file, but not with carving chisels.

I may have asked this before, but what finish do you use on the cedar? Very nice satin look to it.
 
Made a workshop cabinet out of Baltic birch plywood

Looks great but any reason you made it out of such nice materials if it is just for the workshop ?

Baltic birch runs about $45/sheet here for a 5'x5' @ 3/4". So, that cabinet would cost me about 250$ to make in total (roughly pricing the other materials and fittings).
 
Looks great but any reason you made it out of such nice materials if it is just for the workshop ?

Baltic birch runs about $45/sheet here for a 5'x5' @ 3/4". So, that cabinet would cost me about 250$ to make in total (roughly pricing the other materials and fittings).

Not Ronstar, but in my case I've built a lot of workshop storage out of yellow pine and cheap plywood. Now that I've gotten better at it I'd like to redo a lot of it using better materials, Baltic birch plywood and some nice hardwood trims. I'd like my workshop to be a showpiece. It's my hobby and that's what hobbies do. Waste money.
 
Looks great but any reason you made it out of such nice materials if it is just for the workshop ?

Baltic birch runs about $45/sheet here for a 5'x5' @ 3/4". So, that cabinet would cost me about 250$ to make in total (roughly pricing the other materials and fittings).

My answer is pretty much the same as Harley's.
It's my hobby and that's what hobbies do. Waste money.

Here's the financials:
4'x8' 1/2" Baltic Birch 57.99
4'x8' 3/4" Baltic Birch 67.99
packaging/handling 19.99
5 drawer glides 44.00
Handles - around 25.00

total $214.97 + pocket screws, sandpaper, shellac and wipe on poly that I had already.

I saw something similar online and I thought I'd make one just for the heck of it. I don't have anything to put in those drawers. I have empty drawers from my last shop cabinet.

I really wanted to test out Baltic Birch on this as an experiment for another project that I've been looking at.
 
Harley: " I'd like my workshop to be a showpiece."

Ah, okay. I'm not into that so it didn't occur to me. I like a clean and functional shop but made cheaply. Leaves more money for [-]toys[/-] tools.
:D


My answer is pretty much the same as Harley's.
Here's the financials:
4'x8' 1/2" Baltic Birch 57.99
4'x8' 3/4" Baltic Birch 67.99
packaging/handling 19.99
5 drawer glides 44.00
Handles - around 25.00
total $214.97 + pocket screws, sandpaper, shellac and wipe on poly that I had already.
I saw something similar online and I thought I'd make one just for the heck of it. I don't have anything to put in those drawers. I have empty drawers from my last shop cabinet. I really wanted to test out Baltic Birch on this as an experiment for another project that I've been looking at.

Thanks for explaining. I usually just stick to C grade stuff but then I don't have the skills you guys have. Cheers.
 
I wanted to buy a Harbor Freight face shield but it's only available in the store and I didn't want to go. I wanted something that provides room for a respirator and isn't too expensive. I also like that the clearance will probably prevent it from fogging up. Fog was a problem when using my safety glasses with my regular mask.

I had a bump cap that never seemed to fit right (the shell looked ridiculously high) so I attached the polyethylene insert to a heat formed piece of PETG plastic using eyelets. I made it 12" long because that was about the height of the longest commercial face shield I saw.

For those into plastics, PETG with protective film won't deteriorate after 25 years but white high impact styrene will get yellow around the edges. They were stored the same way for at least part of that time.
 

Attachments

  • face-shield.jpg
    face-shield.jpg
    211.9 KB · Views: 75
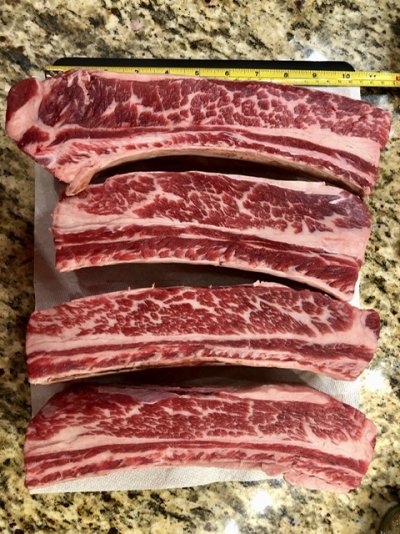
Dino Ribs! (beef plate ribs)

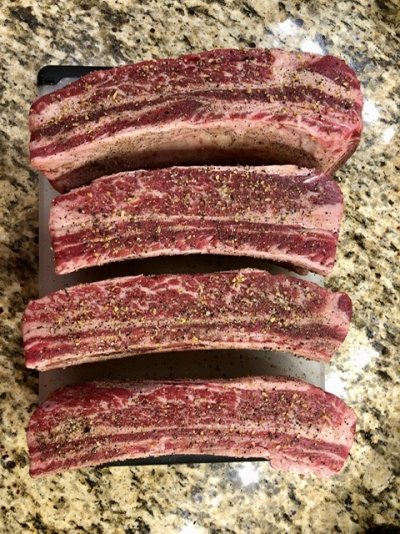
These jumped out on me at the store yesterday. They are huge - I added a measure in one photo. Over 9 pounds total. Even though they were already cut, they are so big they’ll be fine in the smoker. They came 2 to a pack, so of course I had to get 4!

I think the HEB meat section went crazy in preparation for Valentine’s Day. Unbelievable variety of top cuts all over the place. Outdoor grilling is a popular family pastime around here.

We have a long spell of cold, wet and windy weather starting tomorrow, so when I woke up this morning and checked the forecast, I realized that I couldn’t wait until this weekend. So on with the rub, and will start smoking in a couple of hours.
 

Attachments

  • C814B0E3-FCDF-4567-86B7-2A02A246F511.jpeg
    C814B0E3-FCDF-4567-86B7-2A02A246F511.jpeg
    175.9 KB · Views: 56
  • 8B087095-4A58-4E25-80A3-DA5E4403061C.jpeg
    8B087095-4A58-4E25-80A3-DA5E4403061C.jpeg
    200 KB · Views: 57
Beef ribs are way underrated. Properly cooked they are better than pork ribs IMHO.
 
audreyh1, that looks very good!!
 
Beef ribs are way underrated. Properly cooked they are better than pork ribs IMHO.
Agreed. I also like the chuck short ribs that I occasionally buy at Costco. Different flavor, but we like the flavor of chuck roast, so we think the smoked ribs are great.
 
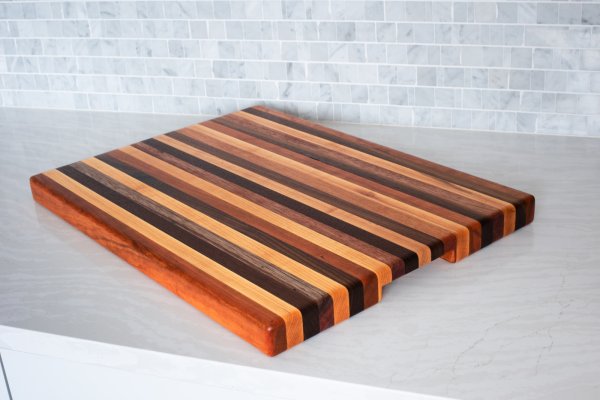
That is a handsome looking cutting board with the center narrowed down for easy moving and handling of the board.

That is very nice!!!
 
Thanks! - The center is only hollowed out back about an inch - just enough to grab the board for moving. Then its full thickness in the middle.
 
That is a clever detailed cutting board.
 
Walnut, maple, ? and ?

oops - forgot to mention. Walnut, cherry, African mahogany, and maple. sanded and spritzed with water to raise the grain a little. then sand smooth, then several coats of food grade mineral oil, and 2 coats of food grade beeswax. I'm going to add little rubber feet.

The spritzing before oil raises the grain. Supposedly the grain will not raise again during use if you do the spritz.

This is an edge grain board. I usually make end grain, but our friend didn't want end grain.
 
Last edited:
oops - forgot to mention. Walnut, cherry, African mahogany, and maple. sanded and spritzed with water to raise the grain a little. then sand smooth, then several coats of food grade mineral oil, and 2 coats of food grade beeswax. I'm going to add little rubber feet.
This is an edge grain board. I usually make end grain, but our friend didn't want end grain.

Thanks. Looks great. Making some "wood butter" out of mineral oil and beeswax is on my list of things to do.

I agree with them. I actually prefer the look of edgegrain. Even though endgrain is better on knives.
 
That is a clever detailed cutting board.

The problem with these edge grain boards is that each piece needs to be as long as the cutting board. I can't use my smaller scraps from other projects. I have done some end grain boards where I can use scraps down to 2" long x 3/4" wide x 1/4" thick.

I made some of these a few years ago and used every small scrap that I had.
 

Attachments

  • Screen Shot 2021-02-12 at 3.26.23 PM.jpg
    Screen Shot 2021-02-12 at 3.26.23 PM.jpg
    949.8 KB · Views: 46
Nice! Even better, a gift. I made one for my nephew's wedding present, and they used it up.
it was glued slices like that, then cut on a 45 and reassemble in a pattern that really looks Escher-esque. I wish I had remembered to take a picture.
My latest builds are for work. I get to essentially do what I want when we are not busy in the field, as long as it seems productive. I turn in receipts and they never bat an eye at them.
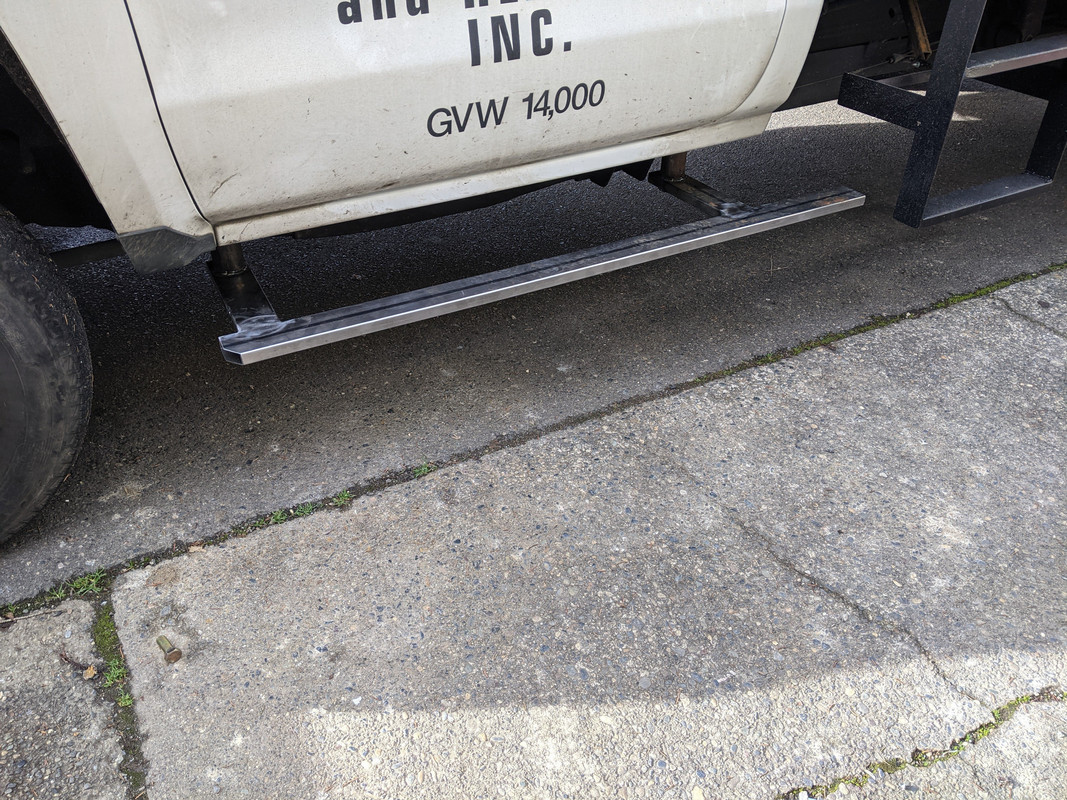
The delivery driver is really beyond retirement age and has bad knees and hips, and was climbing up and down off the truck using one of the side racks leaned up against it. That was insanity, and as soon as I had a few days to spare I built a ladder for the bed.
PXL-20210128-233811934.jpg


He ( and anyone else without 36" inseams) complained about how difficult it was to get into the truck. They looked into a factory step, but they were not sufficient. Then they just forgot about it.
I built a custom nerf bar that split the distance between the floor of the cab and the ground. It is also the exact height of the lower rung of the ladder. Here is the nerf bar before paint and non-skid tape, a test fitting.
PXL_20210129_221220438.jpg
 
Back
Top Bottom