You are using an out of date browser. It may not display this or other websites correctly.
You should upgrade or use an alternative browser.
You should upgrade or use an alternative browser.
What We're Making
- Thread starter davemartin88
- Start date

ugeauxgirl
Thinks s/he gets paid by the post
Very nice!
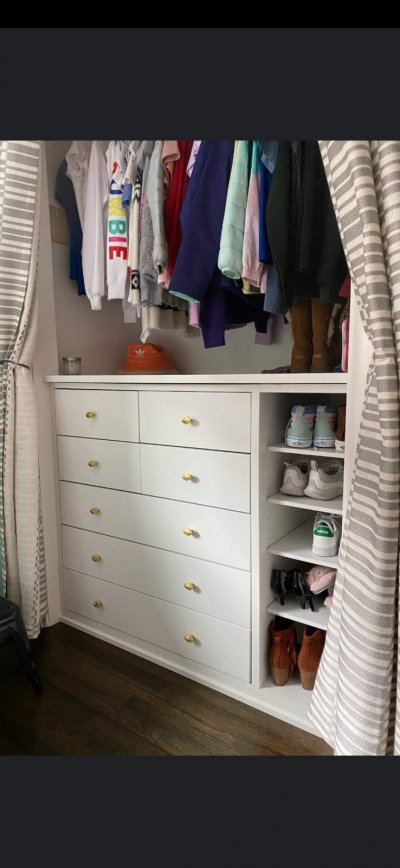
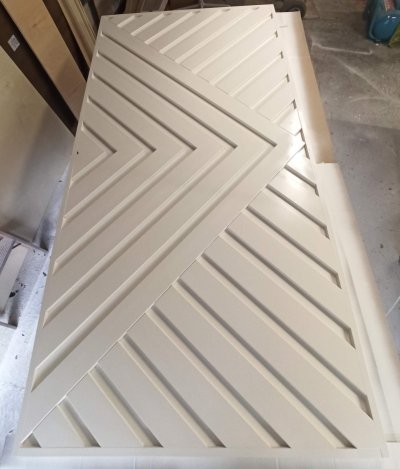
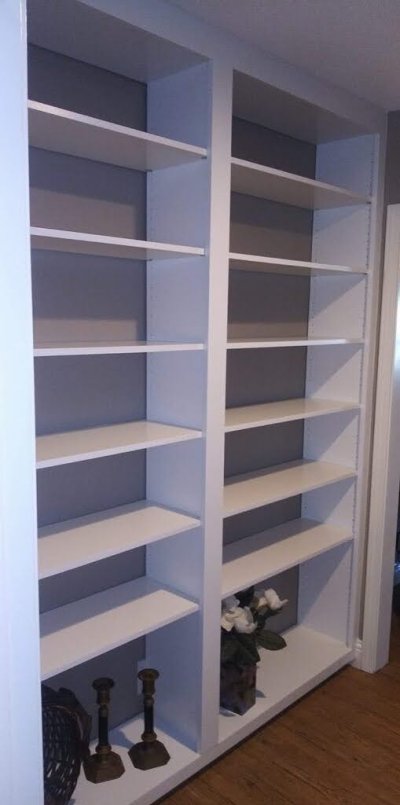
Client wanted a built-in for his daughter...
Ronstar
Moderator Emeritus
Finance Dave
Thinks s/he gets paid by the post
- Joined
- Mar 29, 2007
- Messages
- 1,864
Hobbyist woodworker. Recently completed some flower vases. Three slightly different versions. Various woods including eucalyptus, paduak, jakoba, maple, quilted cherry, walnut, redwood, canary, etc.
Always start with a basic drawing lol.


Always start with a basic drawing lol.
Finance Dave
Thinks s/he gets paid by the post
- Joined
- Mar 29, 2007
- Messages
- 1,864
For those of you who don't know what a caliper is, it's a measuring device often used in machining and auto repair. I decided to make a caliper clock for in my office. Fun project.


Ronstar
Moderator Emeritus
Awesome projects Dave! And very creative.
Finance Dave
Thinks s/he gets paid by the post
- Joined
- Mar 29, 2007
- Messages
- 1,864
Awesome projects Dave! And very creative.
Thanks, but I must admit the caliper clock (as well as many projects I make) are from magazine plans. I usually alter them a bit to suit my needs.
tmm99
Give me a museum and I'll fill it. (Picasso) Give me a forum ...
- Joined
- May 15, 2008
- Messages
- 5,223
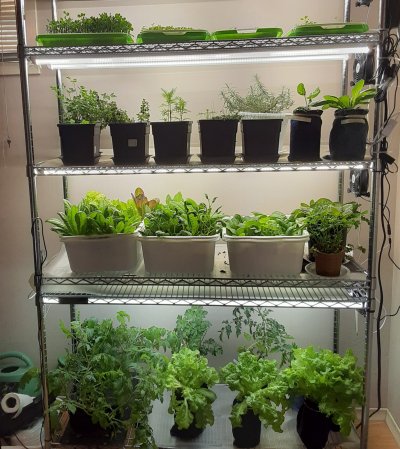
View attachment 37875I hope it's OK that I take the subject "What we're making" loosely, and say that the "making" includes "growing"? I mentioned getting equipment for indoor gardening on the amazon thread, and someone asked me to post an update, so here it is. I started indoor gardening in my basement at the beginning of December. I live in Ontario, so we cannot garden outdoors until spring. I have a lot of salad fixings (herbs (parsley, cilantro, thyme and oregano), a variety of lettuce greens (some spinach but they bolted) and different microgreens (top shelf). Tomato plants (lowest shelf) are finally starting to flower. They are supposedly dwarf tomato plants, but one is growing so big that I had to lower the bottom shelf some more... The bottom shelf and the top shelf are all hydroponic. The rest is with soil. I have a computer fan for each shelf for air circulation.
It's nice to be able to just go to my basement and pick some greens for salads.
It's nice to be able to just go to my basement and pick some greens for salads.
Attachments

Ronstar
Moderator Emeritus
^ Awesome! Now will you transplant some of these plants outside later? Or are they going to live their entire lives in the basement?
ugeauxgirl
Thinks s/he gets paid by the post
They look pretty happy in the basement...^ Awesome! Now will you transplant some of these plants outside later? Or are they going to live their entire lives in the basement?
tmm99
Give me a museum and I'll fill it. (Picasso) Give me a forum ...
- Joined
- May 15, 2008
- Messages
- 5,223
I think I will keep on growing lettuce in the basement. I think the lettuce would be even happier in the basement during summer months as my basement is freezing then with the A/C running.^ Awesome! Now will you transplant some of these plants outside later? Or are they going to live their entire lives in the basement?
You gave me an idea. I should start seedlings in the basement soon so I can transplant them outdoors when they are bigger and it's warmer outside. Or not. I'm getting lazy lately LOL.
Finance Dave
Thinks s/he gets paid by the post
- Joined
- Mar 29, 2007
- Messages
- 1,864
I just started some Frank Lloyd Wright inspired barstools. Will probably take me about a year to complete...it's a big job. I'm sure I'll be able to finish some other projects in the meantime.
Here are some bluetooth speakers I made recently...keeping one for myself and giving the others to friends. Didn't have the speakers mounted yet when I took photos lol.


Here are some bluetooth speakers I made recently...keeping one for myself and giving the others to friends. Didn't have the speakers mounted yet when I took photos lol.
Ronstar
Moderator Emeritus
^ Nice speakers! Let us know how the sound. And keep us posted on the barstools.
Finance Dave
Thinks s/he gets paid by the post
- Joined
- Mar 29, 2007
- Messages
- 1,864
^ Nice speakers! Let us know how the sound. And keep us posted on the barstools.
Sound is "so so"...definitely not for audiophiles. I would imagine you could put some type of fabric inside or something to make them better. The main goal is to make it louder than the phone.
So far here is all I have done of the barstools. Selected the lumber (cherry), had to have full size copies of template drawings made at a print shop, then made templates of the legs.


Finance Dave
Thinks s/he gets paid by the post
- Joined
- Mar 29, 2007
- Messages
- 1,864
Someone asked me to keep updated on the Frank Lloyd Wright inspired bar stools I'm making...so here you go.
I got the 6 back legs (3 stools) made this week. Very time consuming. I had to first make templates out of 1/2" plywood by using paper templates, spray-adhering them, cutting them out on band saw, then sanding to finished condition. Then I had to attach this template to each leg blank and shape them on the router using a flush trimming bit as shown. The holes you see in the legs will be hidden later by tenon joinery.
I will start on the front legs soon.
Surewhitey
Thinks s/he gets paid by the post
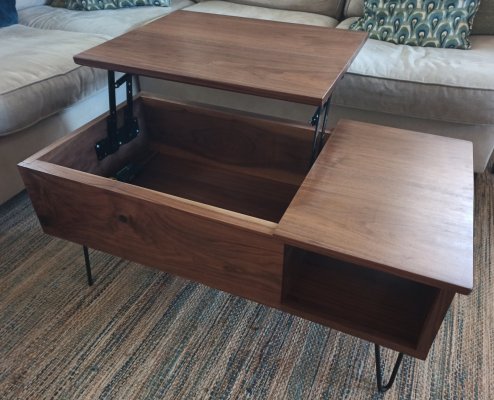
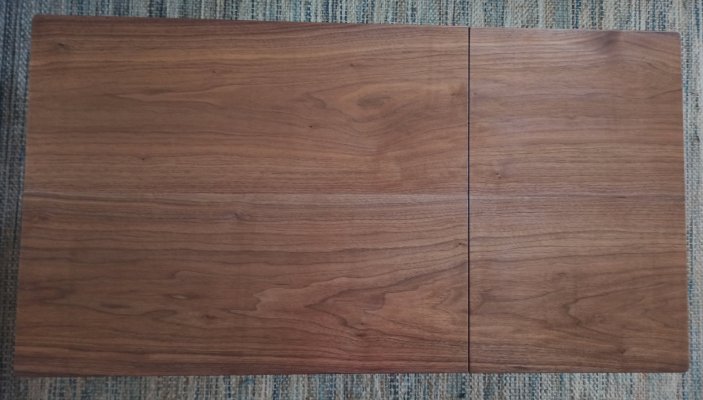
DW wanted a Zoom coffee table and a very specific size. Had a bit of thick walnut and finished it with a few pcs of 4/4 walnut for the top. Did a nice lap joint since I had the 6/4 sides.
Finished with ArmRSeal rubbed on.
Finished with ArmRSeal rubbed on.
Attachments

Surewhitey
Thinks s/he gets paid by the post
street
Give me a museum and I'll fill it. (Picasso) Give me a forum ...
- Joined
- Nov 30, 2016
- Messages
- 9,567
Finance Dave >> please keep us up to date on that project! Looks great already.
Surewhitey >>> WOW! That is amazing work, looks beautiful and show room appearance.
Surewhitey >>> WOW! That is amazing work, looks beautiful and show room appearance.
Ronstar
Moderator Emeritus
Finance Dave and Surewhitey have been busy! Very nice projects!
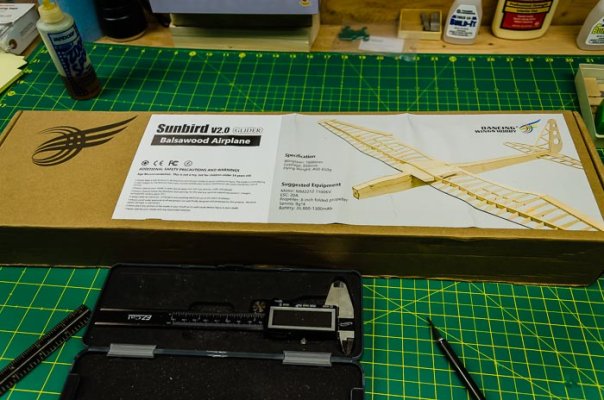
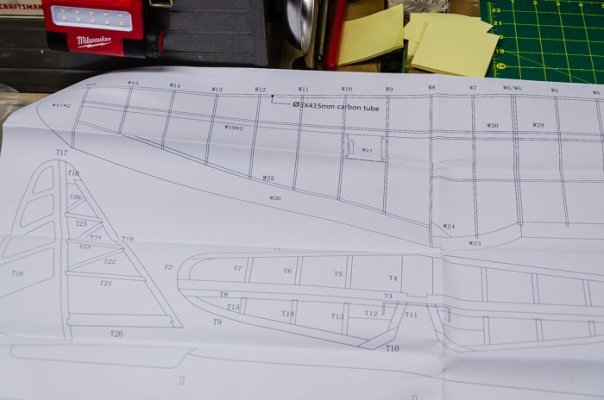
Started on a new R/C kit today, this one is also a powered sailplane but one made in China by a Chinese company called Dancing Wings. The airplane is called a Sunbird. The idea is to periodically post descriptions and photos as a relatively small flat box of wood turns into a flyable airplane. Not having any idea of the reliability of the company I ordered the kit via Amazon since they're so easy to deal with if things go amiss.
One of the things they do that I think is kind of neat is they offer a variety of "packages" of almost all of their kits, from the bare bones model and nothing else, to almost everything needed to complete it, including all radio/electronic stuff like the transmitter, receiver, servos, electronic speed control (ESC) motor, and propeller. I ordered the kit with the servos, motor, and propeller, as sizing the ESC, motor, and propeller can be somewhat of an art form and I'm new to electrics. I'm getting back into R/C after about a 15-20 year layoff. I didn't really care about the red and blue covering and probably won't use it anyway, except maybe for trim. But if you get the sizing wrong on the ESC, motor, or prop that can overload components and let the "magic smoke" out and then you have to figure out what broke first and replace things. That's if you didn't fry the radio too and could get the airplane back.
First impressions are very good, the quality seems high, although the balsa wood is on the thick and heavy side but finding quality balsa wood is a world-wide problem now. It seems that balsa wood is also used in the cores of wind turbines for the same reason it's desirable for model airplanes - it's wood with the highest strength-to-weight ratio of any wood. And the folks who make wind turbines have bigger budgets than modelers.
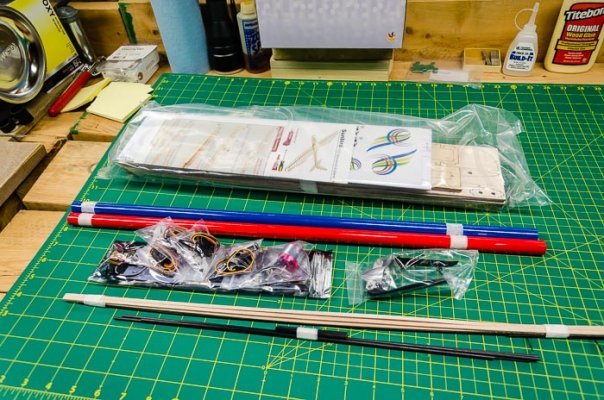
So, here's what I saw when I opened the box to begin. I spent about the first hour just marking parts from the laser-cut sheets of wood. They mark the parts, but not on the parts themselves and reviewers warned to do that before parts started falling out of the sheets and then you have no idea of what part goes where. I usually do that anyway when building a kit. Directions are a bit sketchy but I was warned of this before ordering and it's not a complicated kit anyway.
BTW, I just got that cutting mat. It's 2 feet by 4 feet in size, and the company makes larger ones and custom sizes. I use it for cutting airplane parts out of course but I wanted the bigger size for cutting covering. With shipping, which was $18 by itself, the mat was $104. Given that I know of nowhere else to get one that size that doesn't strike me as all that high for a one-time purchase. The mat company is https://www.cutting-mats.net/.
One of the things they do that I think is kind of neat is they offer a variety of "packages" of almost all of their kits, from the bare bones model and nothing else, to almost everything needed to complete it, including all radio/electronic stuff like the transmitter, receiver, servos, electronic speed control (ESC) motor, and propeller. I ordered the kit with the servos, motor, and propeller, as sizing the ESC, motor, and propeller can be somewhat of an art form and I'm new to electrics. I'm getting back into R/C after about a 15-20 year layoff. I didn't really care about the red and blue covering and probably won't use it anyway, except maybe for trim. But if you get the sizing wrong on the ESC, motor, or prop that can overload components and let the "magic smoke" out and then you have to figure out what broke first and replace things. That's if you didn't fry the radio too and could get the airplane back.
First impressions are very good, the quality seems high, although the balsa wood is on the thick and heavy side but finding quality balsa wood is a world-wide problem now. It seems that balsa wood is also used in the cores of wind turbines for the same reason it's desirable for model airplanes - it's wood with the highest strength-to-weight ratio of any wood. And the folks who make wind turbines have bigger budgets than modelers.
So, here's what I saw when I opened the box to begin. I spent about the first hour just marking parts from the laser-cut sheets of wood. They mark the parts, but not on the parts themselves and reviewers warned to do that before parts started falling out of the sheets and then you have no idea of what part goes where. I usually do that anyway when building a kit. Directions are a bit sketchy but I was warned of this before ordering and it's not a complicated kit anyway.
BTW, I just got that cutting mat. It's 2 feet by 4 feet in size, and the company makes larger ones and custom sizes. I use it for cutting airplane parts out of course but I wanted the bigger size for cutting covering. With shipping, which was $18 by itself, the mat was $104. Given that I know of nowhere else to get one that size that doesn't strike me as all that high for a one-time purchase. The mat company is https://www.cutting-mats.net/.
Attachments
skyking1
Thinks s/he gets paid by the post
No pictures yet and it is not fancy, but i am making a set of steps and a footboard to guide my blind dog to the steps. We had a chair that worked fine for a long time, but she is a little squirrely and has bailed off a corner a couple of times. I'll cushion the edges of the footboard with pipe insulation both for her and for my wife's hands. She has rheumatoid arthritis. I know it will take her some time to develop muscle memory to avoid it.
harley
Give me a museum and I'll fill it. (Picasso) Give me a forum ...
No pictures yet and it is not fancy, but i am making a set of steps and a footboard to guide my blind dog to the steps. We had a chair that worked fine for a long time, but she is a little squirrely and has bailed off a corner a couple of times. I'll cushion the edges of the footboard with pipe insulation both for her and for my wife's hands. She has rheumatoid arthritis. I know it will take her some time to develop muscle memory to avoid it.
One of our pugs has neurological damage, with arthritis. And she's also mostly blind and deaf(-ish). When she started having problems a couple of years ago I was carrying her down the steps off the deck to go out in the yard. So I made a 16' folding ramp, with side rails, coming down the deck stairs. The side rails kept her/them from faling off the sides. I put a joint in it using piano hinges so it could fold up out of the way of the lawn mower and also for when we went away for the winter. I used 1/2"plywood and put some astroturf on it for traction. It's been great. The one pug can't use it anymore (gotten too crippled up), but the other two dogs still do. I also put some little solar lights like you'd use on stairs on the rails as landing lights for them. However, after two plus years of beach front wind and weather it's starting to fall apart. I've got some ideas on how to do it better, and once I rebuild it I'll post the pictures.
Your stairs sound like a good idea, and like the ramp, will be good physical therapy for the arthritis.
Last edited:
Surewhitey
Thinks s/he gets paid by the post
Finance Dave >> please keep us up to date on that project! Looks great already.
Surewhitey >>> WOW! That is amazing work, looks beautiful and show room appearance.
Thanks! Kind of a passion, CoastRE thing for me. Honing my solid wood construction is making DW happy. Painting has opened my appreciation for fine-quality painters. I enjoy learning as I go.
zinger1457
Thinks s/he gets paid by the post
- Joined
- Jul 22, 2007
- Messages
- 3,230
Painting has opened my appreciation for fine-quality painters. I enjoy learning as I go.
I've been doing woodworking as a hobby for years and have always found finishing, whether it be stain or paint, to be the most difficult skill to master. Takes a lot of patience to get everything right and looking good. Some nice looking projects there!
Similar threads
- Replies
- 67
- Views
- 4K
- Replies
- 14
- Views
- 928
- Replies
- 136
- Views
- 11K