You are using an out of date browser. It may not display this or other websites correctly.
You should upgrade or use an alternative browser.
You should upgrade or use an alternative browser.
What We're Making
- Thread starter davemartin88
- Start date
Music Lover
Give me a museum and I'll fill it. (Picasso) Give me a forum ...
Looks great. Composites are nice but tough to beat the look of real wood.
I'm a fan of real wood, even if it's only pressure treated. I also wasn't prepared to pay the premium for 500 sq. ft. of composite.
I saved a lot on the framing, in fact the basic framing cost me nothing other than $30 or so for joist hangers. The original deck was 12" x 28' and they used 2" x 6" boards for the decking. It was worn out visually but still structurally sound so I used that to extend the deck. They staggered it so that one row had a 7' piece, a 14', then another 7'. The next row had 2 - 14' pieces. The framing was also 24" on center. As I was going to use 5/4" decking I knew that 2"x6" on 24" center wouldn't be stiff enough....plus I like to overbuild.
I removed all the decking and cut the 14' - 2"x6" boards down to 12' and doubled the framing to 12" on center, and used the 7' boards to extend the deck. That along with doubled end joists and tripling in the middle where the deck originally ended gave a final width of just under 20'.
street
Give me a museum and I'll fill it. (Picasso) Give me a forum ...
- Joined
- Nov 30, 2016
- Messages
- 9,535
Very nice Ronstar!!
With your talents you should find an outlet store for your work. You would do very well, and your work would look great in homes.
With your talents you should find an outlet store for your work. You would do very well, and your work would look great in homes.
Last edited:
Ronstar
Moderator Emeritus
I'm a fan of real wood, even if it's only pressure treated. I also wasn't prepared to pay the premium for 500 sq. ft. of composite.
I saved a lot on the framing, in fact the basic framing cost me nothing other than $30 or so for joist hangers. The original deck was 12" x 28' and they used 2" x 6" boards for the decking. It was worn out visually but still structurally sound so I used that to extend the deck. They staggered it so that one row had a 7' piece, a 14', then another 7'. The next row had 2 - 14' pieces. The framing was also 24" on center. As I was going to use 5/4" decking I knew that 2"x6" on 24" center wouldn't be stiff enough....plus I like to overbuild.
I removed all the decking and cut the 14' - 2"x6" boards down to 12' and doubled the framing to 12" on center, and used the 7' boards to extend the deck. That along with doubled end joists and tripling in the middle where the deck originally ended gave a final width of just under 20'.
I should have overbuilt my framing. Started with a cedar deck with treated framing at 16" centers 27 years ago. Tore the cedar off and installed trex on the existing framing about 13 years ago. Trex is holding up fine, but I notice some minor sagging spots in the decking. A couple of posts have settled about 1/2". Not noticeable with real wood, but the Trex is more form fitting to the joists.
I should have overbuilt my framing. Started with a cedar deck with treated framing at 16" centers 27 years ago. Tore the cedar off and installed trex on the existing framing about 13 years ago. Trex is holding up fine, but I notice some minor sagging spots in the decking. A couple of posts have settled about 1/2". Not noticeable with real wood, but the Trex is more form fitting to the joists.
I had to re-do a cedar deck a few years ago. I was able to salvage the top cedar planks. But, the substructure was laid directly on the ground when the cabin was built in 1970. It had to be removed with a shovel-completely rotten.
I overbuilt to the TREX spec, despite the fact I was reusing the cedar planks. I also made certain no wood was touching the ground. I think it will outlast the 50 year old cabin now.
street
Give me a museum and I'll fill it. (Picasso) Give me a forum ...
- Joined
- Nov 30, 2016
- Messages
- 9,535
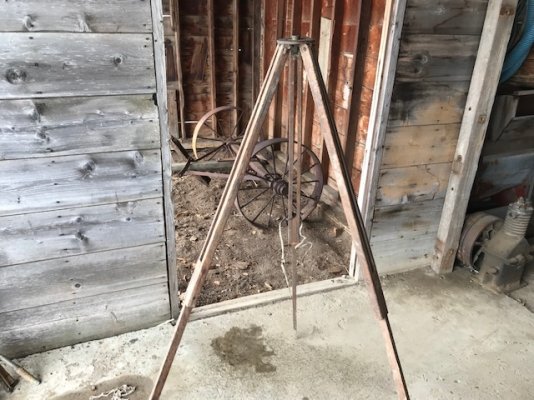
I have this old oak transit tripod I found in the old ranch house from the property I bought last year. I was thinking of making a night lamp from it. I would install a light socket and get a shade for it. What do you think or what other ideas for crafting something out of it?
Attachments
arbeadub
Recycles dryer sheets
street; if you need a light your fence post sculptures may make a finial at the top. I also see it as an easel for paintings or near its original purpose as to mount a spotting scope or telescope.
street
Give me a museum and I'll fill it. (Picasso) Give me a forum ...
- Joined
- Nov 30, 2016
- Messages
- 9,535
^ thanks some great ideas!
Music Lover
Give me a museum and I'll fill it. (Picasso) Give me a forum ...
I should have overbuilt my framing. Started with a cedar deck with treated framing at 16" centers 27 years ago. Tore the cedar off and installed trex on the existing framing about 13 years ago. Trex is holding up fine, but I notice some minor sagging spots in the decking. A couple of posts have settled about 1/2". Not noticeable with real wood, but the Trex is more form fitting to the joists.
Overbuilding costs very little. On a 20' deck going from a 16" to 12" span requires only 5 additional joists. Over the entire cost of a deck it's negligible.
zinger1457
Thinks s/he gets paid by the post
- Joined
- Jul 22, 2007
- Messages
- 3,229
I have this old oak transit tripod I found in the old ranch house from the property I bought last year. I was thinking of making a night lamp from it. I would install a light socket and get a shade for it. What do you think or what other ideas for crafting something out of it?
Would have to modify the top but would also make a nice planter stand, maybe a plant with longer vines/leaves hanging down.
Ronstar
Moderator Emeritus
Awesome tripod street! I like your lamp idea. Or a binocular mount for birdwatching through a window. That’s what I do with mine.
street
Give me a museum and I'll fill it. (Picasso) Give me a forum ...
- Joined
- Nov 30, 2016
- Messages
- 9,535
Would have to modify the top but would also make a nice planter stand, maybe a plant with longer vines/leaves hanging down.
Yes, that is another great idea. That makes me think a plant could hang from the center between the legs.
Ronstar, yes it would be good to just leave it out in the country shop to use to watch the animals on the hillside for spotting scope.
It is an old surveyor tripod which you maybe are familiar with.
I was thinking about putting a laser level on it to use for leveling and grading purposes.
Ronstar
Moderator Emeritus
Yes, that is another great idea. That makes me think a plant could hang from the center between the legs.
Ronstar, yes it would be good to just leave it out in the country shop to use to watch the animals on the hillside for spotting scope.
It is an old surveyor tripod which you maybe are familiar with.
I surveyed with one like that once or twice in the 70's. We had antique surveying equipment on display in the office and I took the old stuff out for the fun of it.
Winemaker
Thinks s/he gets paid by the post
Ammo.... getting ready for a weekend of shooting with friends... figure a few hundred rounds will do it...
That should be in the BTD thread! Some ammo is well over $1.00/round.

That should be in the BTD thread! Some ammo is well over $1.00/round.
That's why I roll my own.
Music Lover
Give me a museum and I'll fill it. (Picasso) Give me a forum ...
Music Lover, You did a great job on the deck and gazebo. Nice mood lighting. I like the enclosed railing.
I used fence boards instead of balusters by the gazebo to add variety, and also to provide privacy and wind protection for the fire table. At first I wasn't sure how it would look but once it was done we both were happy with the end result.
Ronstar
Moderator Emeritus
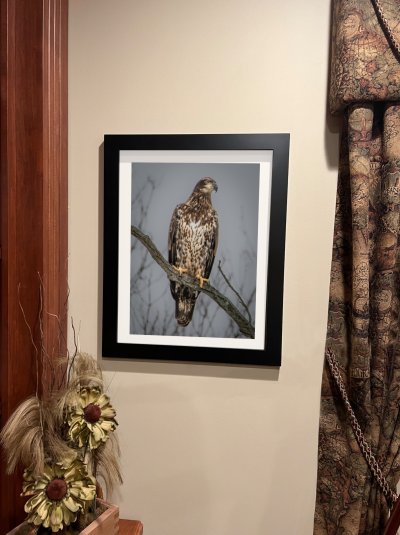
Ronstar, Nice dovetail. What finish did you use?.....
Thanks - Finish is walnut danish oil followed by a few coats of Osmo polyx oil/wax
Ronstar
Moderator Emeritus
Surewhitey
Thinks s/he gets paid by the post
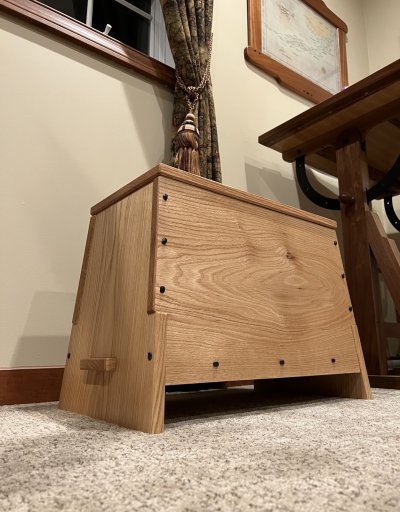
Trying to finish my Viking chest. Waiting on hardware delivery - hand forged hasp, handles and hinges. Until then it will just sit hardwareless.
Very cool Ronstar.
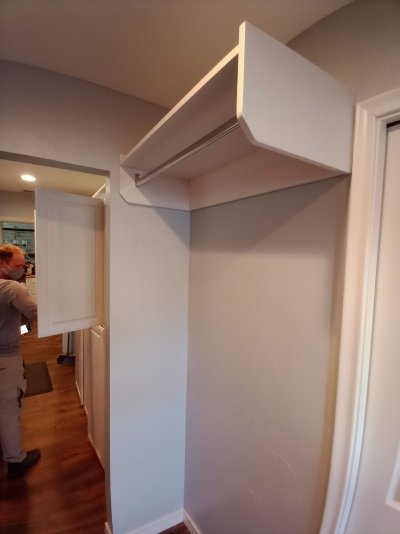
Here are a few things I've built and a pic from a client after filling his bookshelves & matching desk.
DW has a food hoarding problem so I finally gave her a place to put the overflow in a tiny closet.
Attachments


street
Give me a museum and I'll fill it. (Picasso) Give me a forum ...
- Joined
- Nov 30, 2016
- Messages
- 9,535
Surewhitey & Ronstar you both are extremely talented woodworking people. Very nice projects.
Ronstar
Moderator Emeritus
Very cool Ronstar.
Here are a few things I've built and a pic from a client after filling his bookshelves & matching desk.
DW has a food hoarding problem so I finally gave her a place to put the overflow in a tiny closet.
Very nice! Thanks for the ideas. I need to tackle the guest bedroom closet someday.
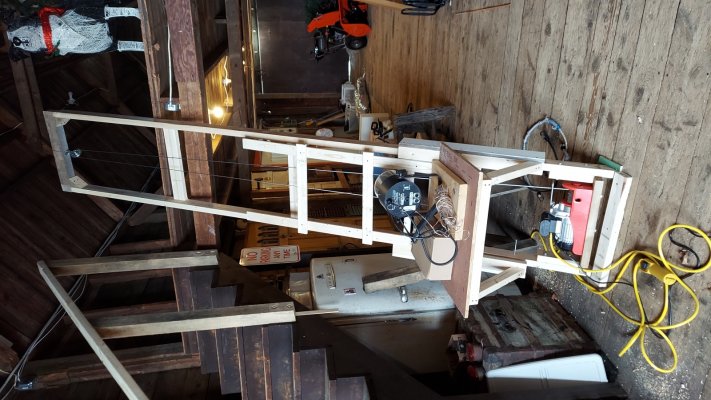
Built this ladder hoist for the barn. After seeing many "DIY" elevator designs on Youtube, I found this ladder hoist made by a roofer. Hoist is from Harbor Freight ($159) and the rest is wood, some small profile fixed casters from Amazon, and $40 for a 25' piece of 4 conductor wire to replace the 6' lead that came with the hoist (so you can control it from above or below). Capacity is 440lbs, but I doubt I will ever hoist anything that I can't lift off the floor myself.
Used it with DW yesterday to hoist storage bins and vintage car parts up there.
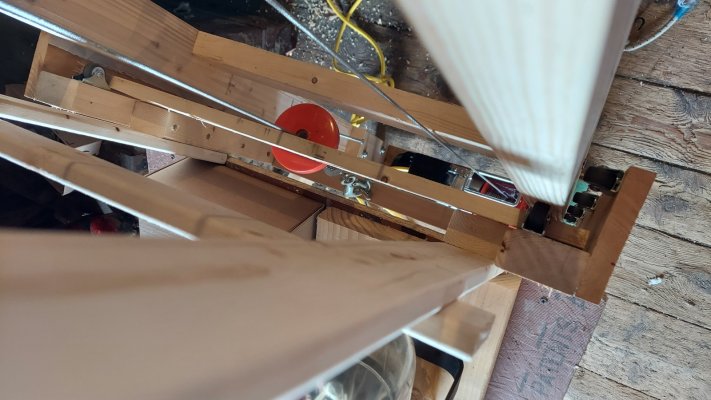
I didn't want to commit the floor space in the barn to a permanent elevator. So the very cool thing about this is that when I am done with it, I disconnect the hoist cable from the trolley, strap the trolley to a cross brace on the ladder frame, hook the hoist cable to a beam overhead up in the loft, hit the button and the whole thing hoists itself up into the loft and lays on the floor up there.
Used it with DW yesterday to hoist storage bins and vintage car parts up there.
I didn't want to commit the floor space in the barn to a permanent elevator. So the very cool thing about this is that when I am done with it, I disconnect the hoist cable from the trolley, strap the trolley to a cross brace on the ladder frame, hook the hoist cable to a beam overhead up in the loft, hit the button and the whole thing hoists itself up into the loft and lays on the floor up there.
Attachments
Similar threads
- Replies
- 67
- Views
- 4K
- Replies
- 14
- Views
- 890
- Replies
- 136
- Views
- 11K