Container Gardening

freebird5825,

I don't know if you are aware of these 2 things but in case not I'll pass this along.

Sugar Snap (my favorite pea) is a trellising pea. In case you wanted something that was free standing vs having to provide a structure for them to climb (if that's difficult) there are peas that grow from 18" to 30" that will stand up. I can't recommend any as the 1 I tried I did not care for.

Garlic needs to be planted in the fall then mulched. Now doing this in a container (planting in the fall) may or may not work. I'd suggest planting your cloves in early November and cover them with leaves. I'd use a 5 gallon pail as garlic grows deep roots. By Thanksgiving place the container on the north side of the house so they stay cold and remain frozen all winter ie out of the sun as a container may warm up enough to thaw the soil in winter. Come early March place the container on the south side. You can remove the leaves which normally would stay as mulch to suppress weeds, in a container you can weed them, garlic does not compete well with weeds. I'd be curious to know how those garlic plants do for you, this is the time garlic is forming bulbs at your latitude and those plants are tiny, I suspect they were planted in mid to late spring. I expect to be digging garlic in another 2 weeks + or -.

Best of gardening!
 
Good info, veremchuka :D

The sugar snap pea (trellising) experiment using a tomato cage and a container will be interesting as far as yields and ease of picking. I intentionally placed this planter on the west side so it doesn't get too many hours of daylight or too much midday heat. There is a roof overhang directly above it.

Yes, I do know about the garlic planting in the fall. I just didn't get to it last fall. :blush: However, there are several volunteers (stray cloves leftover from previous years' regular garlic bed harvest) out in the back garden that may be just about ready for plucking in July.
I am using 2 approaches with the cloves I planted in the containers. I have no idea if the single cloves will form full bulbs or not. They certainly have enough root space in the Ebox. The shallower window box garlic will be primarily for clipping tops for flavor.
 
As far as the strays in the bed since you mention them and being ready soon, you should cut the scapes when they have made 1 full curl at their base where they grow out of the plant. Scapes are good to eat especially grilled. Scapes are forming now (started a couple of weeks ago) and I have cut just about all mine. Cutting the scape improves the storage of the bulb and flavor.

If you planted cloves from a bulb ok but if you planted the bubils that form on the end of an uncut scape (they are round about 1/4" in diameter) it takes years for those to develop into bulb tho they may provide snipping greens. Bubils don't even taste good and are not good for planting unless you want greens only.

Pole beans want lots of sun, putting them on the west side reduces the length of sun light, not sure why you want to do that.
 
Pole beans want lots of sun, putting them on the west side reduces the length of sun light, not sure why you want to do that.

Sugar snap peas are on the west side, not pole beans. I moved the peas there because the direct hot sun was a bit much for them. They get plenty of light, just not direct sun until the middle to end of the afternoon. They are very green and happy. :D

It seems every day, each plant has grown a bit more. It must be the homemade well-rotted compost I mixed in with the soil-less commercial mix I planted them in. I also scattered Osmocote pelleted fertilizer over the surface of each regular planter. The Eboxes I did according to the directions with the enclosed dolomite and fertilizer packages.

I have never had plants this healthy in the open garden out back. I'm hooked! :dance:

Garlic cloves came from supermarket garlic that I kept in a ceramic keeper in a dark cupboard. If it had a sprout, I planted it.

Backyard garden: No scapes yet on the volunteer garlic. I checked today when I was mowing the lawn.
Blackberries are just turning a bit pink and my 3 grapevines (cold hardy table grapes) are going bananas. I will go persuade the errant vines back onto the wood support planks tomorrow. I use soft cloth ripped into strips and/or thick cotton twine to attach them to the planks. I think my back garden is going to become a fruit and pumpkin garden. I have a self-pollinating dwarf Bing cherry tree and a blueberry bush in huge planters, both growing very nicely.
 
Amazon has a Container Gardening for Dummies for the Kindle for $9.99 here

http://www.amazon.com/Container-Gar...?s=digital-text&ie=UTF8&qid=1309215456&sr=1-1

I think I will download the Kindle version. :D I am an experienced gardener, but new to container gardening. This will give me something fun to read until Mr B gets back.

I'm reading this book today. It is excellent! Well worth the $9.99 price. :D

I have gardened since I was a child, and through my adult years, but a good refresher on climate, soil, watering, and sunlight needs for different plants never hurts.
One of the chapters deals with container gardening for persons with physical limitations of any type, including the ability to stand or bend. If you know someone who could benefit from this information, please pass it on. :flowers:
 
I'm reading this book today. It is excellent! Well worth the $9.99 price. :D

I have gardened since I was a child, and through my adult years, but a good refresher on climate, soil, watering, and sunlight needs for different plants never hurts.

I agree! I've been reading a bit each night. The details on the specific needs of different types of plants is really helpful to me. Also, it's giving me new ideas of things to plant. Like yellow beets. Also, I didn't know you could eat beet tops. Or the fact that putting an unlit match (for sulphur) and egg shells in the hole for each pepper is helpful for growth. So cool!
 
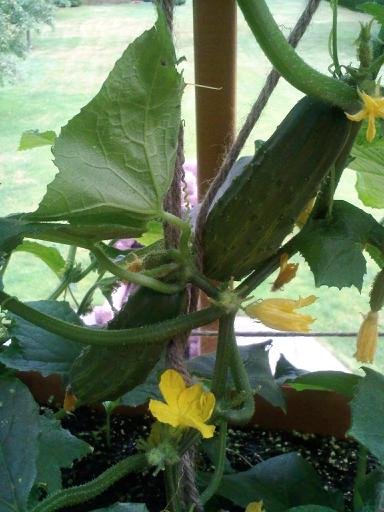
Harvest update...we enjoyed 1 fresh cucumber and 2 tiny filet beans. :D
Next week will be the real deal, with enough beans to serve 2 of us.
The taste of that 1 crisp cucumber, picked fresh off the vine, was enough to convince me to continue gardening this way. No backaches, no weeding, no pests (so far), and complete water, sunlight and fertilizer control.
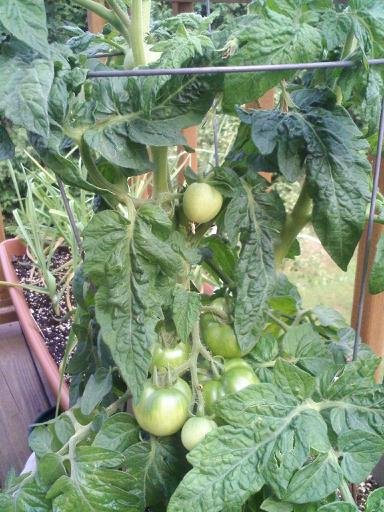
Every tomato plant is forming green fruit and going bonkers with more blossoms than I have ever seen on 1 plant. :dance:
No flowers on the sugar snap peas yet. It may be too hot for them, in spite of their shaded location. I haven't given up hope yet. :flowers:
The garlic is growing just like it would anywhere else. No scapes yet.
I have 1 more empty Earthbox and enough soil-less mix to fill it. I may grow some lettuce or mesclun mix greens once the temps get a bit cooler.
 
The taste of that 1 crisp cucumber, picked fresh off the vine, was enough to convince me to continue gardening this way. No backaches, no weeding, no pests (so far), and complete water, sunlight and fertilizer control.

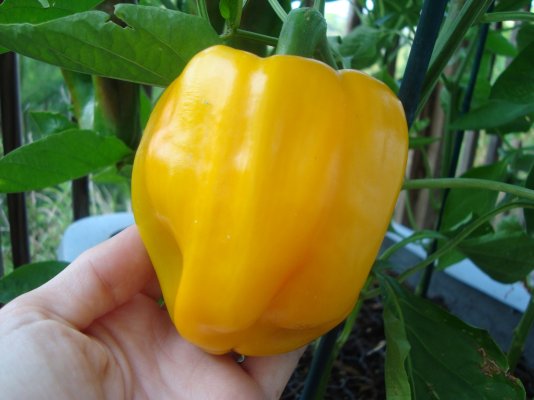
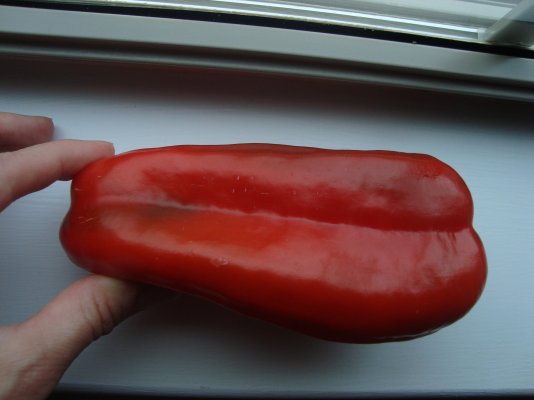
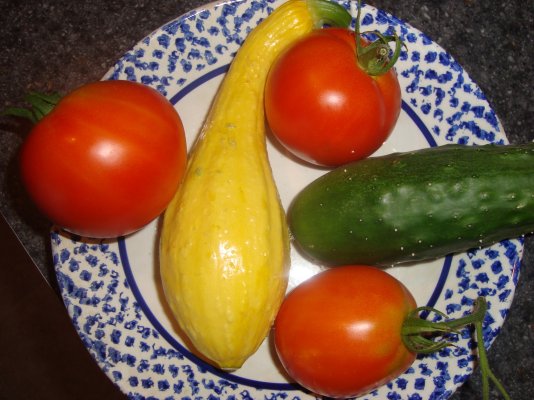
I agree, it's so rewarding, and much easier than I thought it would be! OK, I can't resist posting some pics of my garden harvest over the past few weeks:
 

Attachments

  • Gardening 002.jpg
    Gardening 002.jpg
    416.5 KB · Views: 5
  • Container Gardening 14 wks 002.jpg
    Container Gardening 14 wks 002.jpg
    376.9 KB · Views: 4
  • Container Gardening 10 wks 002.jpg
    Container Gardening 10 wks 002.jpg
    598.1 KB · Views: 4
Woooooo...nice looking veggies. :cool:

I am toying with the idea of cutting off some of those extra tomato and pepper blossoms so more energy can go into fewer fruits on a single plant. OTOH, the tomatoes are super fertilized with my own compost and tomato fertilizer stakes. The peppers and everything else are benefitting from compost and pelletized Osmocote.

Decisions, decisions...:confused:

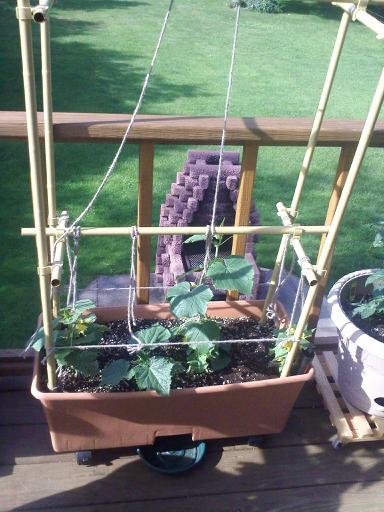
The cucumbers don't need to be de-blossomed. Every single flower is producing a nice little cuke. The vines are now almost 4 feet tall with splendid leaf growth. I am out there every day gently training them to the twine I hung from the faux bamboo poles.

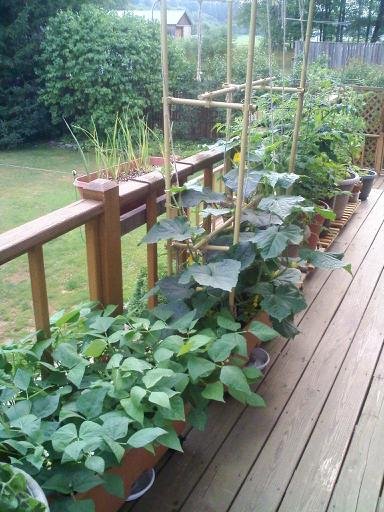
The filet beans are loaded with blossoms. No need to mess with them.
 
No flowers on the sugar snap peas yet. It may be too hot for them, in spite of their shaded location. I haven't given up hope yet. :flowers:
The garlic is growing just like it would anywhere else. No scapes yet.

I don't grow in containers.

I am surprised that you haven't gotten any peas yet. I pulled mine 2 weeks ago after 3 weeks of peas.

No scapes yet? I cut mine 3-4 weeks ago and dug my garlic a week ago.

I am surprised by these 2 things. You are in the same latitude as I am.
 
I don't grow in containers.

I am surprised that you haven't gotten any peas yet. I pulled mine 2 weeks ago after 3 weeks of peas.

No scapes yet? I cut mine 3-4 weeks ago and dug my garlic a week ago.

I am surprised by these 2 things. You are in the same latitude as I am.
I did not plant anything in my traditional garden. My hands have been bothering me, so I did not want to further strain them. I went thru all the bilateral carpal tunnel and tendinitis thing years ago. I have achieved a steady state :D on how much I can do manually without reinjuring them. Tilling and raking a huge garden is not on that list of possibilities.

I planted my peas (container) very late. I checked more closely today and sure enough there were 3 flowers. I am not expecting too much yield.
Garlic got planted in early summer, in the Earthbox, just as an experiment. It is acting just like it should. I expect scapes any week now. I will remember your advice to trim them back. :flowers:

My regular garden will be devoted to large space crops next year. Once the weeds die down, I will get out there and weedwhack them down, followed by black plastic mulch to prevent a spring regrowth.
I plan to do early seedless watermelons, pumpkins, maybe some blueberry bushes, and transplant some of the abudant blackberry runners. The blackberries need more space than they have right now next to my grapevines. I will transplant the new plants and dig out/move the old ones before they get too big.
 
How my garden grows...;)
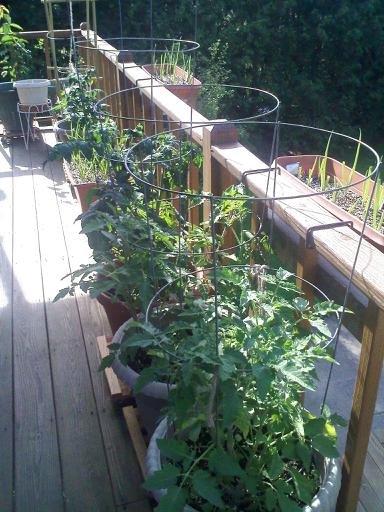
A few Before and After shots, and lots of tomatoes forming on a single plant in a standard round container. :dance:
 

Attachments

  • downsized_0627011728.jpg
    downsized_0627011728.jpg
    42.5 KB · Views: 4
  • downsized_0719010945.jpg
    downsized_0719010945.jpg
    36.4 KB · Views: 5
  • downsized_0627011727.jpg
    downsized_0627011727.jpg
    49.9 KB · Views: 4
  • downsized_0719010941.jpg
    downsized_0719010941.jpg
    50.1 KB · Views: 5
  • downsized_0719010944.jpg
    downsized_0719010944.jpg
    49.8 KB · Views: 4
How my garden grows...;)
A few Before and After shots, and lots of tomatoes forming on a single plant in a standard round container. :dance:

What's the tomato variety you planted? It's pretty robust in it's production!

BTW, my squash plant died:-((( Keeled over and wilted in just a half day. I suspect squash vine borers. :( A lot of my local friends have lost their squash plants, so it seems to be something regional.
 
Got 4 Cherry tomatoes off the container plant. YUM Have had 4 Zucchini. Squash and other tomatoes in ground are doing well I am having to water every two days as we have had little to no rain.
 
BTW, my squash plant died:-((( Keeled over and wilted in just a half day. I suspect squash vine borers. :( A lot of my local friends have lost their squash plants, so it seems to be something regional.

My squash plant is showing possible signs of recovery today. I am now thinking I might have over-fertilized it. I gave it the same amount of fertilizer as my tomatoes (2 in a tub) and cucumbers (4 in a tub), whereas it is only one squash plant in a tub. Duh. I flushed it with water yesterday, plus it rained last night, and it is showing some unwilted nice green leaves today...keeping my fingers crossed.

On a side note, I did not know that with container gardening you need to fertilize with liquid fertilizer on a weekly basis. According to the book I am reading, container plants need more fertilizer because you are flushing the nutrients out with each watering. Since I started fertilizing a few weeks ago, my harvest has almost doubled, it seems. It's a learning process, though, to figure out how much to fertilize without overdoing it...apparently, LOL.
 
What's the tomato variety you planted? It's pretty robust in it's production!

BTW, my squash plant died:-((( Keeled over and wilted in just a half day. I suspect squash vine borers. :( A lot of my local friends have lost their squash plants, so it seems to be something regional.
Bummer about your squash. :(

I bought 2 individual container tomato plants at Lowe's for $3.50 each. The one I showed in the closeup pic here is Patio FASt, a determinant type
Bonnie Plants Varieties - Vegetable Plants and Herb Plants Gardeners Trust

the other one is Bush Goliath VFN, also a determinant type
Bonnie Plants Varieties - Vegetable Plants and Herb Plants Gardeners Trust

The Roma tomatoes were grown from seed indoors under my grow light setup.
Each tomato container has 2 Job's tomato stakes and lots of compost mixed into the soil-less mix.
 
My squash plant is showing possible signs of recovery today. I am now thinking I might have over-fertilized it. I gave it the same amount of fertilizer as my tomatoes (2 in a tub) and cucumbers (4 in a tub), whereas it is only one squash plant in a tub. Duh. I flushed it with water yesterday, plus it rained last night, and it is showing some unwilted nice green leaves today...keeping my fingers crossed.

On a side note, I did not know that with container gardening you need to fertilize with liquid fertilizer on a weekly basis. According to the book I am reading, container plants need more fertilizer because you are flushing the nutrients out with each watering. Since I started fertilizing a few weeks ago, my harvest has almost doubled, it seems. It's a learning process, though, to figure out how much to fertilize without overdoing it...apparently, LOL.
I've done exactly the same thing in my regular garden in past years, using a Miracle Grow fertlizer sprayer. This is why I use Osmocote pelletized slow release fertilizer or Job's plant spikes for tomatoes in the larger round containers (not Earthboxes). When the pellets disappear, I add more right on the surface but not touching the plant stem. You can get good sales on fertilizer in late season to use next year.

I'm using the fertilizer provided with the Earthbox and not adding any more.
 
On a side note, I did not know that with container gardening you need to fertilize with liquid fertilizer on a weekly basis. According to the book I am reading, container plants need more fertilizer because you are flushing the nutrients out with each watering. Since I started fertilizing a few weeks ago, my harvest has almost doubled, it seems. It's a learning process, though, to figure out how much to fertilize without overdoing it...apparently, LOL.
Hmm, that's not in the "official" Earthbox instructions and I've never read it anywhere. It doesn't sound right, either. Earthbox recommends "regular" granulated fertilizer buried in strips very near the top of the container, right under the plastic. The moist soil (water from the bottom, from the resevoir) dissolves these granules over time, so they last the whole growing season. Most of what I've read agrees with this--no use of Osmocote or other slow-release fertilizers needed.
In your source, to where do they say the nutrients get "flushed?" I could understand that in plants put in a regular garden, but the self-watering containers can't lose nutrients except maybe to be dissolved into the reservoir--which gets re-exposed to the potting soil each time you fill up the reservoir. The only stuff leaving the container "system" is leaving by evaporation.
 
Bummer about your squash. :(

I bought 2 individual container tomato plants at Lowe's for $3.50 each. The one I showed in the closeup pic here is Patio FASt, a determinant type
Bonnie Plants Varieties - Vegetable Plants and Herb Plants Gardeners Trust

Ah, determinate - that's why you have so many all at once!


I've done exactly the same thing in my regular garden in past years, using a Miracle Grow fertlizer sprayer. This is why I use Osmocote pelletized slow release fertilizer or Job's plant spikes for tomatoes. When the pellets disappear, I add more right on the surface but not touching the plant stem. You can get good sales on fertilizer in late season to use next year.

I do use osmocote slow release, but the container gardening book recommended liquid fertilizer as well. The osmocote really didn't give it the kick of growth like the liquid did. For now, I am going to keep experimenting with the liquid fertilizer - but more carefully!!!
 
Hmm, that's not in the "official" Earthbox instructions and I've never read it anywhere. It doesn't sound right, either. Earthbox recommends "regular" granulated fertilizer buried in strips very near the top of the container, right under the plastic. The moist soil (water from the bottom, from the resevoir) dissolves these granules over time, so they last the whole growing season. Most of what I've read agrees with this--no use of Osmocote or other slow-release fertilizers needed.
In your source, to where do they say the nutrients get "flushed?" I could understand that in plants put in a regular garden, but the self-watering containers can't lose nutrients except maybe to be dissolved into the reservoir--which gets re-exposed to the potting soil each time you fill up the reservoir. The only stuff leaving the container "system" is leaving by evaporation.

Hmmm..that's true. My source is Amazon.com: McGee & Stuckey's Bountiful Container: Create Container Gardens of Vegetables, Herbs, Fruits, and Edible Flowers (9780761116233): Rose Marie Nichols McGee, Maggie Stuckey: Books. I suspect that they were writing it for normal containers, not self-watering, now that I think about it. Hmmm....didn't think about that! Thanks!
 
I have read that if a leaf is damaged by pests or is yellowing, snip it off immediately, cutting very close to the main stem, to prevent the plant from trying to "save it" or to control leaf born diseases and/or get rid of any insect eggs deposited on the underside. If the plant is still healthy, it will grow new foliage to replace the damaged ones.
 
I have read that if a leaf is damaged by pests or is yellowing, snip it off immediately, cutting very close to the main stem, to prevent the plant from trying to "save it" or to control leaf born diseases and/or get rid of any insect eggs deposited on the underside. If the plant is still healthy, it will grow new foliage to replace the damaged ones.

I've already snipped off all the dead stuff - didn't know to snip it close to the main stem though - thanks! Keeping my fingers crossed!
 
I've already snipped off all the dead stuff - didn't know to snip it close to the main stem though - thanks! Keeping my fingers crossed!
Hope it recovers. If possible, get it out of the hot sun but still in bright light until it springs back.
I just planted my remaining Earthbox with more sugar snap peas, and some baby radishes in a 6" deep windowbox. The heat wave should be over by the time they are growing to full height.
I will use an expandable metal pea fence (on hand) to support the peas when they come up. :D
http://www.gardeners.com/Expandable-Pea-Fence/SummerSaleGardening,35-061RS,default,cp.html
 
Hmm, that's not in the "official" Earthbox instructions and I've never read it anywhere. It doesn't sound right, either. Earthbox recommends "regular" granulated fertilizer buried in strips very near the top of the container, right under the plastic. The moist soil (water from the bottom, from the resevoir) dissolves these granules over time, so they last the whole growing season. Most of what I've read agrees with this--no use of Osmocote or other slow-release fertilizers needed.

Took some time to read the FAQ's on the earthbox site. Very helpful - thanks for pointing me in the right direction! I'm afraid it's too late now to add the fertilizer strip (would hate to disrupt the root system?), but I definitely will be following these tips for next year. Also, they offer other good tips as well.

FAQ | EarthBox
 
Back
Top Bottom