The Photographers' Corner 2013-2020

Status
Not open for further replies.
I did a little tree work on this one ... thanks for the nudge Walt34 ;)


Local Traffic by KBColorado, on Flickr

Very nicely done. It really does improve the shot, which was already beautiful.

One thing, and maybe it's just me - but I see the head of a little seal pup (side view, eyes and nose and outline of the head), or maybe the dog in your avatar in the branches at the left frame, just above the horses nose.

-ERD50
 
Thanks for the kind words. Audrey, I started with the content aware tool and then cleaned up some unnatural looking spots with the cloning tool.
 
Thanks for the kind words. Audrey, I started with the content aware tool and then cleaned up some unnatural looking spots with the cloning tool.
That content aware fill is a pretty amazing tool, isn't it?
 
Very nicely done. It really does improve the shot, which was already beautiful.

One thing, and maybe it's just me - but I see the head of a little seal pup (side view, eyes and nose and outline of the head), or maybe the dog in your avatar in the branches at the left frame, just above the horses nose.

-ERD50

There is a little artifact there of some sort but my imagination is not as strong as yours, just looks like a smudge :cool:
 
That is really beautiful. How does it look if you lighten the overall exposure a bit? There are some really intriguing details in the darks, so I'm thinking it might look really good lighter as well.
thanks - I'll give a lighter exposure a try
 
... I see the head of a little seal pup (side view, eyes and nose and outline of the head), or maybe the dog in your avatar in the branches at the left frame, just above the horses nose.

-ERD50
I see a cute seal pup, too :).
 
That is really beautiful.

How does it look if you lighten the overall exposure a bit?

There are some really intriguing details in the darks, so I'm thinking it might look really good lighter as well.

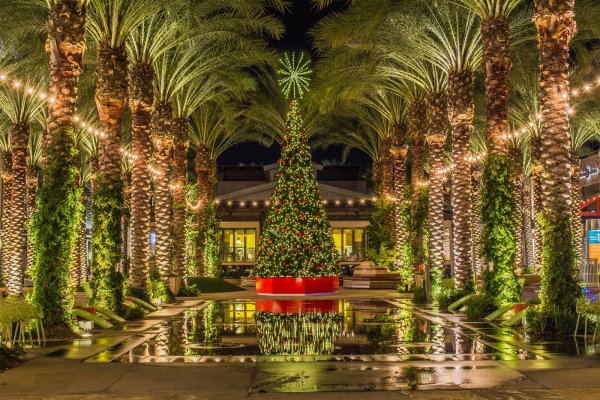
Audrey - Here it is - lighten exposure and saturated greens and reds a little. I think I like the lighter version. Thanks for the advice!
 

Attachments

  • ChristmasLightsScottsdale2.jpg
    ChristmasLightsScottsdale2.jpg
    1.2 MB · Views: 31
Audrey - Here it is - lighten exposure and saturated greens and reds a little. I think I like the lighter version. Thanks for the advice!
Cool! I thought the palms might pop out against the dark sky.
 
Very nice, Ronstar !

When I took a photography class and we started critiquing each other's photos, the number 1 correctable problem was underexposure. I am as guilty as any ... these days when I think I am done working on a photo, I always lighten it up a bit to see if that improves the result.
 
Last edited:
Very nice, Ronstar !

When I took a photography class and we started critiquing each other's photos, the number 1 correctable problem was underexposure. I am as guilty as any ... these days when I think I am done working on a photo, I always lighten it up a bit to see if that improves the result.

Often the only thing I do to photos is tweak the brightness/contrast...
 
Very nice, Ronstar !

When I took a photography class and we started critiquing each other's photos, the number 1 correctable problem was underexposure. I am as guilty as any ... these days when I think I am done working on a photo, I always lighten it up a bit to see if that improves the result.

Night photographs outside are a particularly challenging in this respect, as the scene is naturally dark overall . So the photographer has to make a judgement call about how light to present the scene.
 
Very nice, Ronstar ! When I took a photography class and we started critiquing each other's photos, the number 1 correctable problem was underexposure. I am as guilty as any ... these days when I think I am done working on a photo, I always lighten it up a bit to see if that improves the result.

Thanks Mr. Paul. I just bought a book that suggests the same thing. The book even suggested to underexpose on purpose. Up until recently, my daytime shots were overexposed and nighttime ones were underexposed. And I noticed that the overexposed ones were tough to fix. So now I'm underexposing a little just to get a more workable photo
 
Pathetic opposite is true in film - slight overexposure creates a thicker negative which holds detail, increases saturation, and prevents shadows from losing detail. Digital works in the opposite direction: under exposure holds detail and increases saturation, while preventing loss of detail in highlights. The nice thing about digital is one can check the highlights for detail - then retake if necessary. Using film, and if relying on a single meter reading, I generally over exposed one stop with consistent results I like. Using the DSLRs meter, I start with a one stop under exposure, then check the results. A spot meter makes the correction unnecessary, as both highlight and shadow can be individually metered.
 
Haven't been to this thread for a while, and I'm seeing some very nice photos posted.
 
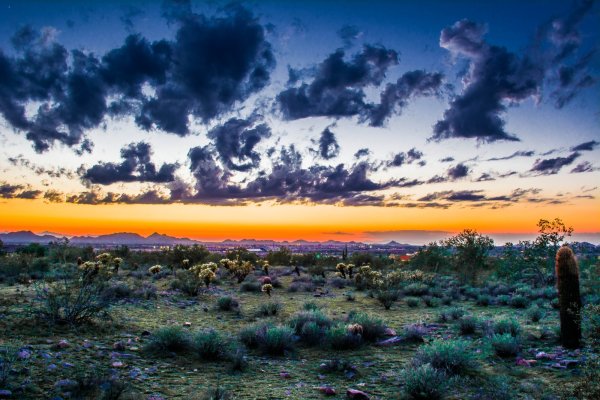
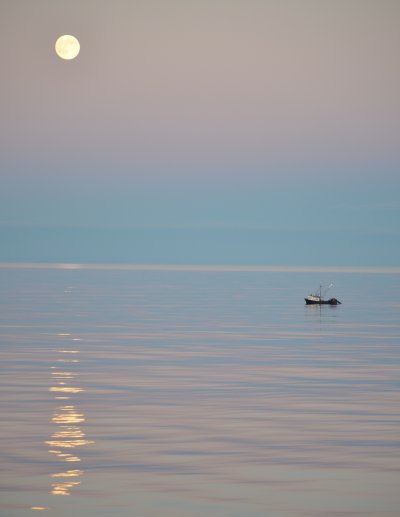
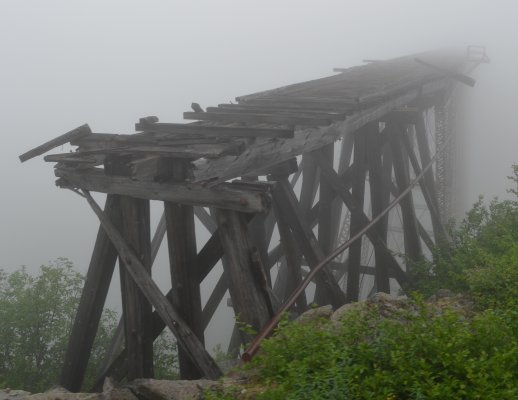
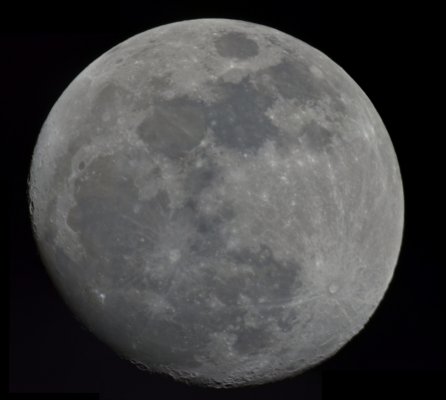
Just discovered this thread. Have enjoyed working my way through the posts and admiring the photos. Late last year, I bought a Nikon D5100 for use in retirement travel, but have found myself using it for much more than travel. Here are a few samples:
First photo is of the 2013 Summer Solstice Super Moon taken just after midnight sunset from a balcony of the Celebrity Millennium while in the Queen Charlotte Sound off the coast of Alaska.

Second photo is of an abandoned spur of the White Pass & Yukon RR taken from a rail car as train descended from the summit in thick fog.

Third photo is a composite of a number of images taken by attaching the DSLR to my 8" Dob telescope (effectively adding a 1200mm telephoto lens to the camera). With that level of magnification, less than a quarter of the moon is in the frame. So I had to take a number of photos which I then stitched together using the free Image Composite Editor (ICE) from Microsoft Research [Highly recommended].
 

Attachments

  • DSC_2531.jpg
    DSC_2531.jpg
    273 KB · Views: 25
  • DSC_3632.jpg
    DSC_3632.jpg
    406.3 KB · Views: 21
  • Waxing Gibbous Moon Stitch (24JAN2012) (1920x1723) (2).jpg
    Waxing Gibbous Moon Stitch (24JAN2012) (1920x1723) (2).jpg
    300.6 KB · Views: 29
Third photo is a composite of a number of images taken by attaching the DSLR to my 8" Dob telescope (effectively adding a 1200mm telephoto lens to the camera).

How do you attach the camera to the telescope? I imagine there's some sort of bracket/mount to do that. While I know the mount to the camera has to be specific for that brand, is the other end for the telescope an industry standard or does that have to be made for the specific make or even model of telescope?

Admittedly I haven't done a lot of looking for mounts (I don't even have a telescope) but I've never seen one advertised either.

A universal T-adapter replaces the eyepiece on the telescope. This adapter is not specific to the brand of telescope. A T-mount, specific to the camera brand, mates the camera to the T-adapter. These parts are available from almost any telescope or photo retailer.
 
Great shots Mr Paul & Southern Geek!

Here's a shot of Paige, our overnight house guest
 

Attachments

  • paige1.jpg
    paige1.jpg
    498.2 KB · Views: 25
Status
Not open for further replies.
Back
Top Bottom