What We're Making

The sauna looks great. I have been reading and listening (podcasts) about all the positive health effects of sauna use. I want one! The only place I have is on a screened porch on the back side of the house. I'm wondering if I could frame it with aluminized styrofoam panels and then build the seating arraingement inside and not have any attachment to the walls. The panels come in many thicknesses, but 2" should be plenty. I have attached a picture of the foam material. I have questions about outgassing of the foam, although the seams would all be sealed from the foam, what 185* temps would do to the foam and fire threat.

We had a pontoon boat with a room and roof made of the material, that we used for 18 years before a hurricane beat it up.
Did you put a finish on the seating in your sauna? What wattage is the heater? How long does it take to bring it up to (what) temperature.?

Have you looked at the complete sauna kits? Comes with everything, takes maybe 2 hours to assemble/disassemble, the smaller units (2 people size) can usually plug into any 115V outlet. I have one and like it.
 

Attachments

  • sauna2.jpg
    sauna2.jpg
    130.4 KB · Views: 86
Nice. And yes, as soon as clicked, I figured this also would be put to use in your beer brewing (BTW, have you tried the Kveik Yeast strains? They ferment clean at high 90F range! ). Now I'm really curious. I've never tried modifying the cooling coils on a fridge/freezer before, but when I saw you bend those coils, I cringed. And I guess the first attempt was a failure?
Yep. It actually cooled after I pulled the coils from the foam, but after the final bit of assembly, it no longer chilled. I had no use for that fridge (came back from the kid's dormitory), so not much of a loss.
So how much water do you use per cold shower? And what temp delta? It's not hard to calculate the BTUs (or joules in SI) needed to chill your water supply, and what it takes to deliver that.

I'm really wondering if you need to go to these extremes. If it is 24 hours between cold showers, I bet the cold water reserve would hit very close to the fridge temp setting even w/o direct contact to the coils.
The only reason I did the direct method was because I pulled the coils (on the first fridge). On the second fridge, the coils were not immersed.
Or how about a mini-freezer? Using anti-freeze, you could be at 0F instead of 34F, and almost double your delta-T. And it would not be hard to add some ice packs to the coolant. As I'm sure you know, the phase change of water absorbs ~140x more heat than the water alone.
I thought about freezer / anti-freeze, but figured this was good enough. If I take a long cold shower, I notice it's not quite as cold at the end, but still plenty cold. And the fridge recovers, gets down to 39 degrees and cycles off in much less than 24 hours, which is my requirement.
Hmm, maybe even simpler - several (to increase the surface area) big blocks of ice in containers in the freezer. Have the overage drain to a bucket outside at room temp with the pump. The pump drives that room temp water over the ice, and through the counter-flow chiller.

I could draw up a simple diagram if that's not clear.

Also, with your current setup, won't that stored water get slimy, even if kept cold?

-ERD50
I figured I'd put a splash of beach in it every so often. As to the blocks of ice thing, I wanted something really easy, no separate steps, nothing to prepare, nothing to clean up...just press a button when I want cold.
 
Did you put a finish on the seating in your sauna? What wattage is the heater? How long does it take to bring it up to (what) temperature.?
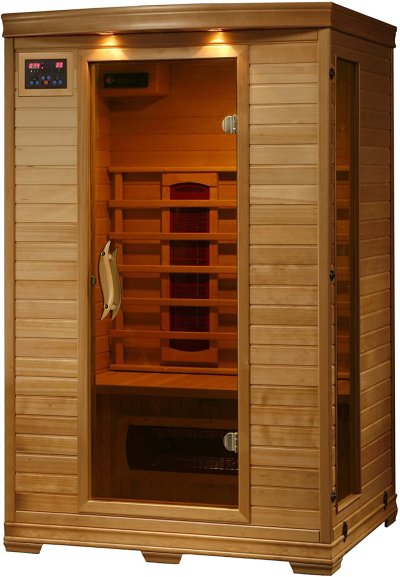
The company that sold me the kit said that some people choose to put a sealer on the wood, and some people choose not to. They warned against any sealer that wasn't specifically for saunas, I suppose for toxicity. I did not seal the wood. I have been sponging off the bench when I'm done. The heater is 4.5 KW. I have always set the timer to come on when I want to step in, so haven't been waiting for it to heat up. I give it 45 minutes or so to heat up, and it's always been at 155 at head height (but near the ceiling, it's much hotter...like 30 more degrees). I need to get a better feel for how long it takes to heat up, but it's certainly less than 45 minutes. The sauna temp / hygrometer that my daughter bought me takes longer to respond, whereas the electronic indoor/outdoor thermometer responds quickly, and the slow response one always said 155 when I stepped in after 45 minutes. I have the control set to 5 out of 9, and 155 is where it stops.

I think the foam panels would work, but you'd need a waterproof floor and some kind of structure to keep it from blowing away, and structure to mount the benches. In my case, the insulation was a small part of the sauna construction. For me, having a pleasing interior, the cedar wood, is a huge part of the experience. As mentioned earlier, you can get stand-alone sauna kits that can just be placed on your patio. That sounds like what you want if you're in a hurry. The stand-alone (whether a kit or from scratch) have more surfaces to worry about. I had 6 (cement floor, four walls and a ceiling, but you'd have another 5 (4 exterior walls and a roof). You'd basically be building a small exterior building, which is more complicated than what I had to do (frame an interior space, insulate, then nail cedar T&G). I've only used it 8 or 10 times so far, but really feel wonderful after I do.

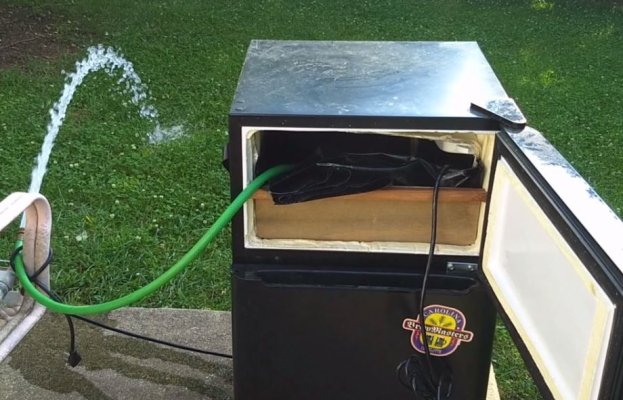
One more thing...I'd warn against going with 110V unless you knew it heated up fast enough for you. I got lazy, didn't want to run a 220 line for my steam generator (not my new sauna, but my old steam generator). As a result, it takes so long to start generating steam that I rarely use it. It doesn't have enough "umph". The sauna, on the other hand, the heater I bought can't be used in a smaller sauna than mine (meaning, it's got plenty of "umph").
 
Last edited:
.... As to the blocks of ice thing, I wanted something really easy, no separate steps, nothing to prepare, nothing to clean up...just press a button when I want cold.

Right. I was thinking about blocks of ice in a container in a small freezer, not taking them in/out from a freezer to your fridge. The small supply of water outside the freezer would be pumped up to flow over the ice blocks, and drain out by gravity. So the circulating water would not freeze, but it would melt some ice as it flowed over it, getting chilled near 32F in the process, which would then run into your counter-flow chiller.

Again, melting ice will absorb ~ 144x the heat that water raised one degree F will. Sounds like you have something working, but this just seems way simpler to me. The only mod to the mini-freezer would be getting the circulating water in/out, which you need to do anyhow. It might even work well enough to leave a shelf open for food items?

-ERD50
 
Right. I was thinking about blocks of ice in a container in a small freezer, not taking them in/out from a freezer to your fridge. The small supply of water outside the freezer would be pumped up to flow over the ice blocks, and drain out by gravity. So the circulating water would not freeze, but it would melt some ice as it flowed over it, getting chilled near 32F in the process, which would then run into your counter-flow chiller.
Ok, I didn't get your meaning before. You'd need to pump out of some kind of reservoir. That reservoir could be room temperature or refrigerated, but not freezer temperature. So out of the reservoir into the heat exchanger, over the ice blocks, back into the reservoir. Depending on the flow rate and the temperature, the ice blocks would either grow or shrink. Not something I would call simple. Let us know when you get all that working :)
 
Ok, I didn't get your meaning before. You'd need to pump out of some kind of reservoir. That reservoir could be room temperature or refrigerated, but not freezer temperature. So out of the reservoir into the heat exchanger, over the ice blocks, back into the reservoir. Depending on the flow rate and the temperature, the ice blocks would either grow or shrink. Not something I would call simple. Let us know when you get all that working :)

No, I don't see that as a problem. The output is lower than the input, so it always drains to that level, the ice never shrinks or grows, other than melting during use and re-freezing, but always to the same level.

It seems simple in my mind, so I drew it out, and yes, I think it would be simple. After I drew it, I realized you probably need it closed loop to overcome the flow restriction of the heat exchanger, so the pump pulls the circulating water out through it, but I that doesn't really change anything (add another small 'leak-hole' to allow the pipes to drain out when the pump is off). You'd need to size the outlets to handle the flow, but again, seems do-able to me.

You could also seal the tops to withstand a few PSI so the circulating pump could push it through and not rely on gravity. Stainless steel steam table pans might be a good match for this.

Here's my sketch:

-ERD50
 

Attachments

  • ICE_HEAT_EXCH.pdf
    25.8 KB · Views: 27
Here's my sketch:
You do a great sketch; your intent is clear at a glance! Now I see how you keep the size of the ice blocks from changing. I agree on the need for closed vessels that could take the PSI of the pump. And the vessels would have to expand without breaking to get through the water expansion during the phase change. Although it's an interesting idea, I'm not convinced that this would be more effective than what I have. And I'm pretty sure it would cost more and be harder to build. At least I can't come-up with a way to easily implement it, specifically a cheap source for the closed vessels that could take freeze/thaw and have low-pressure connections. But a bigger concern is the effectiveness. Thermodynamics was one of my least favorite classes in college, hehe! The reason for questioning the effectiveness isn't based on formulas, but I figure you'd be running a good bit of water over a limited number of square inches of ice. Obviously "too much" water over "too few" square inches wouldn't give a temperature drop below 39F (which is what's in my simpler mini-fridge system).

The picture shows the rate of flow of the pump I'm using. That's a lot of water volume to chill "on demand".
 

Attachments

  • watervolume.jpg
    watervolume.jpg
    104.3 KB · Views: 37
You do a great sketch; your intent is clear at a glance! Now I see how you keep the size of the ice blocks from changing. ....

Thanks, glad it was clear. Yes, the real question is the flow - will it get below 39F in the time it has to flow over the ice? That's not straight math, it would take an expert to be able to predict it, us mere mortals would need to experiment. I thought of some relatively simple ways to greatly increase the surface area, but even simple is making it a bit more complex. Add that is a lot of flow, open containers and gravity won't cut it.

With a shallow container open at the top, and especially if it is tapered even a bit (like a steam table tray), I don't think the expansion is an issue, but I can't be certain of that. Like a big ice cube tray, it just expands into the open space. But if the flow requires a sealed container, I agree that's probably just too complex.

Or the other mini-freezer alternative I mentioned earlier (or one shelf of a full size freezer that could still be used for other purposes), anti-freeze in a covered container. It wouldn't see any pressure build-up. And floating some ice packs in there should give you some phase change action, which absorbs a LOT of heat.

Just something to consider if you ever need to re-do your set up (hope you don't!).

-ERD50
 
Made a small occasional table/dipped leg stool for beside my [-]drinking[/-] thinking chair out of scrap lumber.
 

Attachments

  • IMG_20200718_082912.jpg
    IMG_20200718_082912.jpg
    643.5 KB · Views: 57
Made a small occasional table/dipped leg stool for beside my [-]drinking[/-] thinking chair out of scrap lumber.

I see myself putting off that project for months as I consider carving the white parts in the same profile as the base molding, ultimately deciding not to.
 
Have you looked at the complete sauna kits? Comes with everything, takes maybe 2 hours to assemble/disassemble, the smaller units (2 people size) can usually plug into any 115V outlet. I have one and like it.

+1.

We bought a tent style that you poke your head out of on Amazon for ~$100 to see if we would use it. We do, so our upgrade is exactly like your photo - 2 people capacity & 115 VAC.

The tent style looks incredibly goofy. But, if one can get past that, it does what you want a sauna to do, and does it very well.
 
I see myself putting off that project for months as I consider carving the white parts in the same profile as the base molding, ultimately deciding not to.

I am highly color blind but DW assures me the baseboard and the dipped legs are two different colors of white...:facepalm:

Luckily I can't see it so I'll just have to ruminate on its other shortcomings... :LOL:
 
Or the other mini-freezer alternative I mentioned earlier (or one shelf of a full size freezer that could still be used for other purposes), anti-freeze in a covered container. It wouldn't see any pressure build-up. And floating some ice packs in there should give you some phase change action, which absorbs a LOT of heat.
I was showing my chiller to my daughter (engineer) who came to visit, and I learned that there's a thick block of ice in the area adjacent to the coils! So although the temperature probe still reads 39, it's in with a sizable block of ice. There's mostly water, but it looks like maybe 4 inches thick by 12 wide and 10 high.
 
Solar panel rack and mounting in process at camp.
 

Attachments

  • Solar pannel mounting.jpg
    Solar pannel mounting.jpg
    103.6 KB · Views: 50
Cutting board from leftover pieces of walnut, cherry, mahogany, and maple
 

Attachments

  • 32FC78B0-AD12-4D9E-B4ED-DEE565A591C2.jpeg
    32FC78B0-AD12-4D9E-B4ED-DEE565A591C2.jpeg
    938.1 KB · Views: 41
That is beautiful! I remember some making them in shop class while in HS.
 
That is beautiful! I remember some making them in shop class while in HS.

Thanks! I miss those HS shop class days!

Wow! Gorgeous!!! How do you protect it from liquid damage - some kind of oil treatment?

After sanding to 220, I wet the board a little to raise the grain. Then let it dry and sand to 220 again. Then I applied several coats of mineral oil over a few day period, letting the mineral oil soak in a while and wiping off excess. Then a few coats of Howard cutting board conditioner - a mixture of mineral oil and beeswax. Same thing - let it soak in, then wipe off excess. Then a few coats of beeswax rubbed in.

The board will dry out somewhat and the grain may raise a little after some use - maybe 6 months. Then just apply more mineral oil and/or wax to bring it back.

Beautiful!! Do you glue the pieces together or...?

Thanks - Yes I start with individual wood strips and glue and clamp them together into a single board. Then unclamp and crosscut this board into a series of strips that now consist of alternating small pieces of different woods glued together. Then flip them over so that the end grain is face up and glue/clamp all these new strips into a single board. Then sand / finish.
 

Attachments

  • Screen Shot 2020-08-30 at 7.33.52 PM.jpg
    Screen Shot 2020-08-30 at 7.33.52 PM.jpg
    417.1 KB · Views: 62
  • Screen Shot 2020-08-30 at 7.34.08 PM.png
    Screen Shot 2020-08-30 at 7.34.08 PM.png
    1.8 MB · Views: 54
  • Screen Shot 2020-08-30 at 7.34.29 PM.png
    Screen Shot 2020-08-30 at 7.34.29 PM.png
    1.6 MB · Views: 55
Thanks! I miss those HS shop class days!


After sanding to 220, I wet the board a little to raise the grain. Then let it dry and sand to 220 again. Then I applied several coats of mineral oil over a few day period, letting the mineral oil soak in a while and wiping off excess. Then a few coats of Howard cutting board conditioner - a mixture of mineral oil and beeswax. Same thing - let it soak in, then wipe off excess. Then a few coats of beeswax rubbed in.

The board will dry out somewhat and the grain may raise a little after some use - maybe 6 months. Then just apply more mineral oil and/or wax to bring it back.


Thanks - Yes I start with individual wood strips and glue and clamp them together into a single board. Then unclamp and crosscut this board into a series of strips that now consist of alternating small pieces of different woods glued together. Then flip them over so that the end grain is face up and glue/clamp all these new strips into a single board. Then sand / finish.

Wow, I had no idea how it was made. Thank you very much for the photos showing the process! Very, very pretty.
 
Last edited:
Made my sister a "Chippendale" planter as a house warming present. Not my greatest work but I was sooo glad to see the back of this thing. 4 coats of Varathane by hand wore out my patience.
 

Attachments

  • IMG_20200911_142814436-1.jpg
    IMG_20200911_142814436-1.jpg
    711.8 KB · Views: 59
Back
Top Bottom