What We're Making

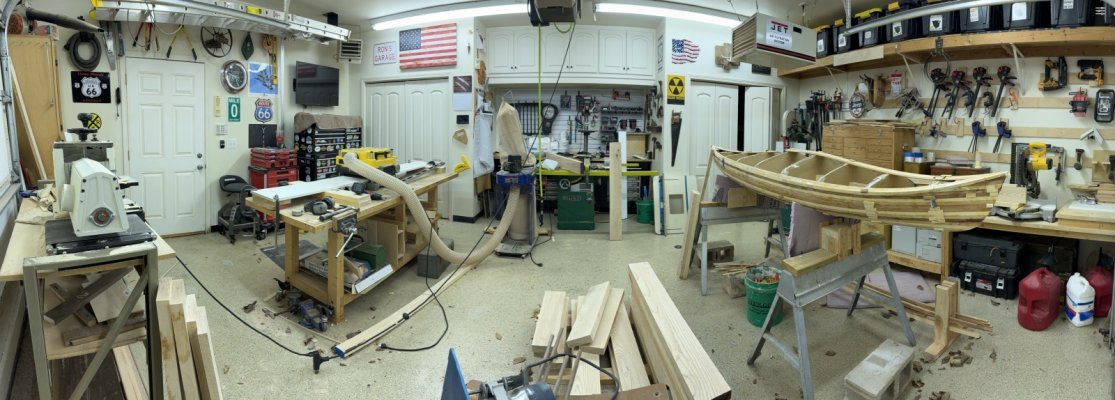
I've done some research and find that epoxy/ fiberglass work on my kayak should not be done in less than 70°. So I'm taking a break on building my kayak and have started my woodworking workbench. Barely started. It's the pile of wood in the lower middle.
 

Attachments

  • Screenshot 2023-11-07 at 6.11.12 PM.jpg
    Screenshot 2023-11-07 at 6.11.12 PM.jpg
    423.4 KB · Views: 28
What a great work area you have Ronstar. I have been wondering how that kayak project has been going. I did see you were doing some traveling of late.

Well keep us informed on that next project.
 
What a great work area you have Ronstar. I have been wondering how that kayak project has been going. I did see you were doing some traveling of late.

Well keep us informed on that next project.

Thanks - Our recent east coast road trip took us a few blocks away from Chesapeake Light Craft, the dealer that I got my kayak supplies from. I stopped in, got a tour and asked the old timer kayak maker a few questions. Mainly the best temp for applying fiberglass and epoxy. He told me that I should wait until spring to epoxy/ fiberglass. So I am. But I have a few projects in the hopper to get me through the winter.
 
Yeah, I’m jealous of all that space in your shop. I work out of a 2 car garage, and everything needs to be cleaned up and put away every night. My SawStop and dust collector are each on a rolling base. My bandsaw, drill press, jointer and planer are all benchtop models. Not the most ideal arrangement but I make it work.
 
Yeah, I’m jealous of all that space in your shop. I work out of a 2 car garage, and everything needs to be cleaned up and put away every night. My SawStop and dust collector are each on a rolling base. My bandsaw, drill press, jointer and planer are all benchtop models. Not the most ideal arrangement but I make it work.

Yep, I also work out of a garage and on patio when doing projects.
 
I agree. All are a little finicky on install, but if you square up everything, they all seem to work. I'm doing self closings on the dresser and they work just fine. Lontan is the brand... Even if I have to replace them in a few years, I'd rather take the chance...plus the drawers are easier to make.

I got 10 pairs of Lontan soft close slides and got them all installed in the kitchen now. The boxes, made of 3/4 plywood, weigh 13 pounds! This was the widest cabinet yet, but also the most useful...I found that although you can see everything, and get to everything, you can't get quite as much stuff in the cabinets with the drawers compared to heaping it in with no drawers. This is more true on the narrower cabinets.

I presumed my factory cabinets were square, but that wasn't always true. Near the bottom, yes, but on this wide cabinet, near the top, not true. I used the brackets, so a simple matter of moving one side over to get the slides parallel.

 
Last edited:
Oooo, I like shop pictures. Thanks Ronstar. Is that a cedar strip kayak?

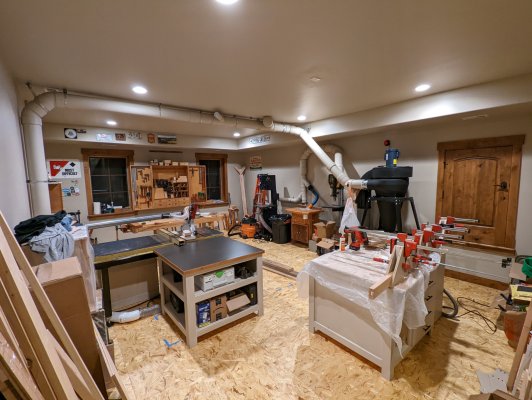
My shop is my project now. I moved from a farm that had an outbuilding. At this house, I repurposed the downstairs family room into my shop. I tore out the carpet and put the OSB tiles down. I just finished the worktables.

I have to be a lot more careful about dust. So, I bought a dust collector and ran 6" PVC to all the tools.

Here, I'm working on French cleats for the clamps. I've gone nuts with French cleats.
 

Attachments

  • PXL_20220201_140307112.jpg
    PXL_20220201_140307112.jpg
    622.3 KB · Views: 22
Oooo, I like shop pictures. Thanks Ronstar. Is that a cedar strip kayak?

My shop is my project now. I moved from a farm that had an outbuilding. At this house, I repurposed the downstairs family room into my shop. I tore out the carpet and put the OSB tiles down. I just finished the worktables.

I have to be a lot more careful about dust. So, I bought a dust collector and ran 6" PVC to all the tools.

Here, I'm working on French cleats for the clamps. I've gone nuts with French cleats.

Nice shop Sparky! I'm going nuts with French cleats too. Yes that is a cedar strip kayak. Going to finish stripping it and making the cockpit opening this winter, and epoxy/ fiberglass in the spring.
 
I got 10 pairs of Lontan soft close slides and got them all installed in the kitchen now. The boxes, made of 3/4 plywood, weigh 13 pounds! This was the widest cabinet yet, but also the most useful...I found that although you can see everything, and get to everything, you can't get quite as much stuff in the cabinets with the drawers compared to heaping it in with no drawers. This is more true on the narrower cabinets.

I presumed my factory cabinets were square, but that wasn't always true. Near the bottom, yes, but on this wide cabinet, near the top, not true. I used the brackets, so a simple matter of moving one side over to get the slides parallel.


What's a square cabinet!? Those brackets are handy for sure. I've given up on retrofitting for old cabinets personally. Just a big headache.
 
Oooo, I like shop pictures. Thanks Ronstar. Is that a cedar strip kayak?

My shop is my project now. I moved from a farm that had an outbuilding. At this house, I repurposed the downstairs family room into my shop. I tore out the carpet and put the OSB tiles down. I just finished the worktables.

I have to be a lot more careful about dust. So, I bought a dust collector and ran 6" PVC to all the tools.

Here, I'm working on French cleats for the clamps. I've gone nuts with French cleats.

Another beautiful work area. Wow I like it!!
 
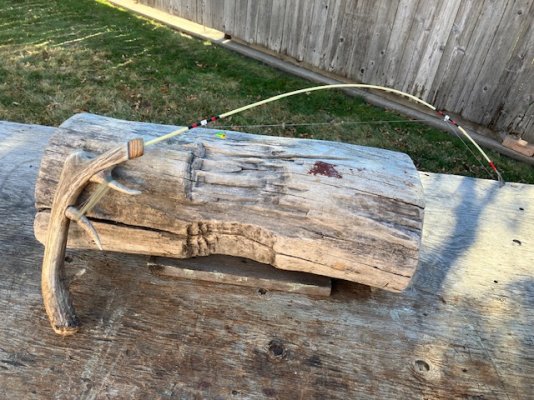
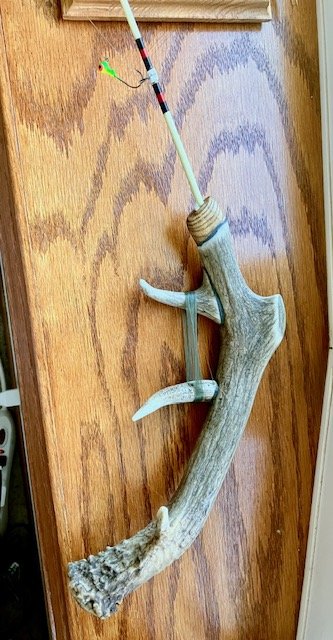
I had a slow day this past week the snow has all melted and to wet for me to do much. I decided to make an ice fishing jigging rod. I love to build and be creative and then use what I make. I used a deer horn for handle and used an old top off of a rod.
 

Attachments

  • IMG_2486.jpg
    IMG_2486.jpg
    147.5 KB · Views: 6
  • IMG_2489.jpg
    IMG_2489.jpg
    190.7 KB · Views: 4
  • IMG_2490.jpg
    IMG_2490.jpg
    119.2 KB · Views: 7
Wow, that's cool Street. I especially like how you use the points for wrapping the fishing line.
 
Made new drawers last winter and doors.

Got some of these slide jigs from Kreg, work well
https://www.kregtool.com/shop/cabinet-solutions/cabinet-drawer-shelf-jigs/drawer-slide-jig/KHI-SLIDE.html

The Kreg pocket screw jig is a great tool too, use that a fair bit, makes quick face frame work.

I've used both of them for 5 years now and upgraded to the foreman last year when doing a complete kitchen. A must have for a lot of holes.

https://www.amazon.com/Kreg-DB210-F...pcontext&ref_=fplfs&psc=1&smid=A2EJCTH67GJMT3
 
Made new drawers last winter and doors.

Got some of these slide jigs from Kreg, work well
https://www.kregtool.com/shop/cabin...er-shelf-jigs/drawer-slide-jig/KHI-SLIDE.html
Just now saw this, and watched the little video. That jig would certainly make it easy to get drawer slides level (or at least perpendicular to the vertical side of the face frame). Doesn't seem to address the problem I had, where the back of the cabinet was a bit wider than the front, making a uniform offset from the cabinet wall cause the slides to bind. The video shows a different installation sequence than I used. They secured the slide to the drawer after the slides were installed in the cabinet. Instead, I removed the part of the slide that attaches to the drawer, and secured it to the drawer "in the field". The way they do it in the video is "safer", I think, because it doesn't require measuring. But I think having an accurate model helped in my case.
 
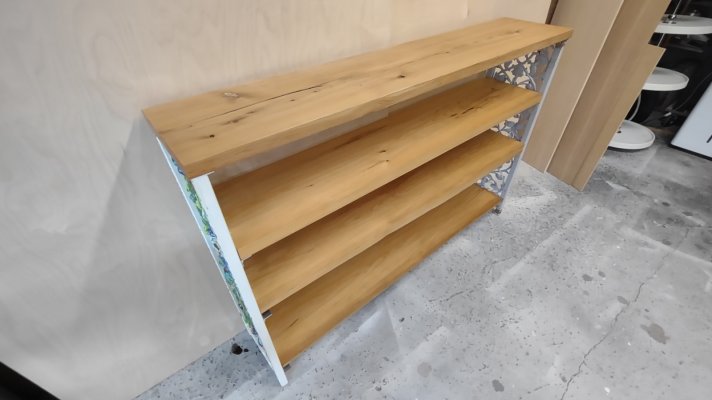
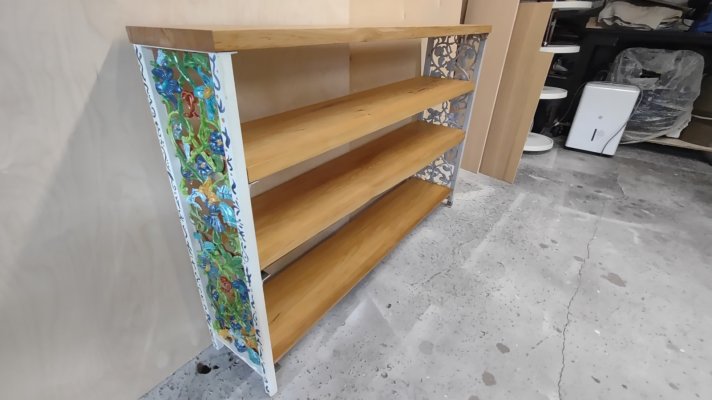
A neighbor had some wrought iron cut down and sides painted by a local artist and I helped her plane down some boards her father milled a couple of decades ago and added clear coat and assembled with some aluminum angle pcs. Nothing special, except for the person remembering her father when she looks at it.

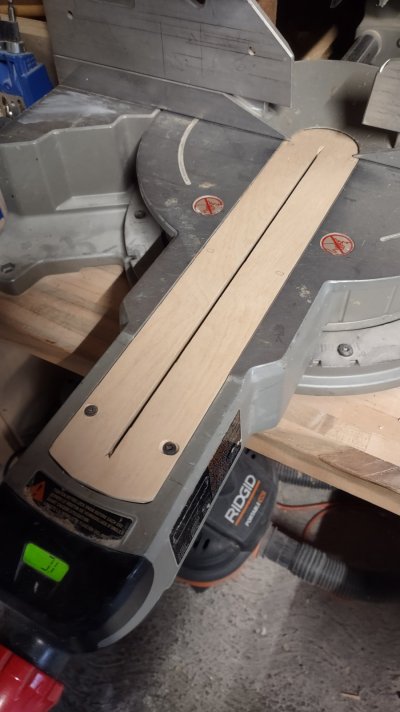
I also finally took a minute to add a zero clearance insert to the chop saw...used some scrap 12mm baltic birch and planed to the correct thickness.
 

Attachments

  • IMG_20231117_122429182.jpg
    IMG_20231117_122429182.jpg
    248.6 KB · Views: 8
  • IMG_20231117_122422540.jpg
    IMG_20231117_122422540.jpg
    291.6 KB · Views: 11
  • IMG_20231116_145219550.jpg
    IMG_20231116_145219550.jpg
    341.1 KB · Views: 9
Last edited:
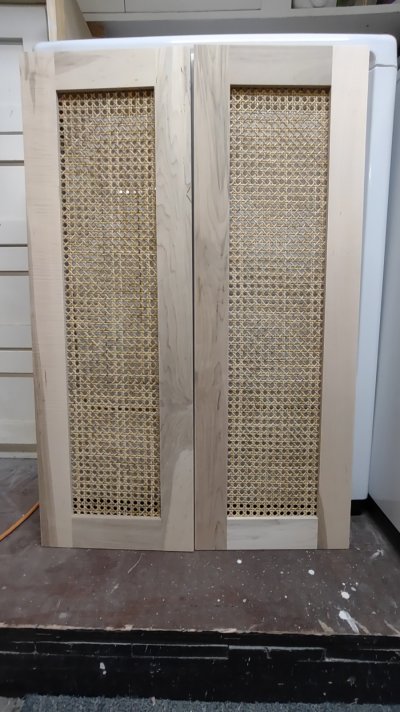
Did a boatload of these doors for a big remodel. Cane rattan doors. I'll eventually have a proper pic of the big picture.

Ordered doors for glass and soaked the rattan for 30 minutes in warm water. Not a fun project & very stressful until they are done. With high humidity, sealing them is important as soon as they dry...
 

Attachments

  • IMG_20231102_095635007.jpg
    IMG_20231102_095635007.jpg
    440.5 KB · Views: 6
Last edited:
Couple of sweet projects Surewhitey!! I really like those cane rattan doors. What are you going to seal them with?

I was commissioned to make only, but I added some shellac primer to seal them until they get painted. They were absorbing the air moisture and loosening. Using a dehumidifier or radiant heat tightened them back in order to prime them. The alcohol based primer dries quickly too...
 
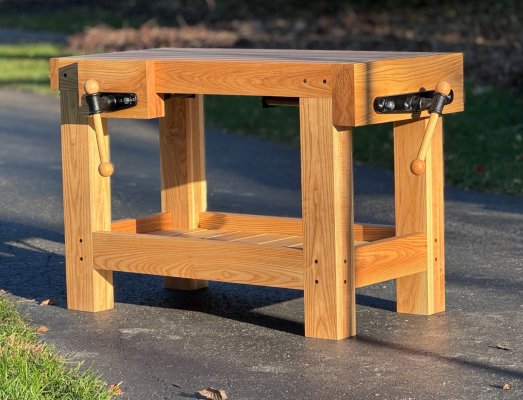
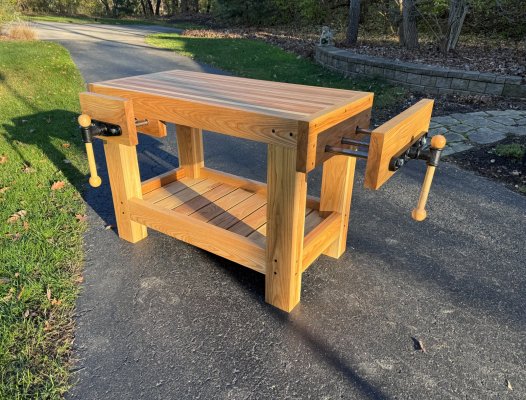
Finished my workbench. Ash with walnut pegs, finished with danish oil.
 

Attachments

  • Screenshot 2023-11-25 at 5.26.25 PM.jpg
    Screenshot 2023-11-25 at 5.26.25 PM.jpg
    707.5 KB · Views: 7
  • Screenshot 2023-11-25 at 5.24.47 PM.jpg
    Screenshot 2023-11-25 at 5.24.47 PM.jpg
    1.2 MB · Views: 8
Back
Top Bottom