skyking1
Thinks s/he gets paid by the post
DW would agree that the island is overhuge. It fits the size of the room, but you can't work it from both sides.
DW would agree that the island is overhuge. It fits the size of the room, but you can't work it from both sides.

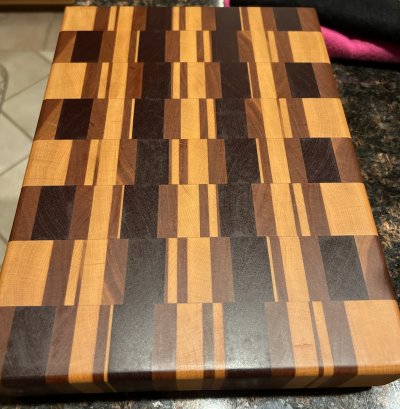
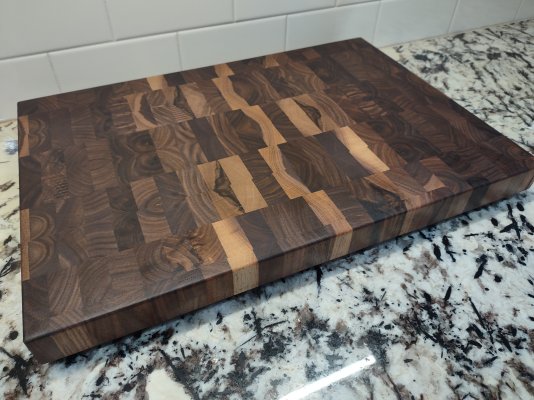
Made this end grain board from scraps for a Christmas gift last week.
Cool end grain. Did you run it through your planer to get the final, smooth finish?
Thanks; I did sand it very well up to 320 grit with my Ryobi orbital sander. Thank god for that tool!
Made this end grain board from scraps for a Christmas gift last week.
Yeah, the end grain is no joke. I rounded the trailing edge and ran it through my planer and it worked perfectly with no tear out. Then finish sanded it. Definitely the best looking grain for chopping, imo.
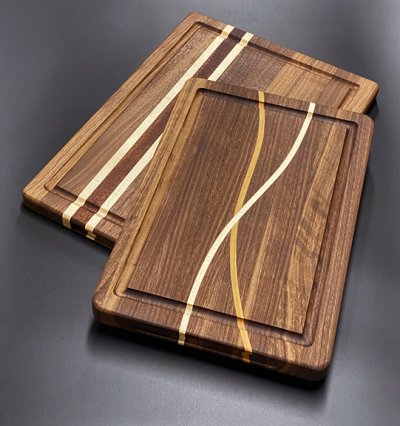
This was a slab of walnut butcher block from a j*b that was just right...
Nice cutting boards!! I haven't tried running an end grain cutting board through the planer. Never thought about rounding the edges to avoid tearout.
I have a bunch of scraps - mainly ash and oak - not too good for cutting boards.
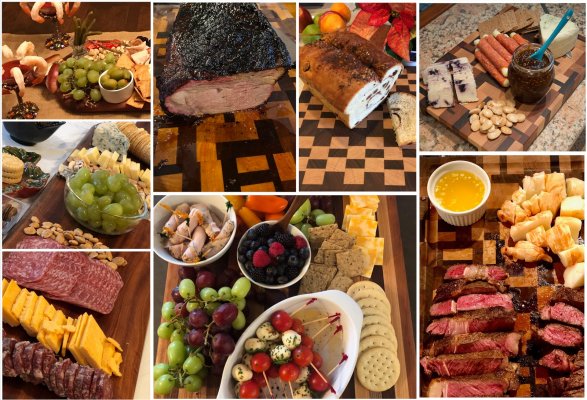
Had the relatives send me pics of the boards I gave them.
Yeah, the end grain is no joke. I rounded the trailing edge and ran it through my planer and it worked perfectly with no tear out. Then finish sanded it. Definitely the best looking grain for chopping, imo.
This was a slab of walnut butcher block from a j*b that was just right...
Nice cutting boards guys. What are you using for a finish? Mineral oil has been popular for a long time, but when I made mine I wanted a bit more “pop” and went with Odies Oil which is advertised as food safe.
Beautiful work Ronstar!. Running end grain through the planer can be dangerous if you’re the impatient type….must take tiny bites until you get a big swath. Even then a little at a time if the way to go. I also put another piece of cheap wood that’s same width and thickness, behind the trailing edge, to prevent chip out and tearing. Works perfectly I find.
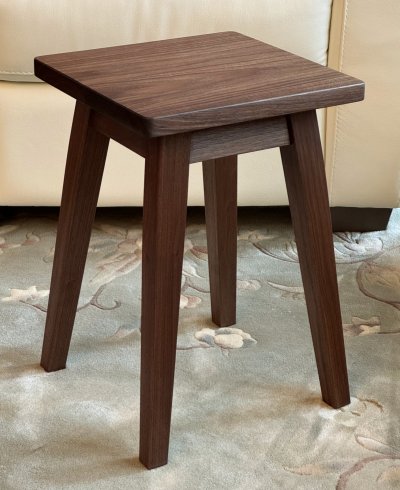
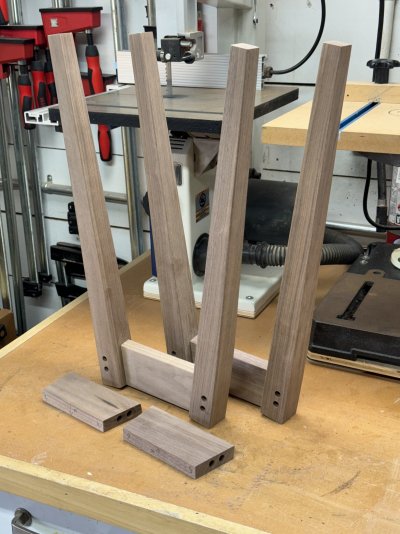
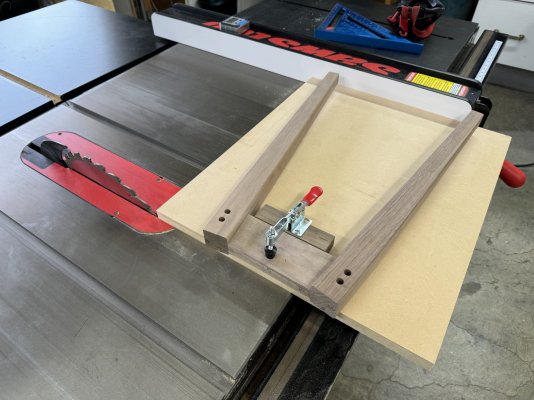
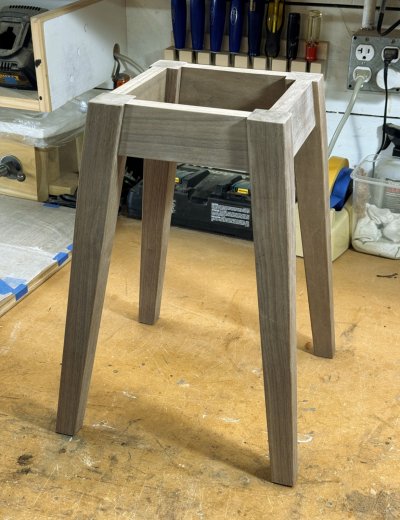
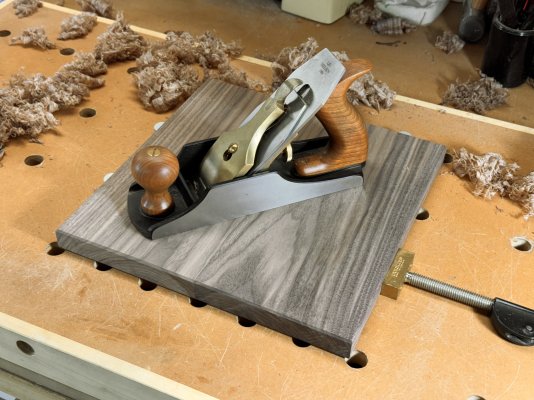
I just finished a fun project, a walnut stool that my wife requested. The legs angle out at 7 degrees in both directions which create compound angles and is what complicates the build. My solution was to make 2 partial assemblies with the legs angled in one plane, and then use a sled on the tablesaw with the blade tilted to 7 degrees to trim the top and bottom of both leg assemblies in the second plane. I used my Dowelmax jig for all joinery except the top which is attached with figure 8 fasteners to allow for wood movement. For finishing I used a highly diluted TransTint walnut dye to slightly darken the walnut, then 3 coats of Osmo Polyx.